Altenew Education Certification Program Workshop: My “Final”

Today I am sharing my “Final” project for the Altenew Education Certification Program. For this project I created 3 cards using Altenew products then did a live workshop with 4 attendees. Virginia Lu and Erum Tasneem from Altenew attended the workshop via Zoom.

The AECP program has been amazing. I love creating and designing. I also love sharing this creativity with others. As I progressed through this program I not only learned designing and stamping techniques, but I learned about my creative style. Out of necessity, I created this blog (huge learning curve for me) and learned how to create videos (enormously huge learning curve for me) so I can share my creative style with others. The whole program, from when I was first accepted to the completion of this “final”, took approximately 18 months. The first year I was completing about one project a week, then my work life changed and my progress slowed tremendously. If you have been following my blog then you have watched this happen. That was one of the beauties about this program: go at your own pace. The AECP team has been incredibly helpful throughout the program. I cannot say enough positive things about the AECP program. As you can see by looking back through my blog, there is a lot involved in completing this program. Each step was invaluable to my creative education. If you are inspired by what you have seen in my blog and you think this program is for you, GO FOR IT! Yes, it takes commitment; yes, you will likely be stretched outside of your comfort zone (isn’t that how we learn?); and yes, you will receive something in the end that money cannot buy: incredible guidance and education, personal growth, and creativity growth. Now, let me share the workshop creative process and outcomes.

Below are the cards created for the workshop. First, I will review the instructions for each card. I will then discuss the process of scheduling and holding the workshop. So relax and enjoy…

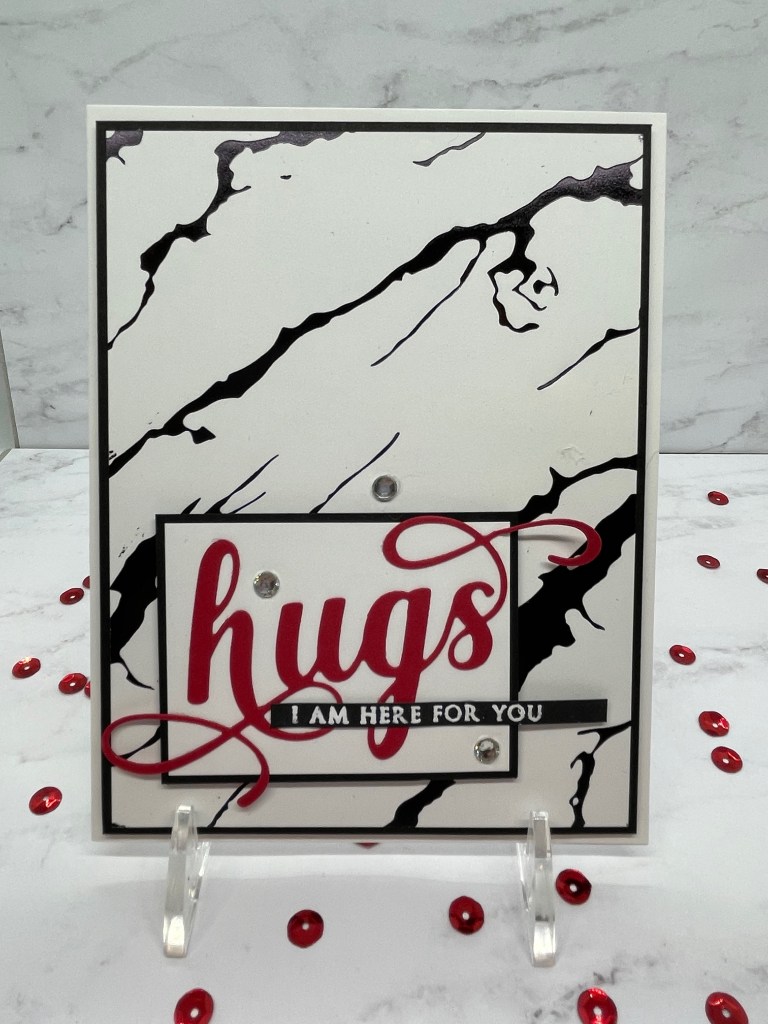
HUGS: I AM HERE FOR YOU

  • SUPPLIES:
  • STAMP SETS: Altenew “Thinking of You”
  • CARD STOCK: Stampin’Up! Real Red, Neenah White, Basic Black
  • INKS: Versamark Watermark Ink
  • DIES: Altenew “Hugs” Die
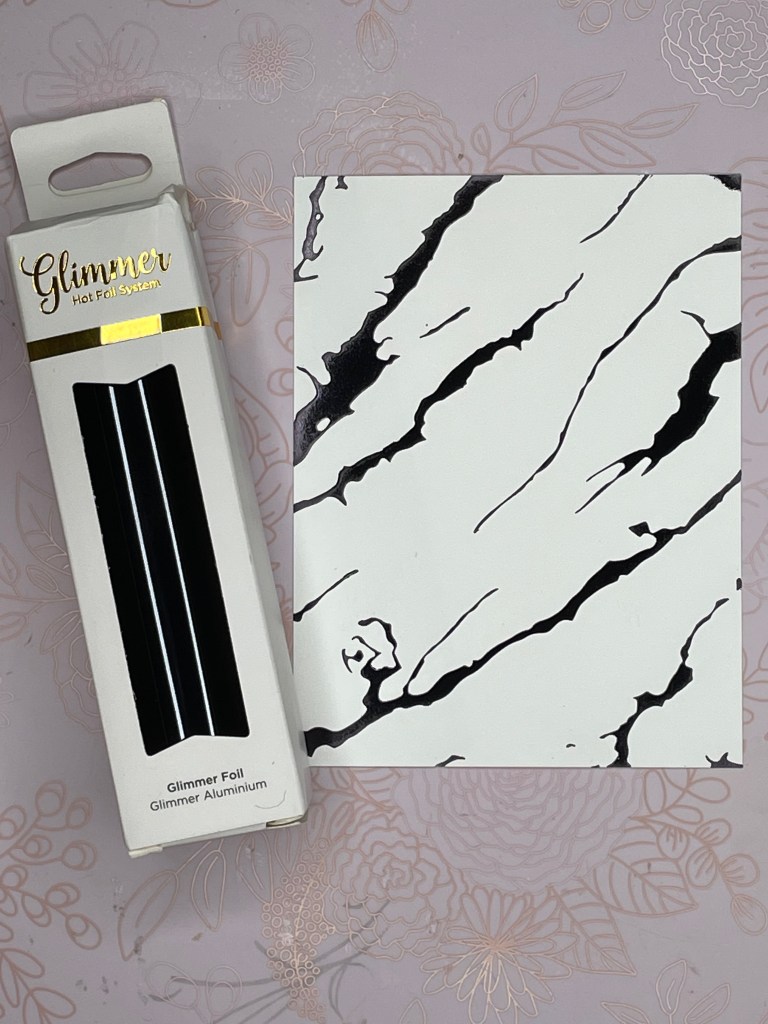
  • OTHER: Rhinestones, White embossing powder, Glimmer Hot Foil System, Black glimmer foil, Altenew Exquisite Marble Hot Foil Plate, foam tape

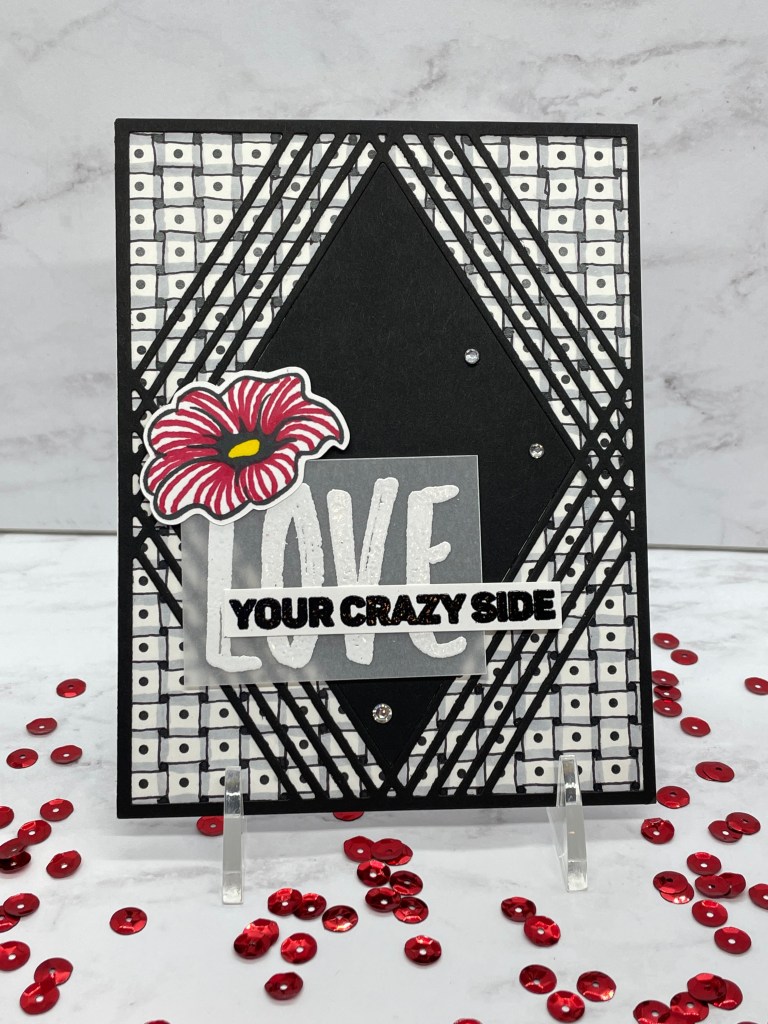
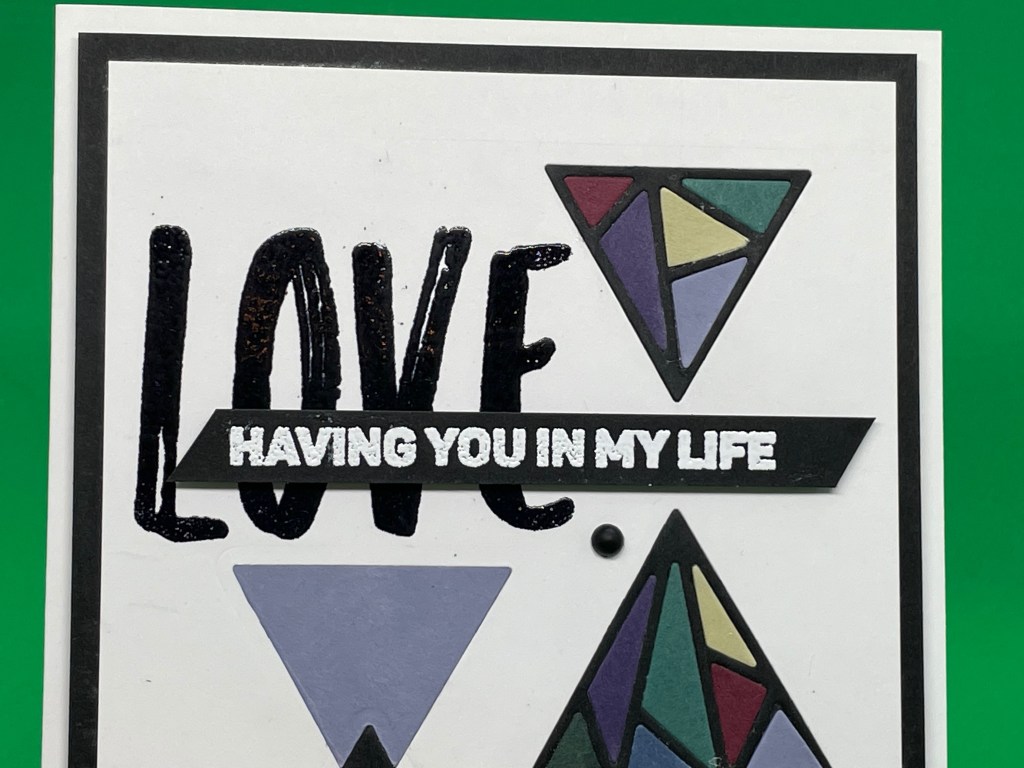
Using the Glimmer Hot Foil System, emboss the Altenew Exquisite Marble Hot Foil Plate with the Glimmer Black Foil onto a piece of 5 1/8″ x 3 7/8″ Neenah white card stock. There are two types of embossing foil so be sure to use the product for hot foiling. Hot Foil creates a beautiful shiny look.

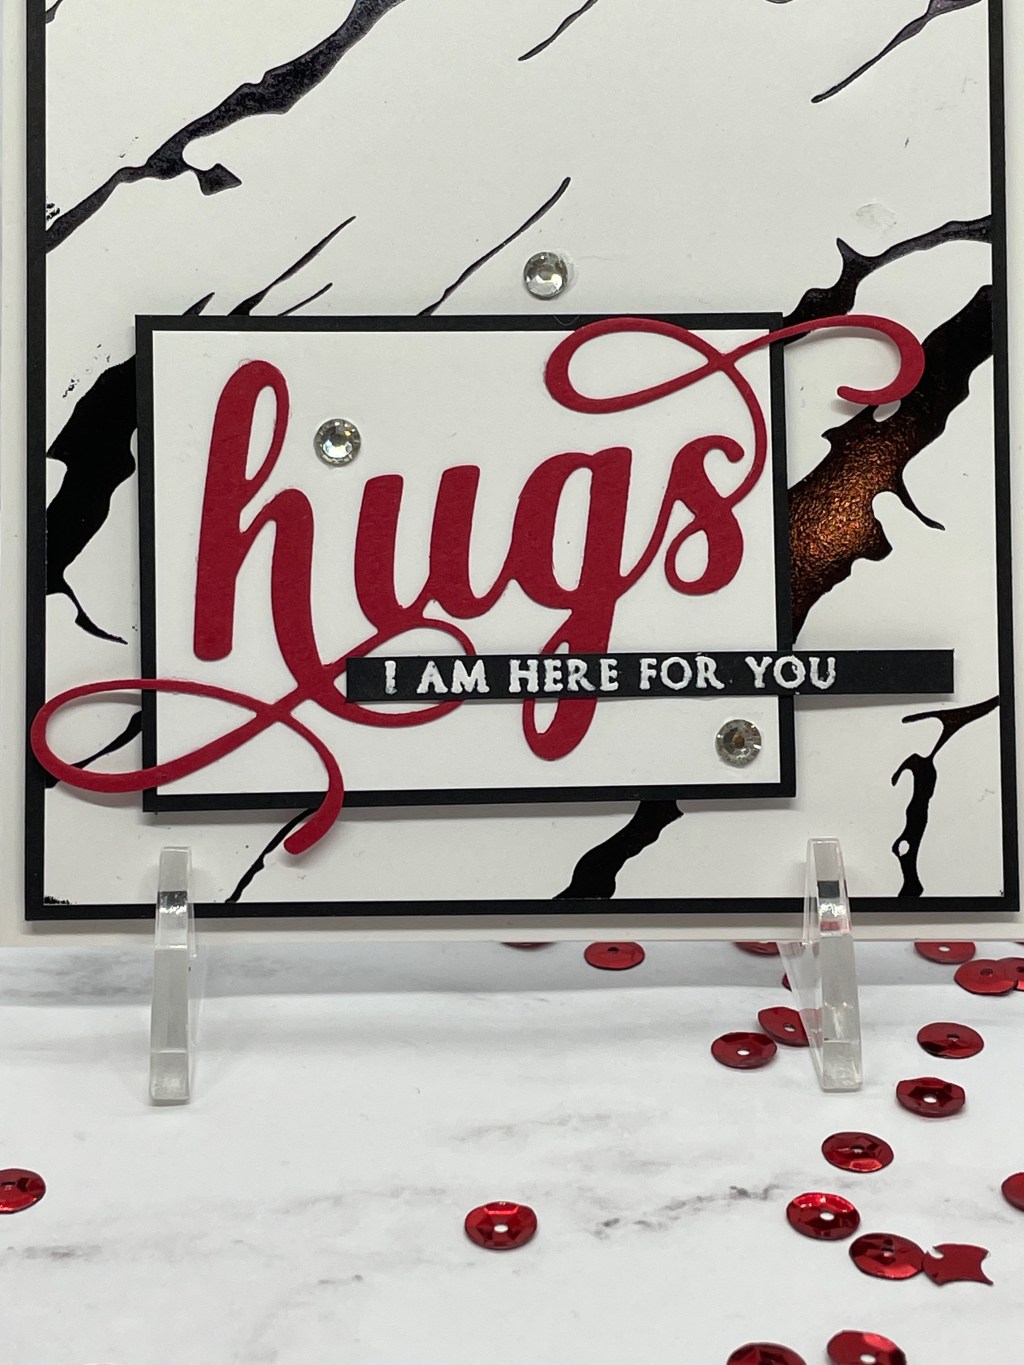
Attach this panel to a piece of 5 1/4″ x 4″ basic black card stock. Attach this to a Neenah white card base using foam tape. Next, attach the 2 1/2″ x 1 7/8″ Neenah white card stock to a piece of 2 5/8″ x 2″ basic black card stock. Attach to left lower section of hot foil embossed panel with foam tape. Die cut the Altenew “Hugs” image in Real Red card stock, glue to this small panel. Using Versamark ink and white embossing powder, emboss the sentiment “I am here for you” from the Thinking of You stamp set onto a piece of 2 1/2″ x 1/4″ black card stock. Attach to this small panel with glue. Attach rhinestones as seen.
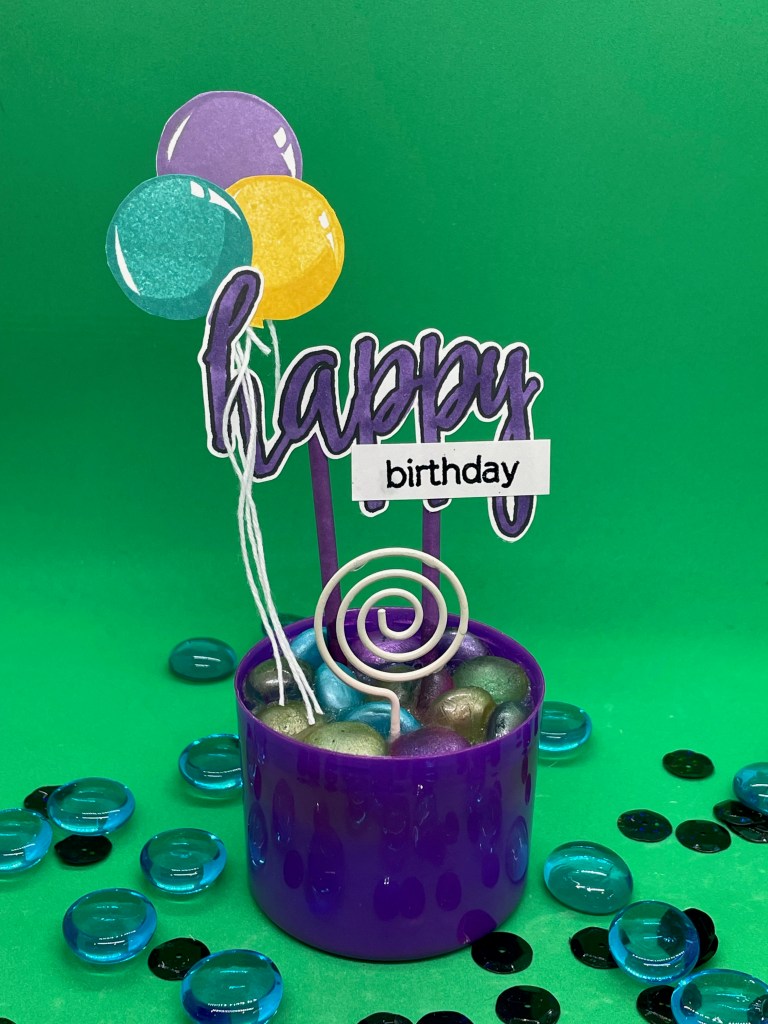
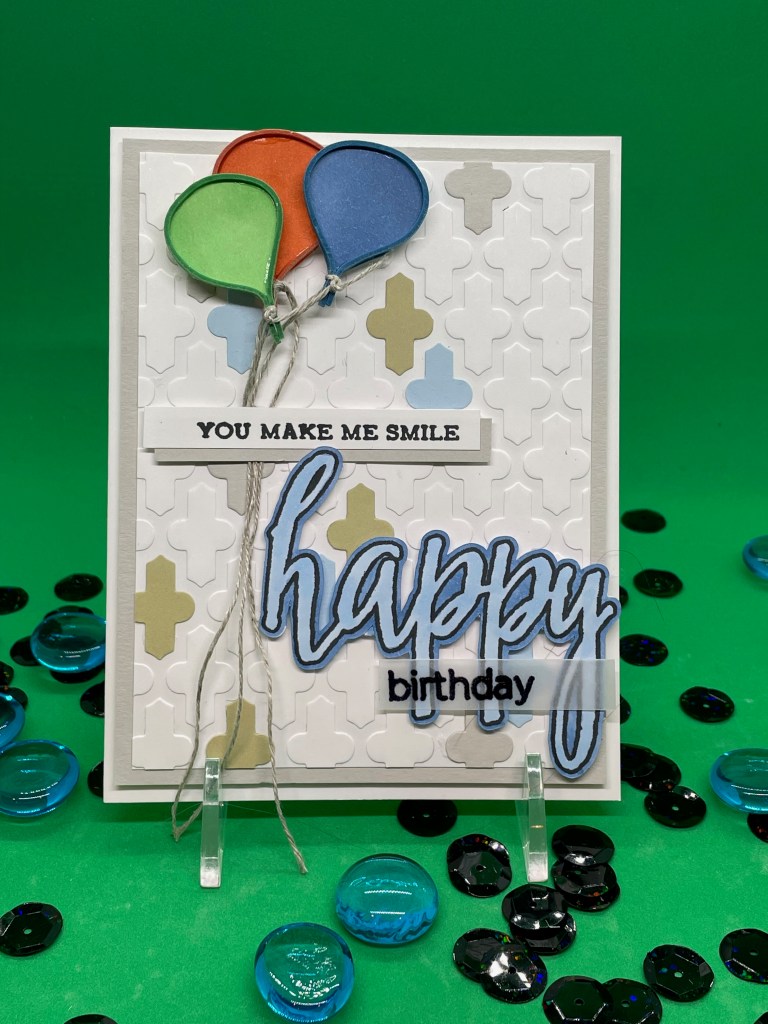
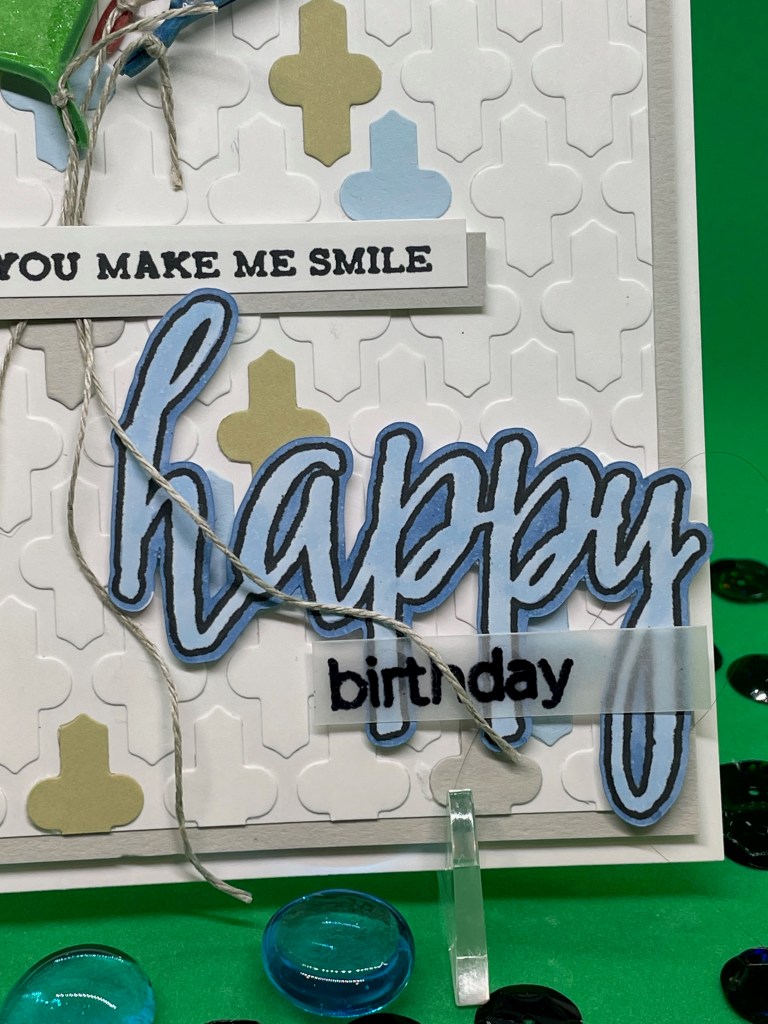
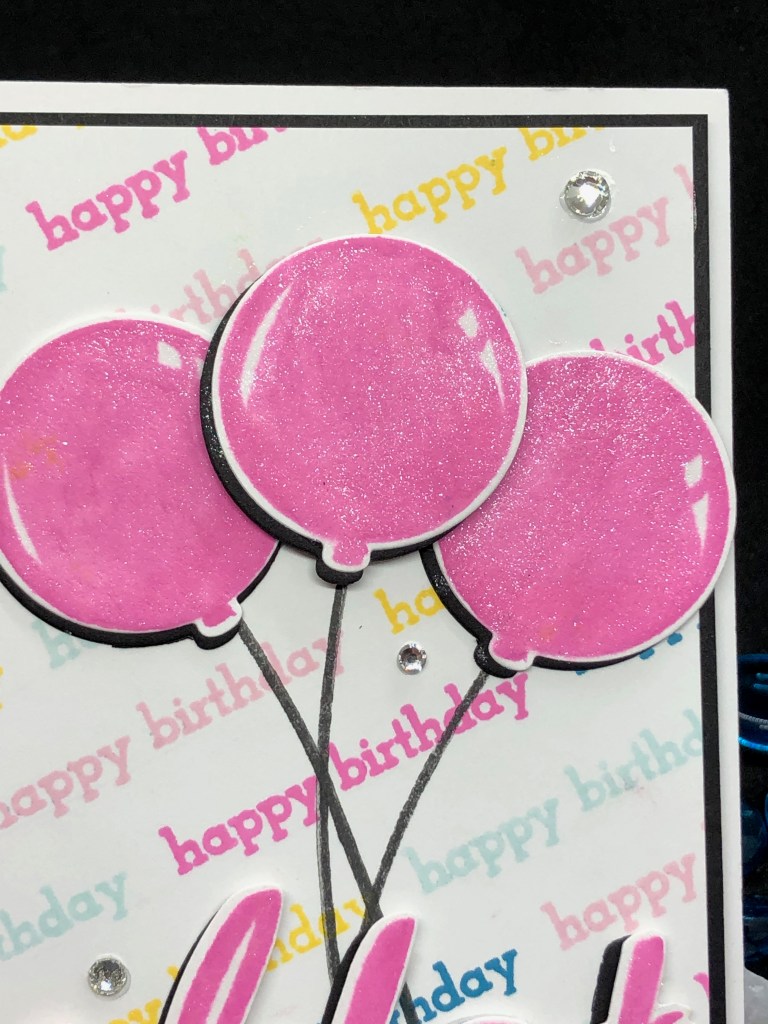
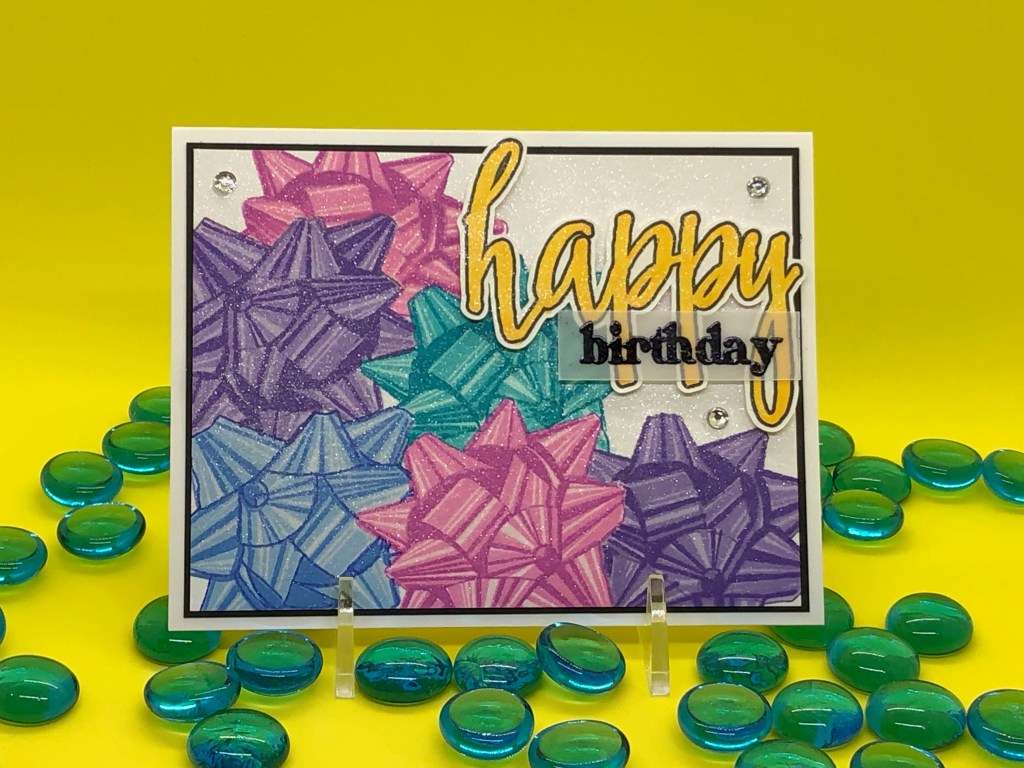
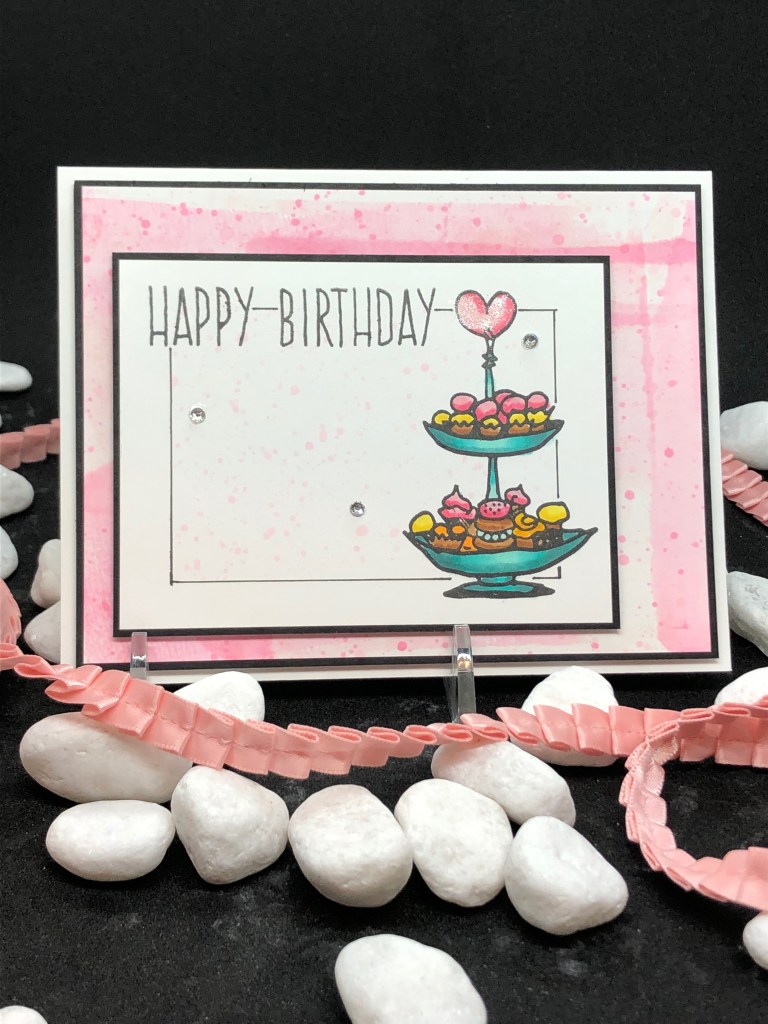
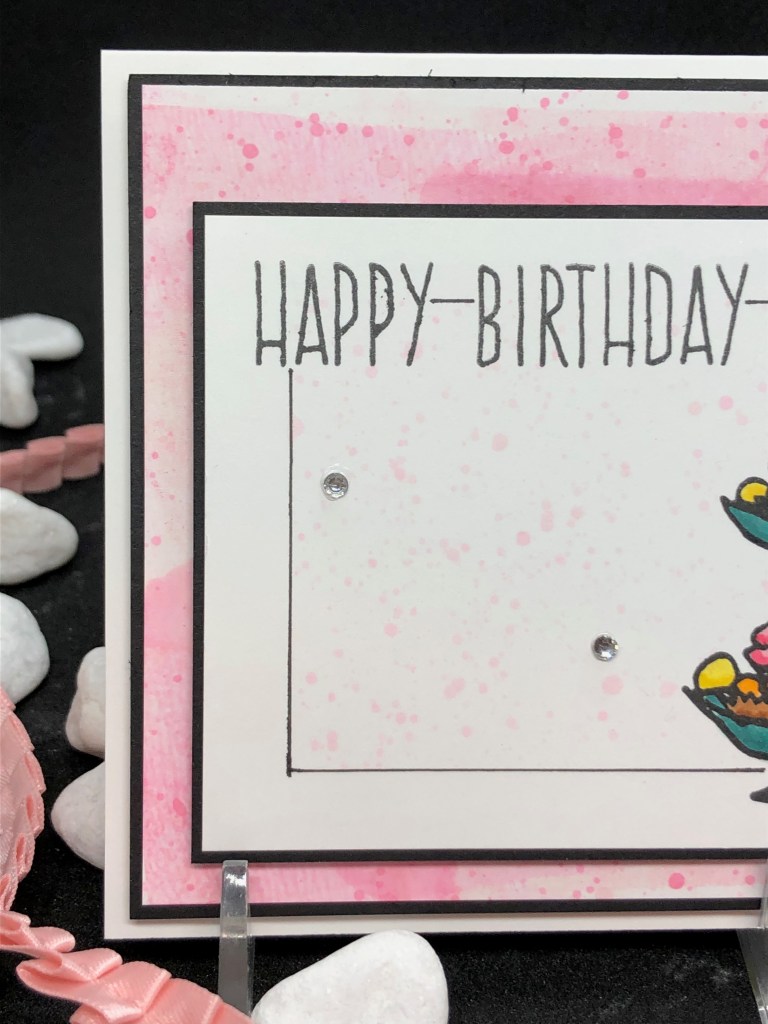
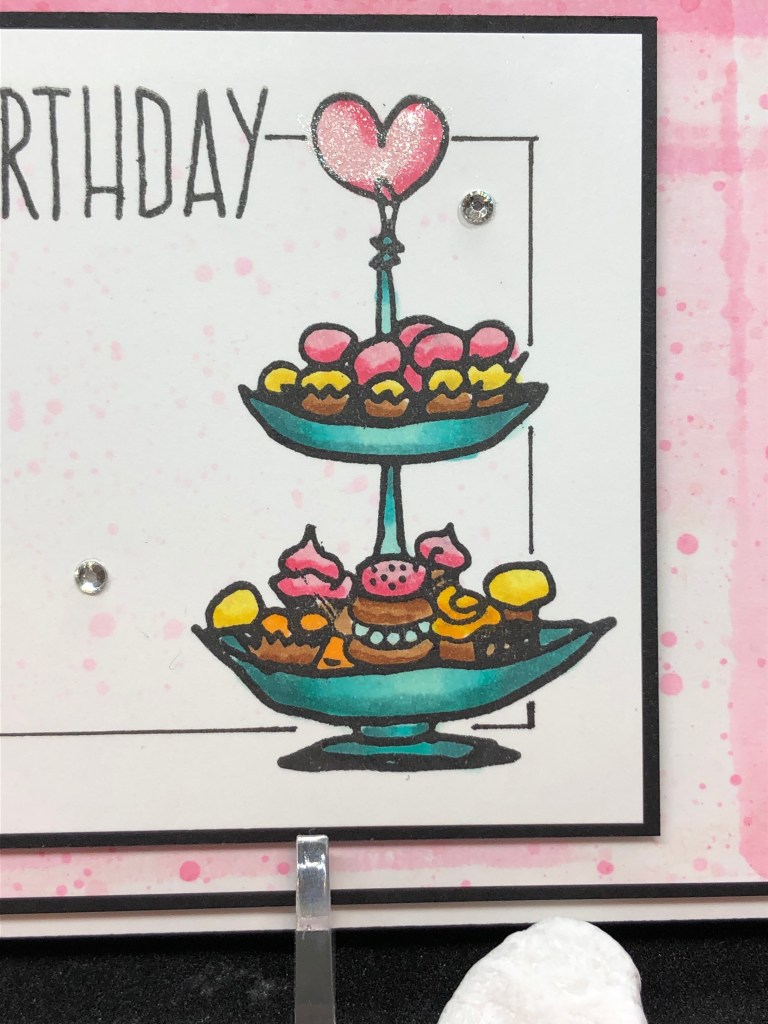
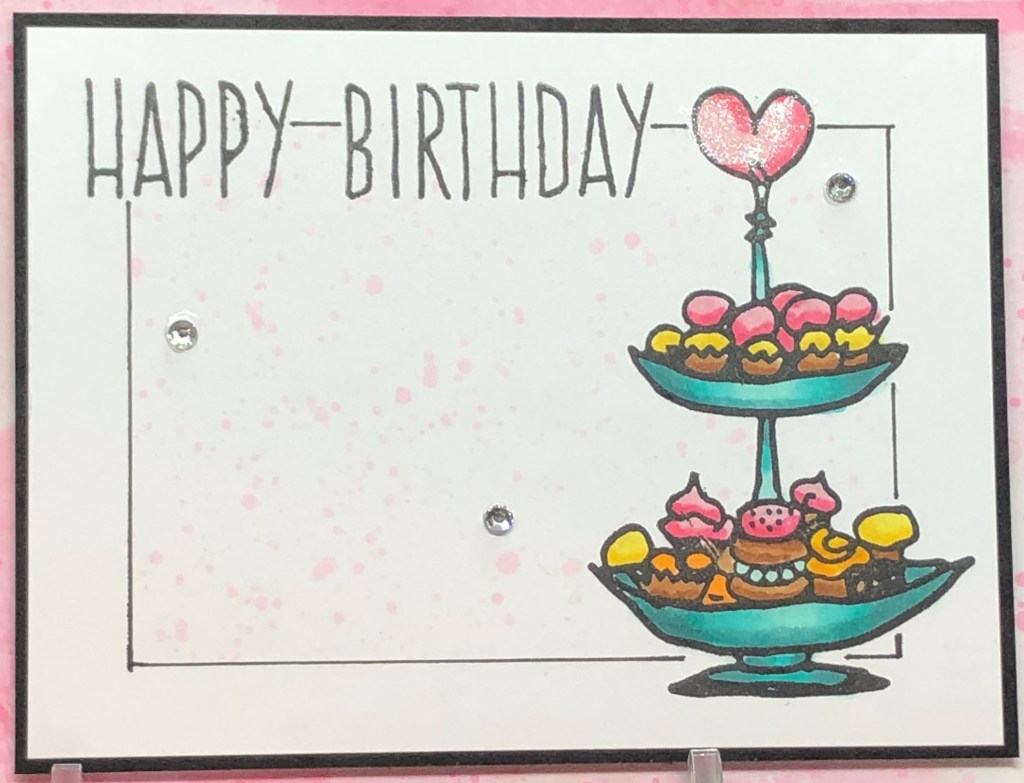
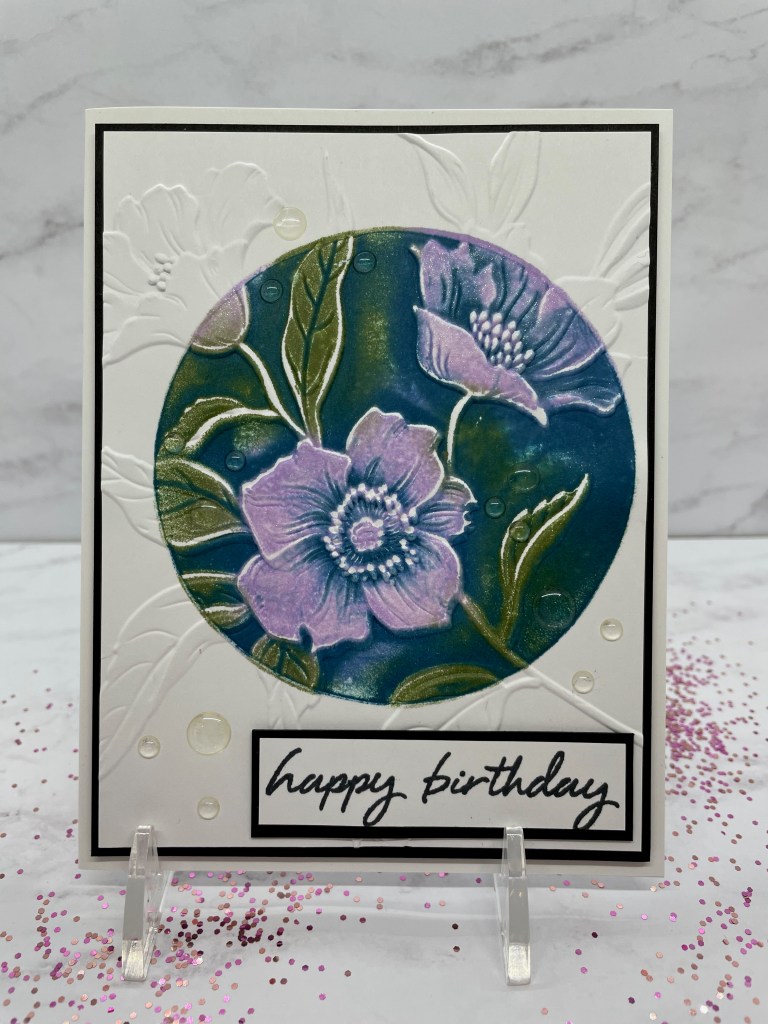
HAPPY BIRTHDAY

  • SUPPLIES:
  • STAMP SET: Birthday Builder
  • CARD STOCK: Neenah white, basic black
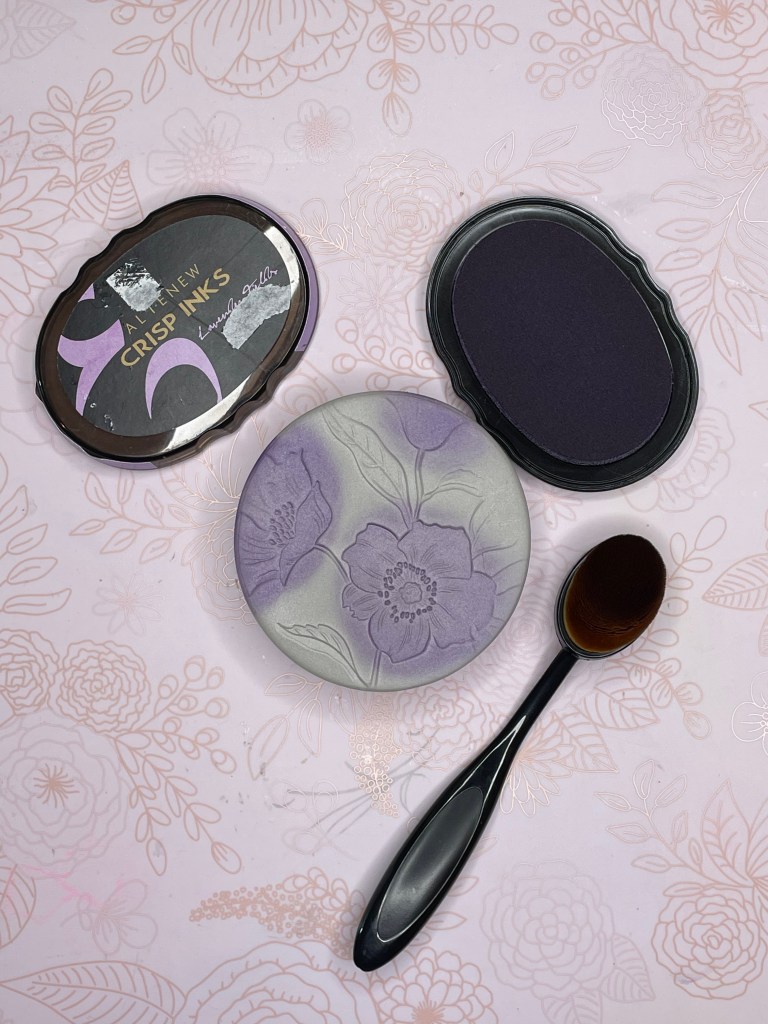
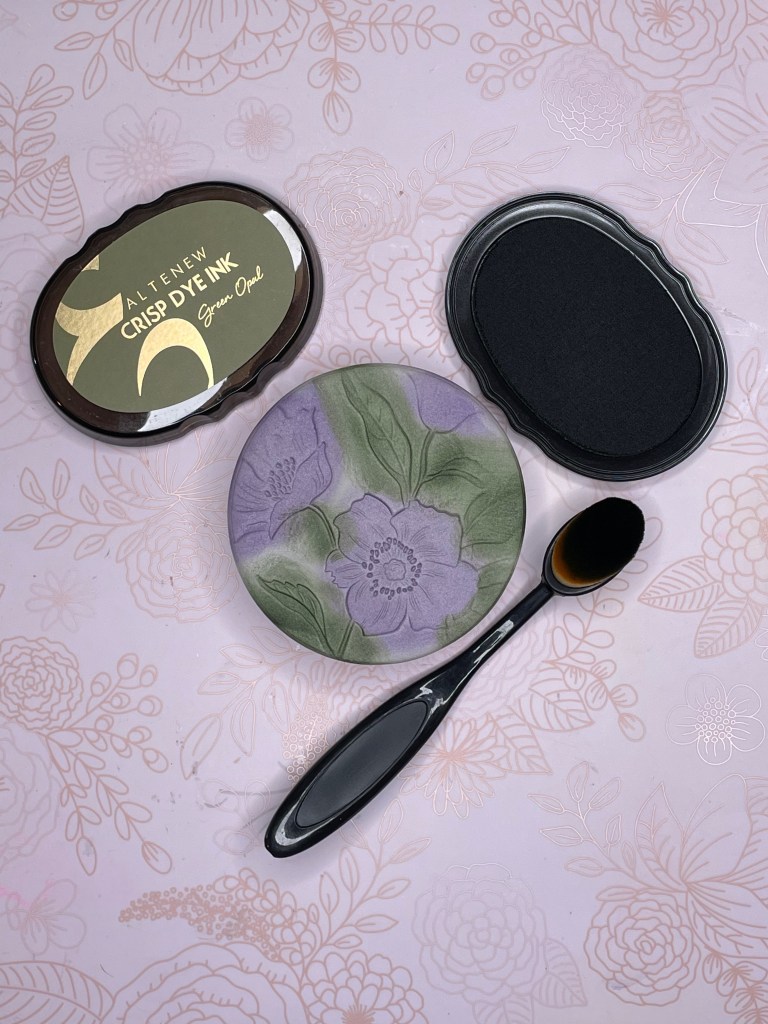
  • INKS: Altenew Permanent Black, Green Opal, Lavender Fields, Desert Night, Champagne Mist All-Purpose for fantast/x
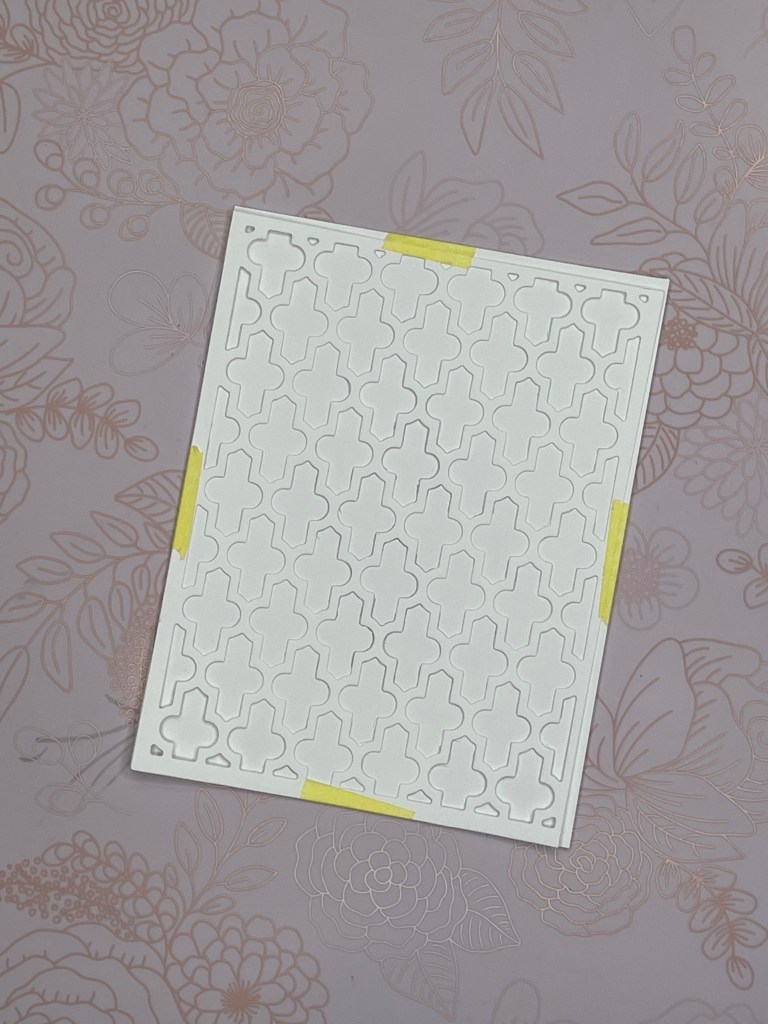
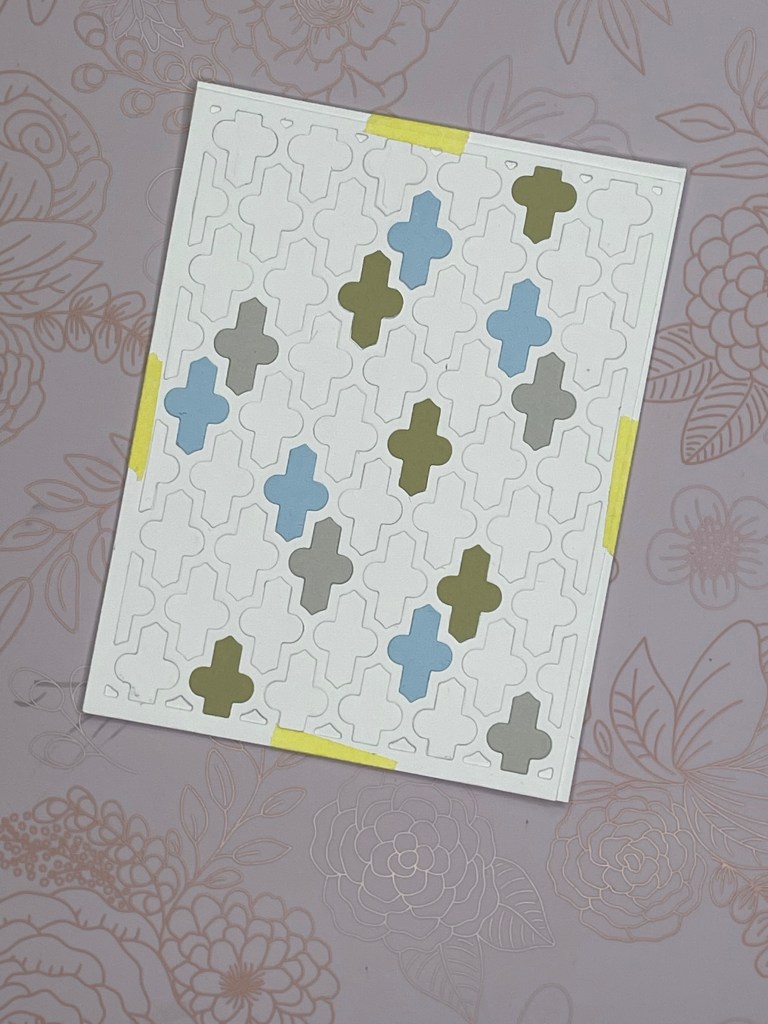
  • EMBOSSING FOLDER: Hello Beautiful
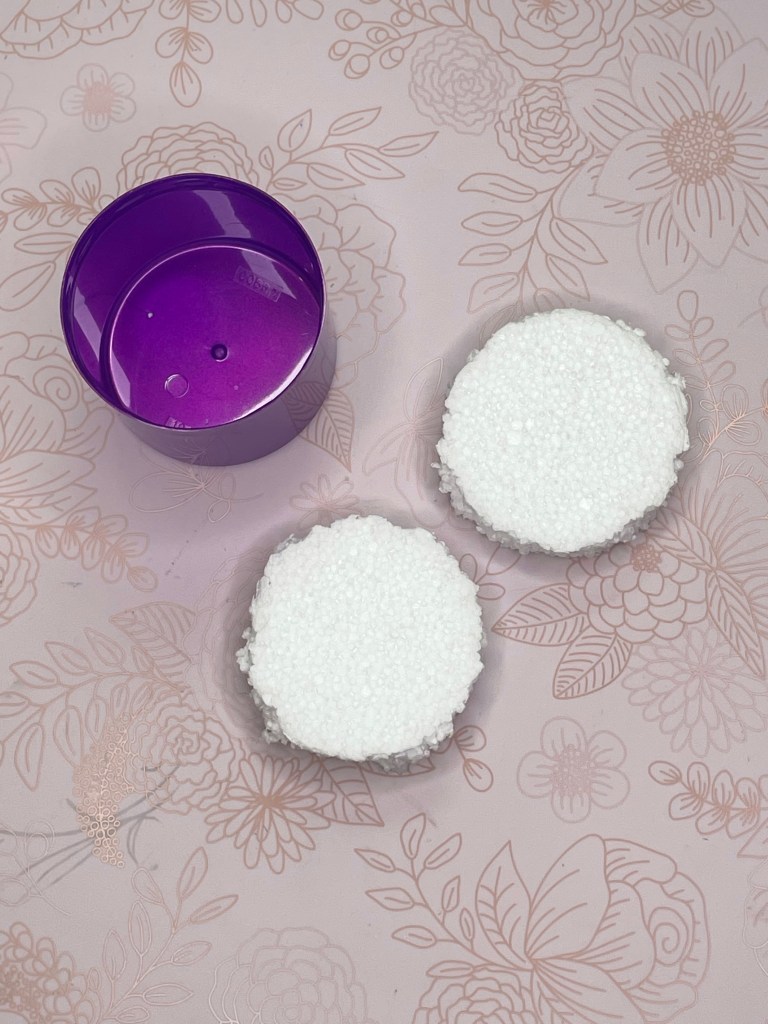
  • OTHER: Clear enamel dots from The Ton, Stamping Foam, Blending Brushes, water spritzer, foam tape. 70% isopropyl alcohol

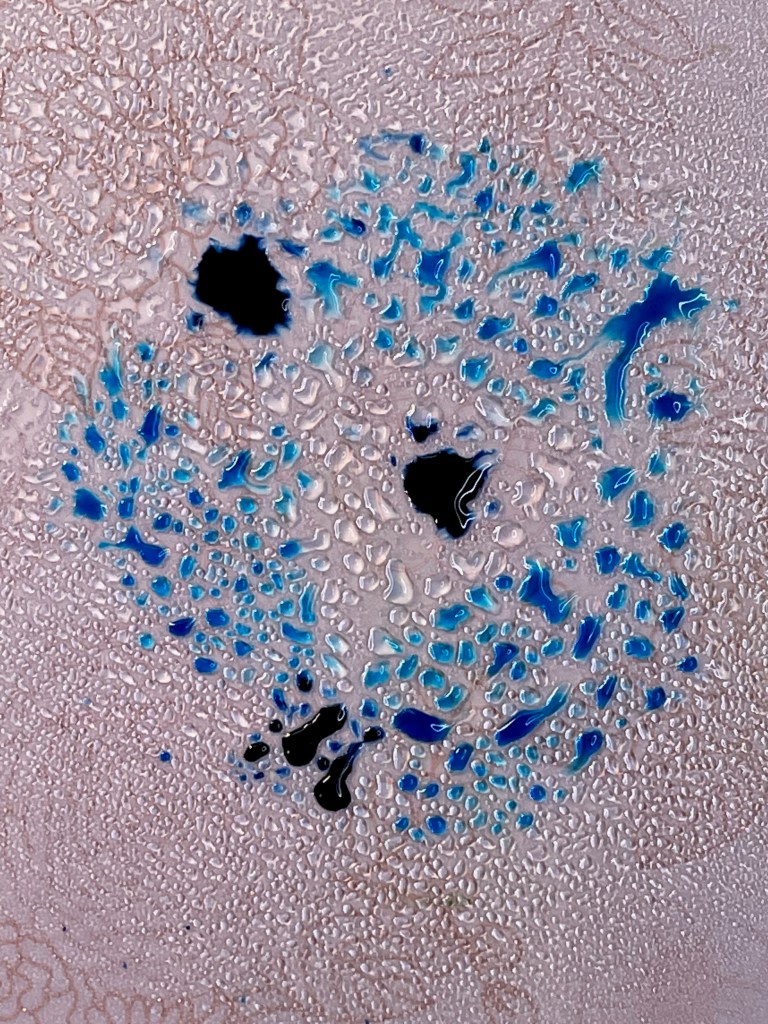
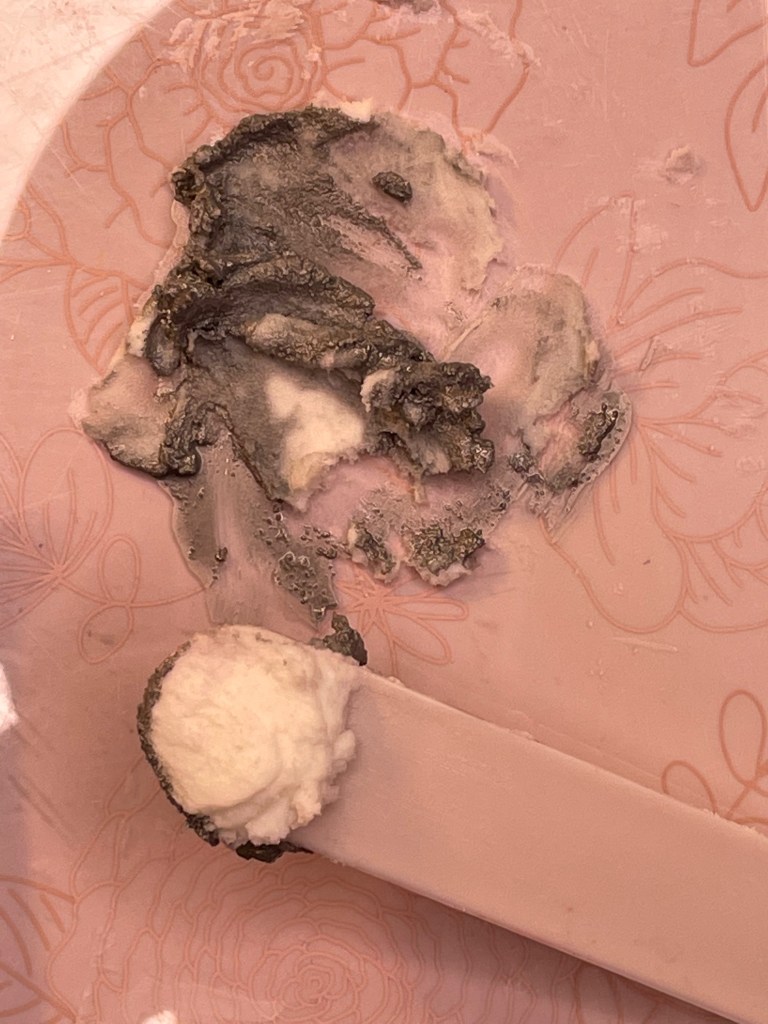
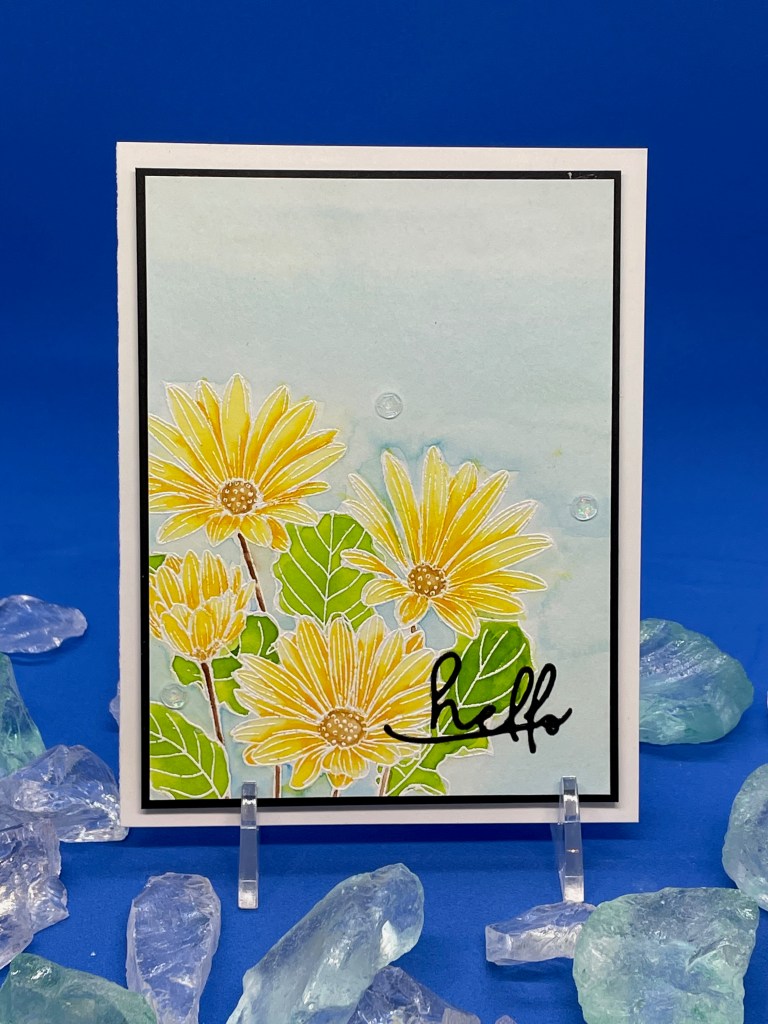
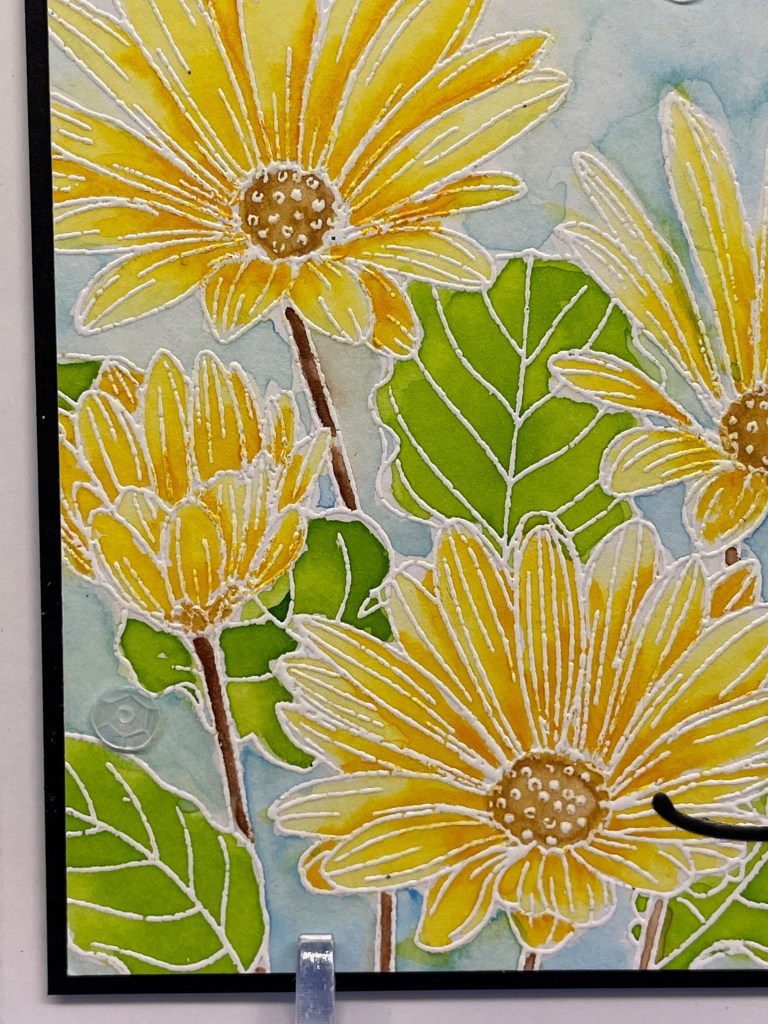
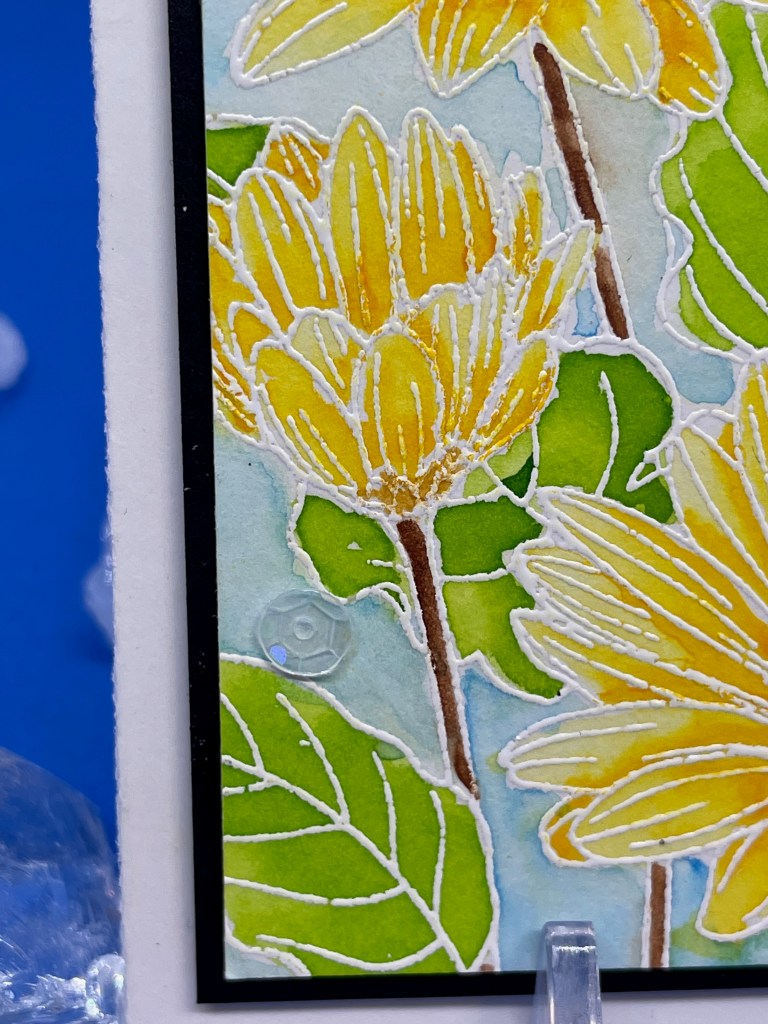
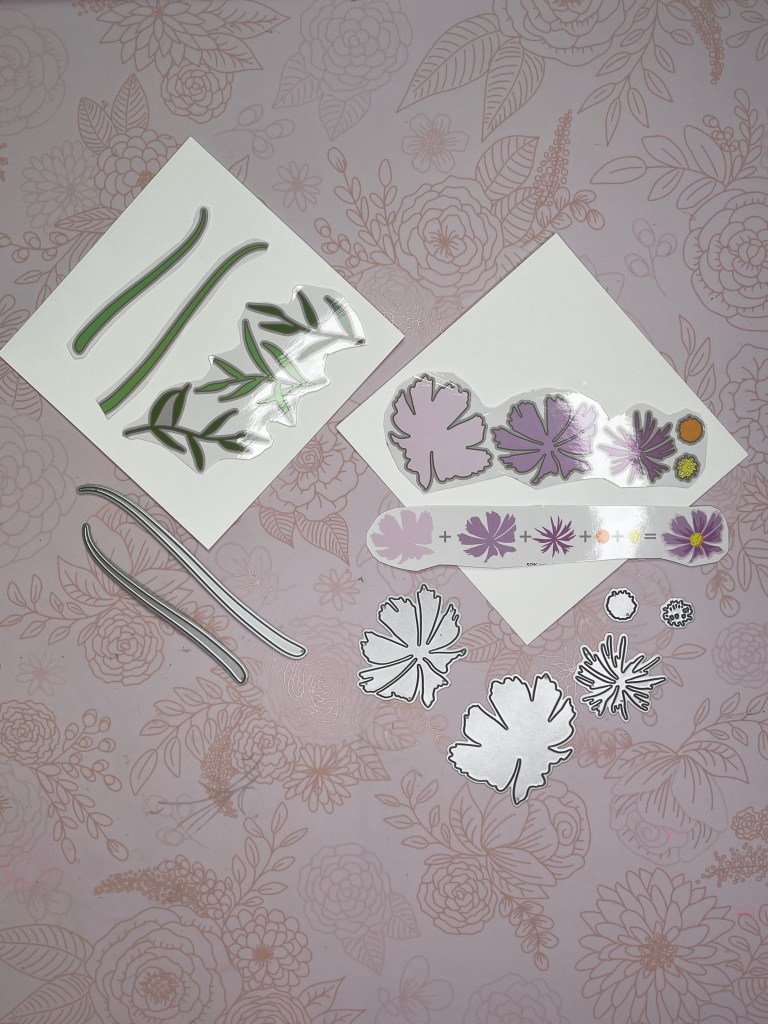
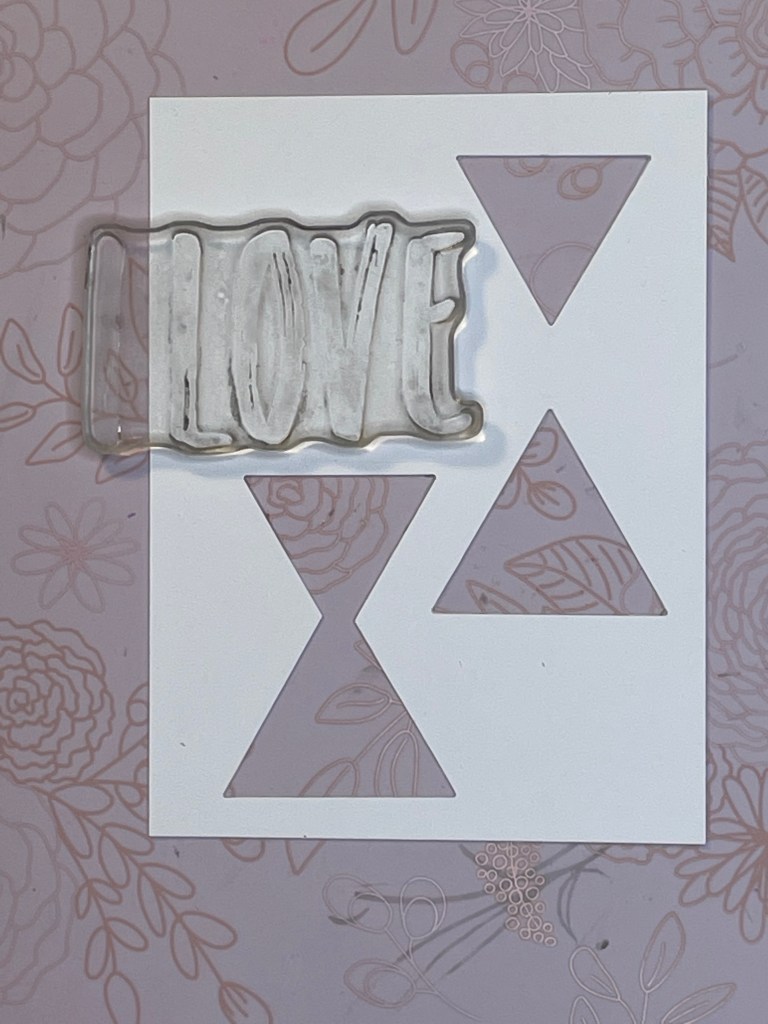
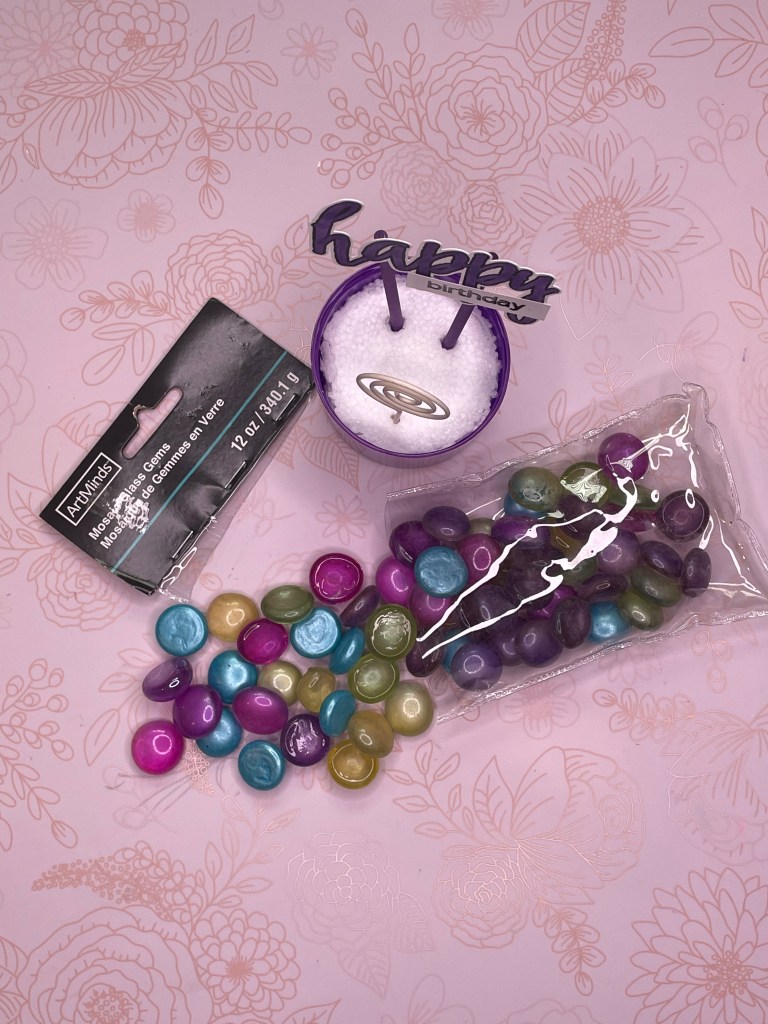
Stamping Foam is a firm foam that will hold an image until the foam is heated. In this case I used the foam to pick up an image from an embossing folder which was then colored and stamped. Heat the surface of the foam with your heating tool. Hold the heating end of the heating tool about 1/4″ from the surface of the foam for 15-20 seconds, slowly moving it around the whole surface for even heating. Immediately press the heated foam firmly onto the raised side of the Hello Beautiful embossing folder.

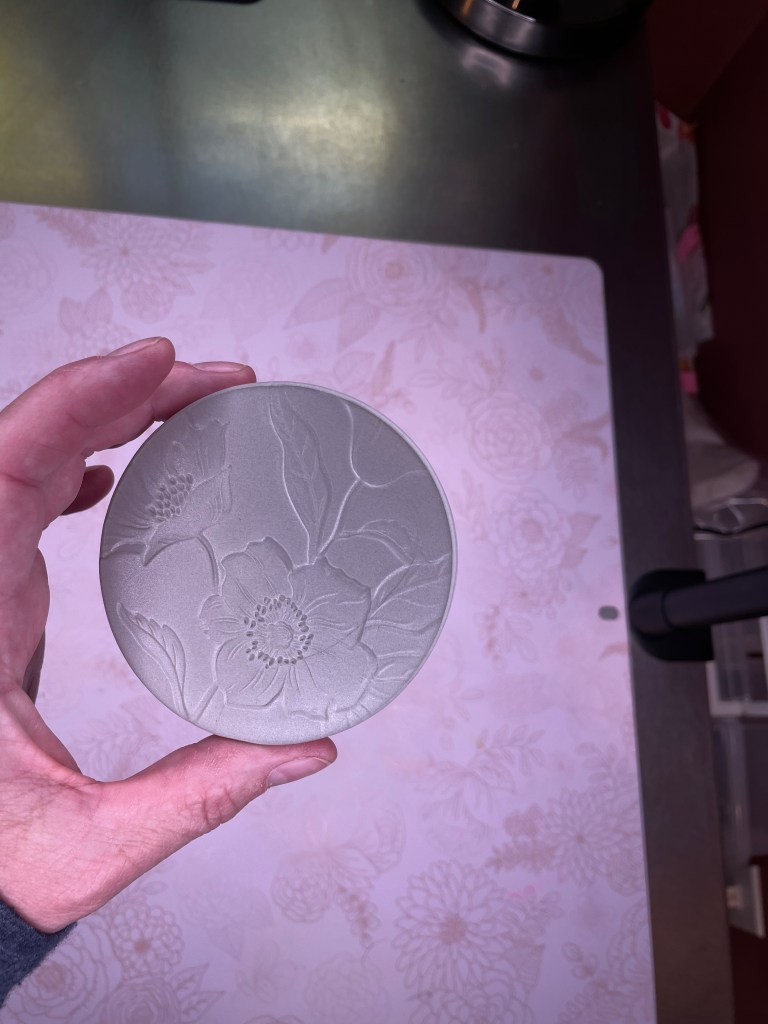
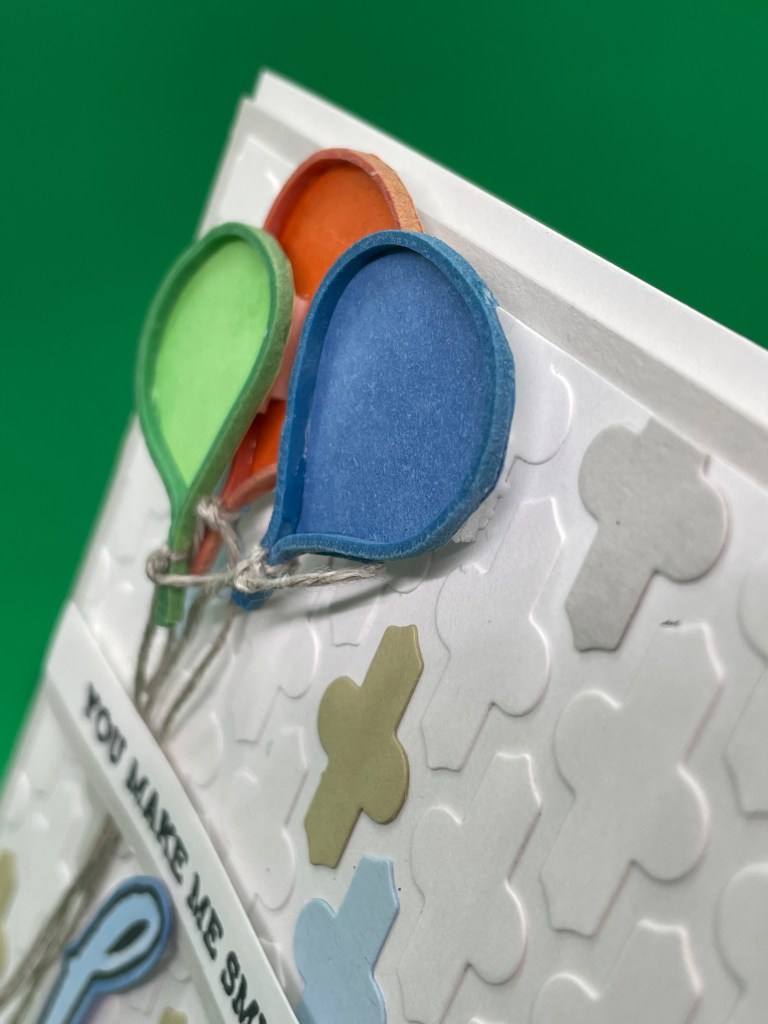
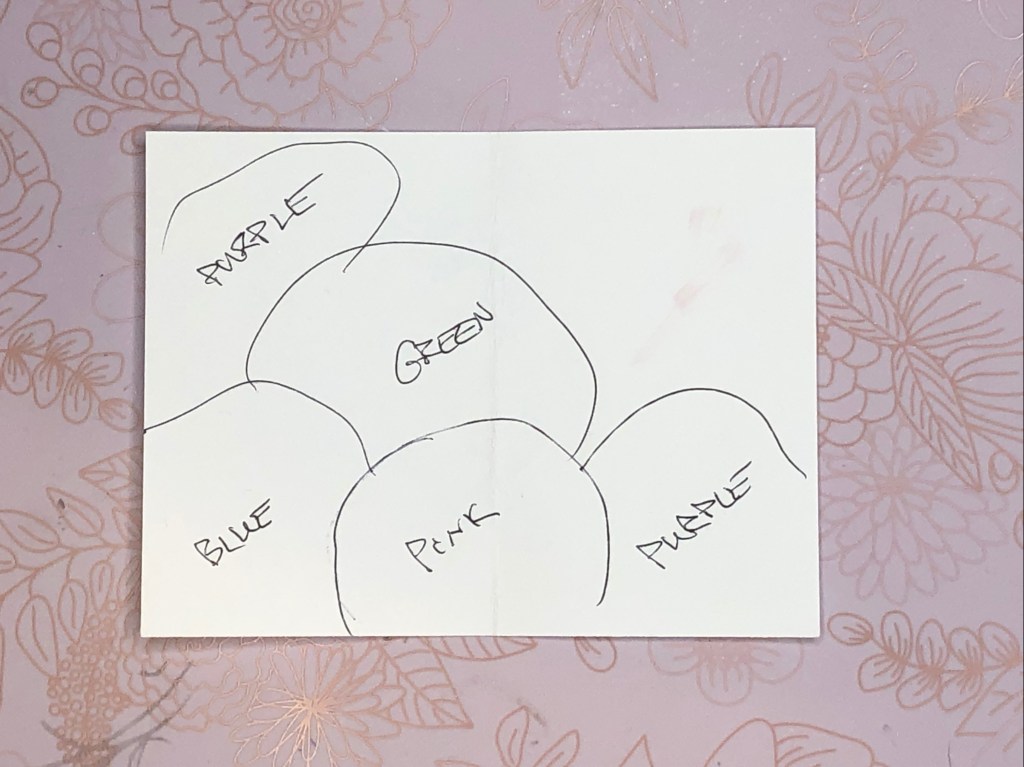
You will notice the arrow at the top of the foam. I penciled this in to keep the orientation of the stamp once placed on the card stock.

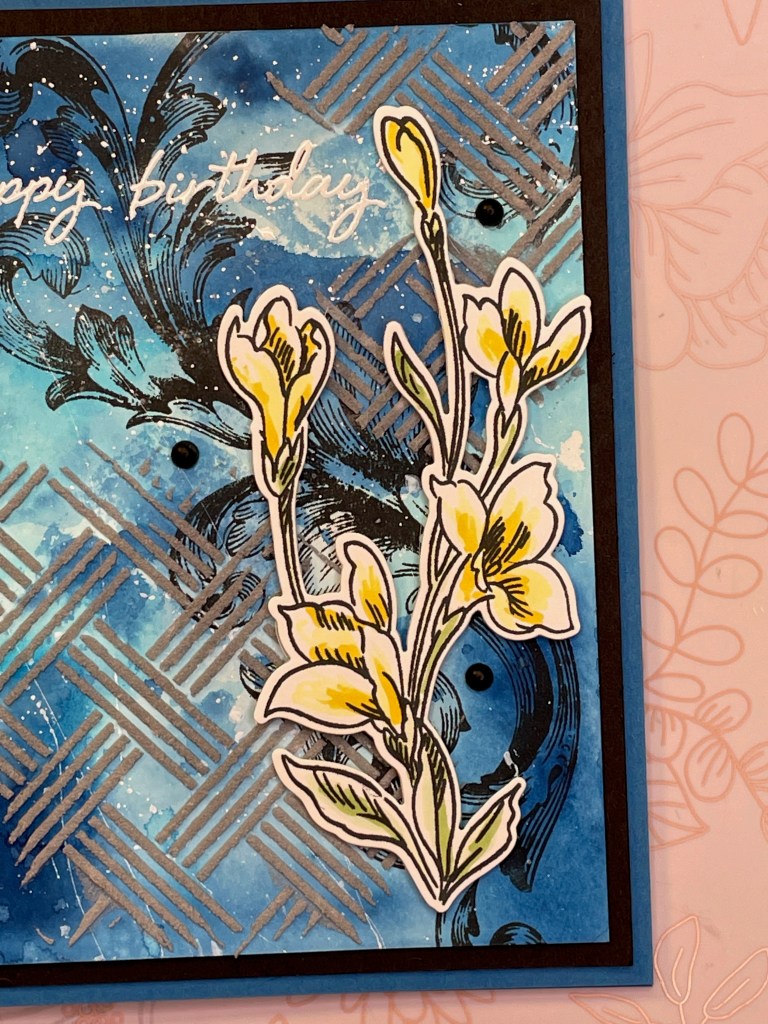
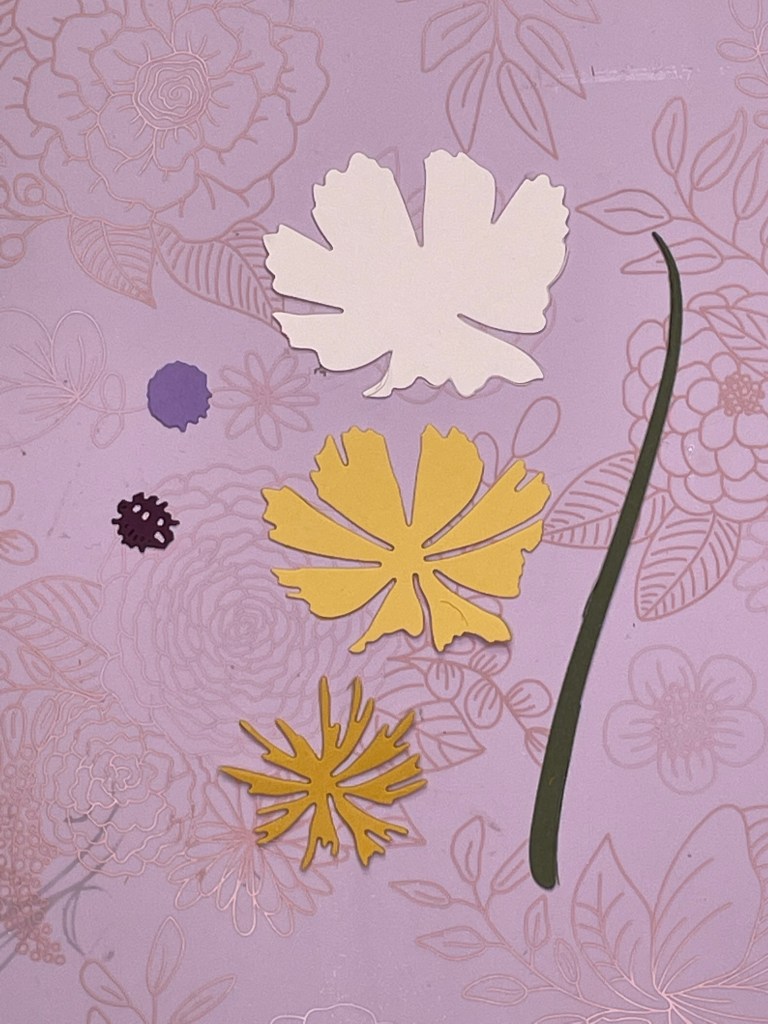
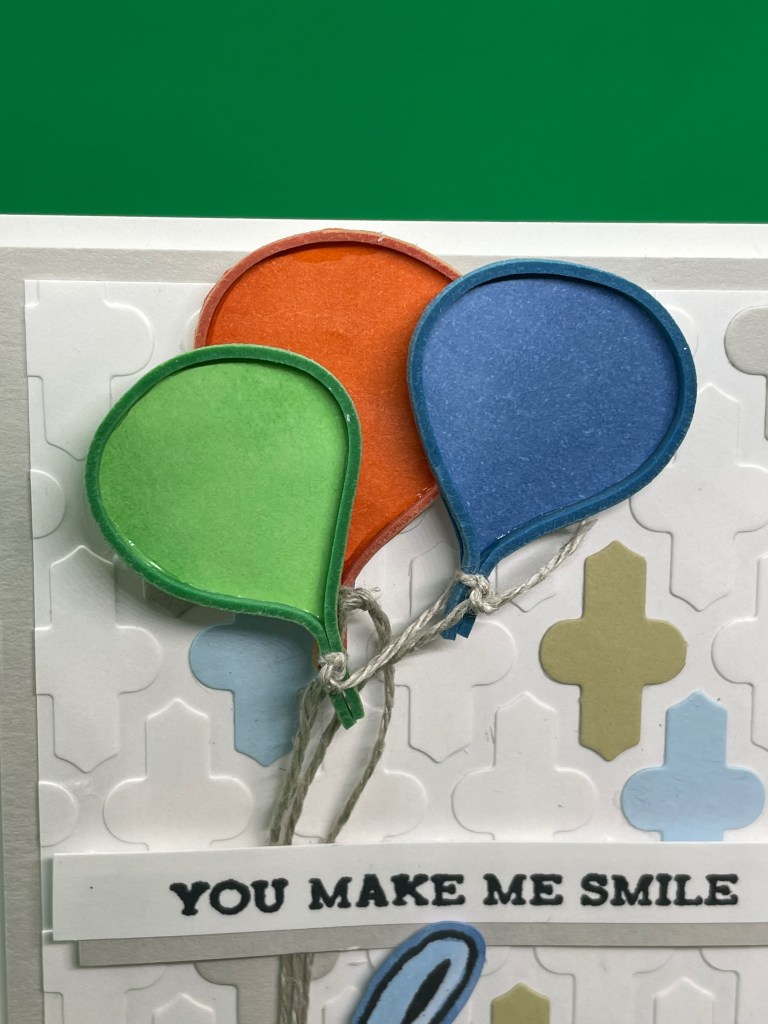
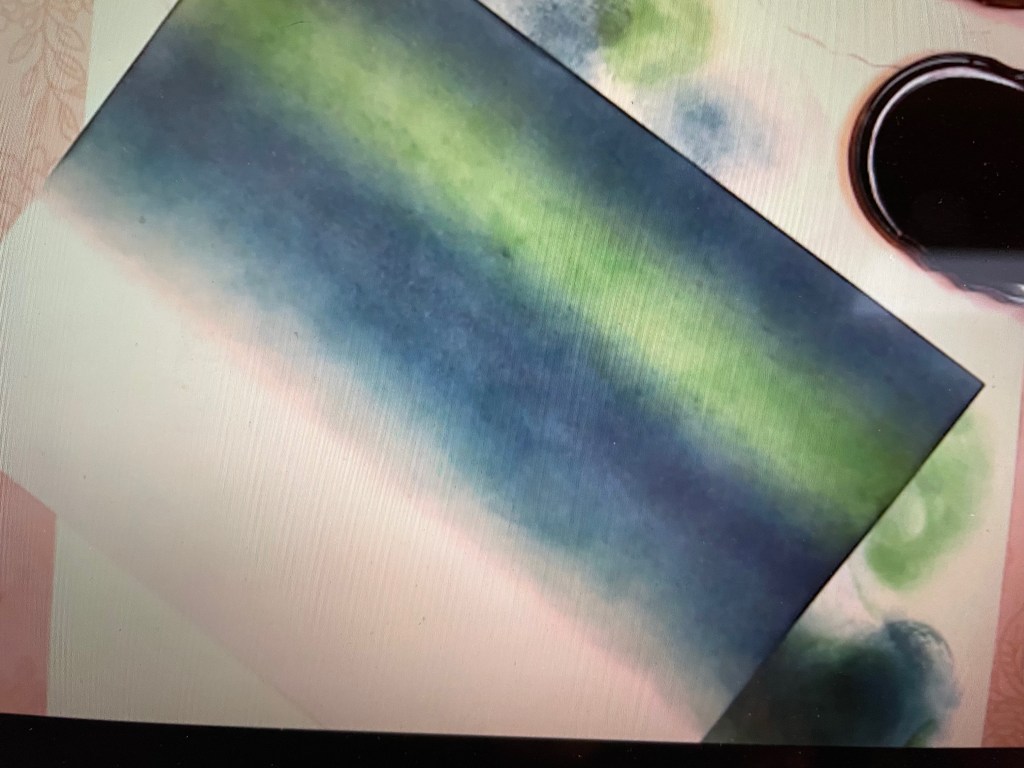
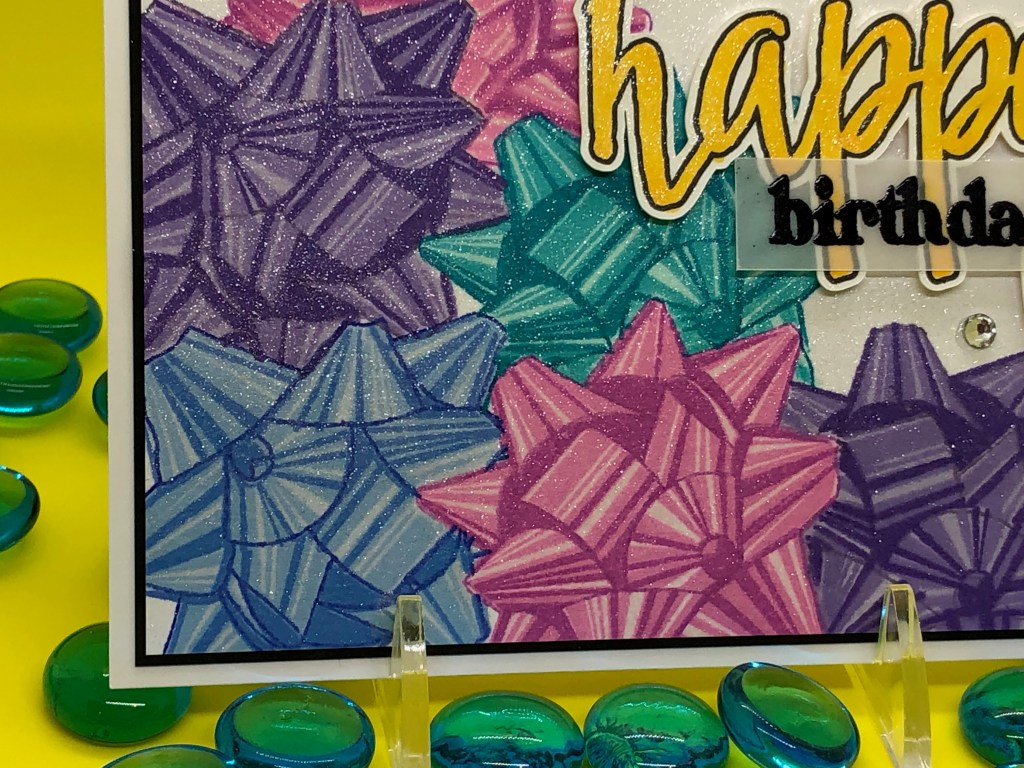
Using a blending brush, color the flower petals with Lavender Fields, color the leaf images with Green Opal. You will notice I was not careful about “staying in the lines” with this coloring.

Next, place the Desert Night ink pad, ink side down, onto the stamping foam. Without applying any more pressure than needed to move the ink pad, move the ink pad around the surface of the stamping foam in small circular motions. You will notice the Desert Night ink is not evenly spread. This is the expected outcome and is what you want. Do not overwork this…allow it to become what it is…trust the process.

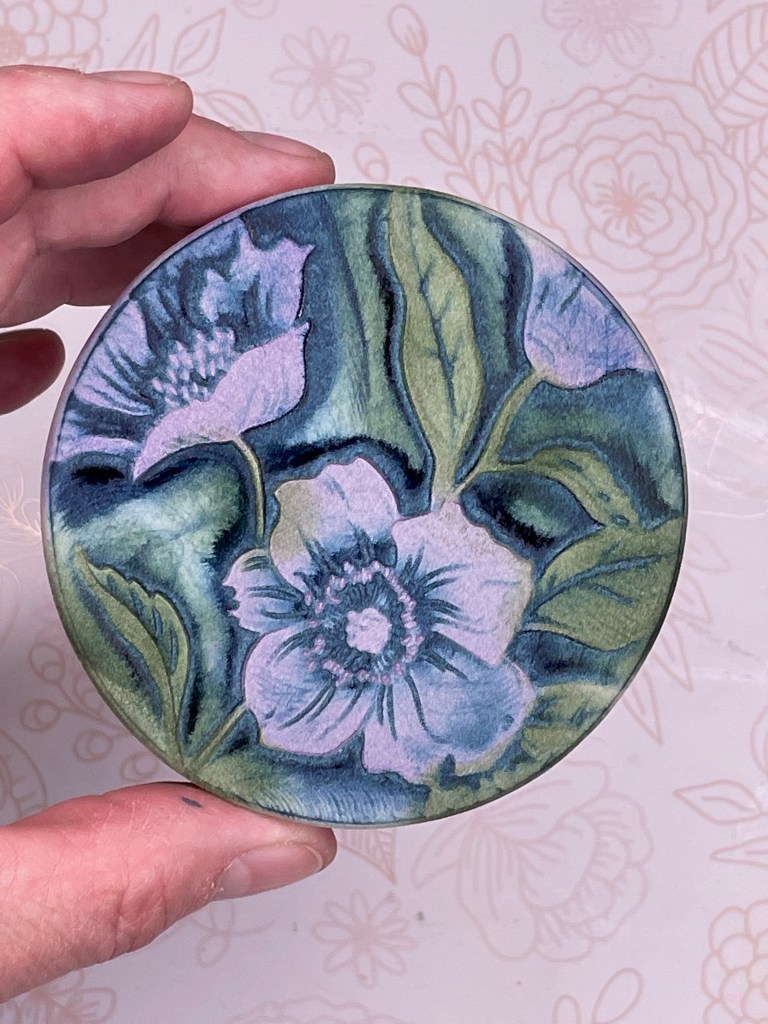
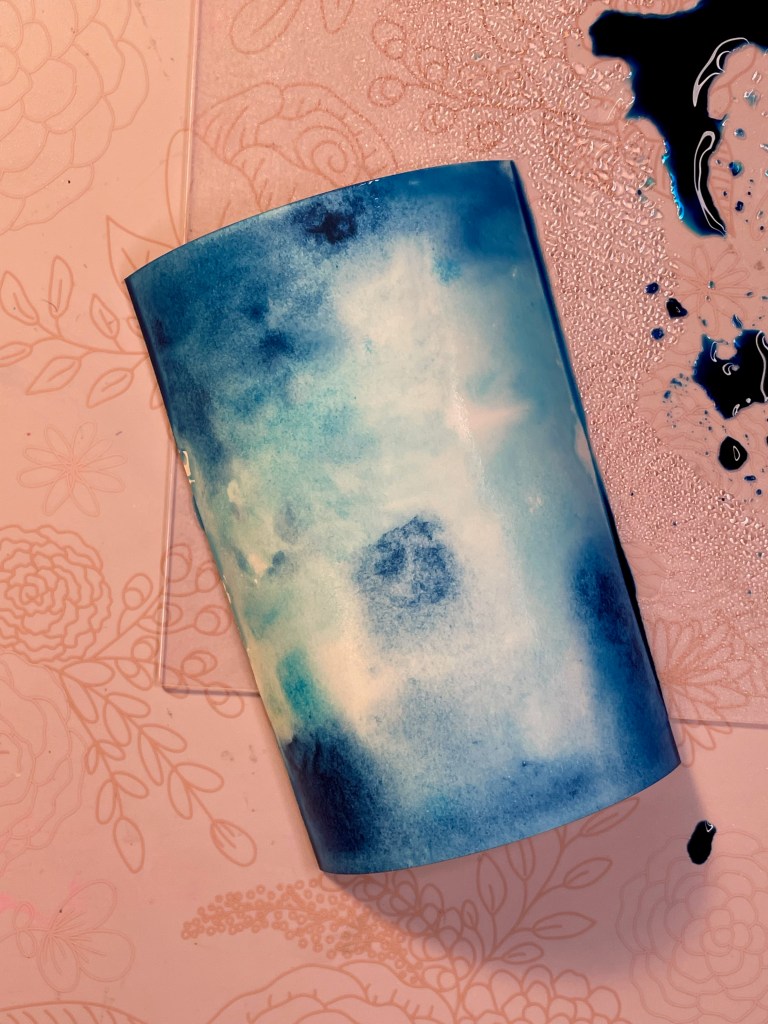
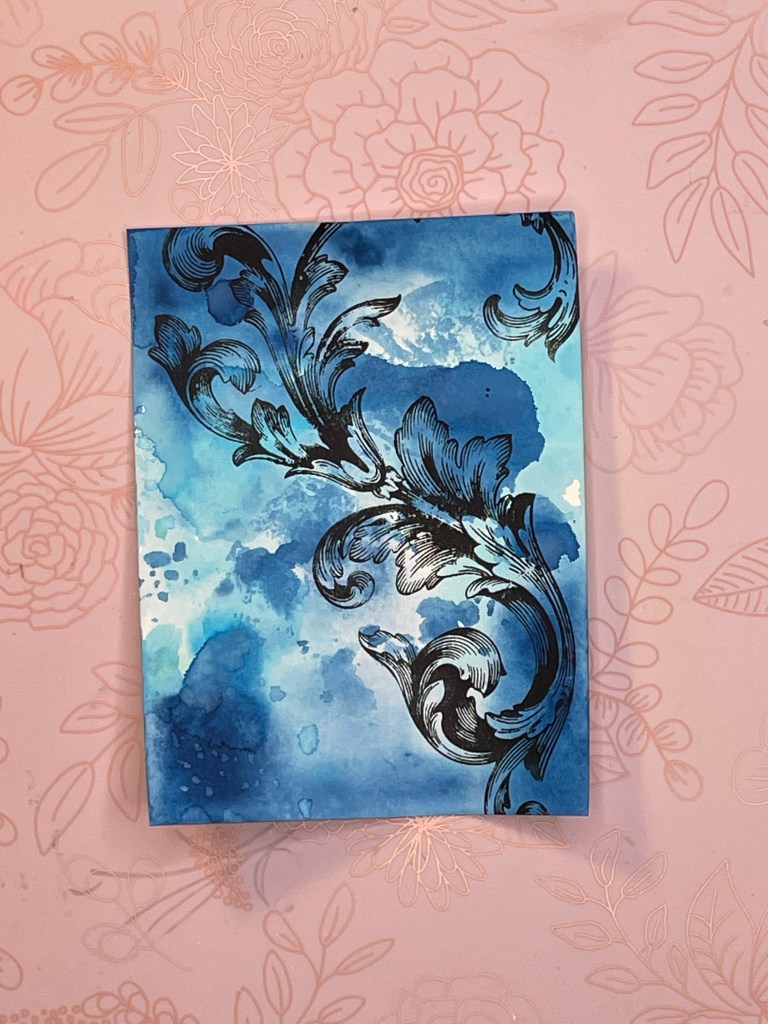
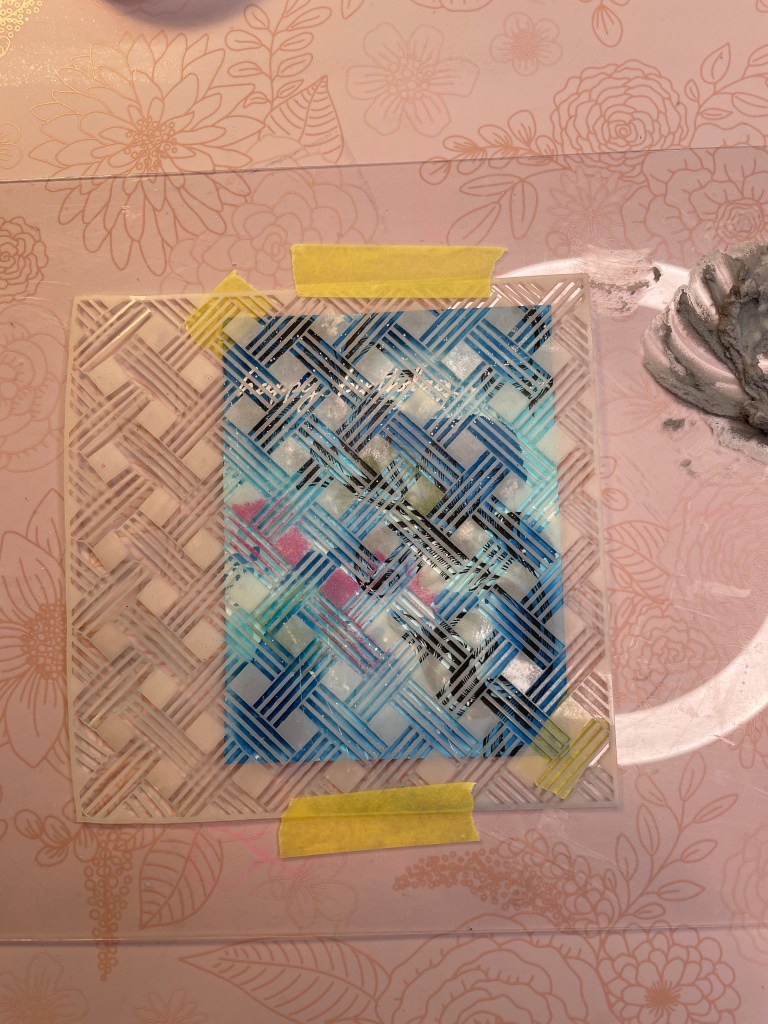
Hold the stamping foam arms length from you and spritz lightly with water. You do not want to over-wet or have large water droplets on the image. Press the image onto a piece of 5 1/8″ x 3 7/8″ Neenah White card stock and press firmly to fully stamp. Place the stamping foam with the previously penciled arrow on the back of the foam pointing to the top of the card panel. Place the card stock back into the embossing folder, lining up the stamped image with the embossing folder image and run through the embossing machine.

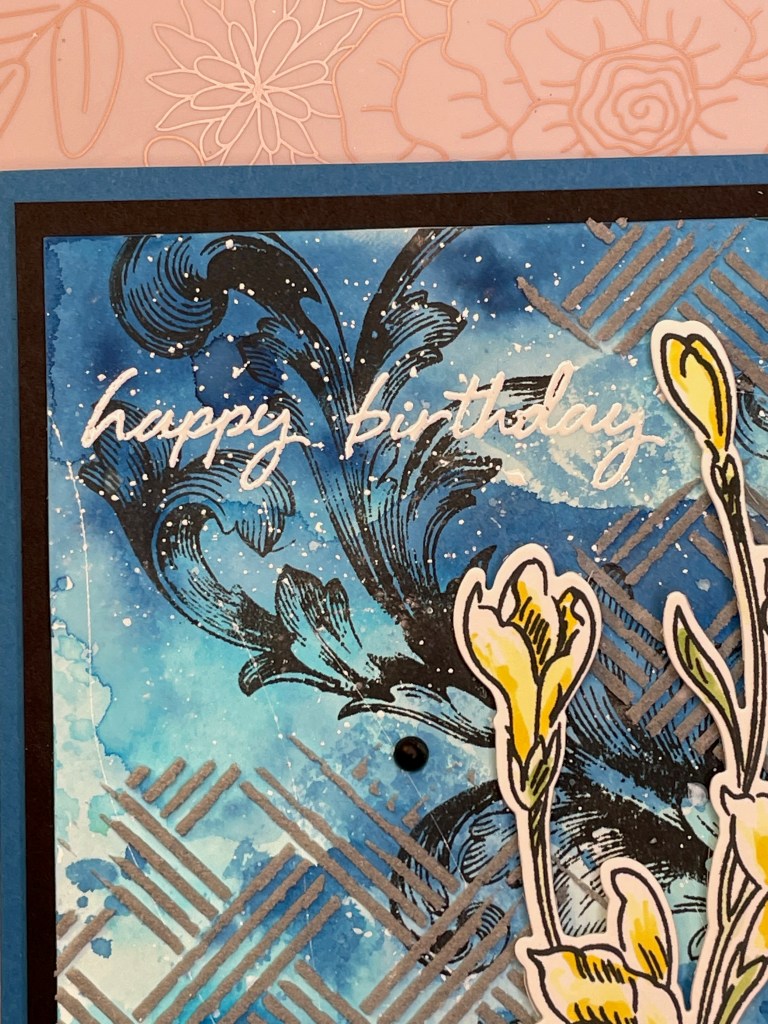
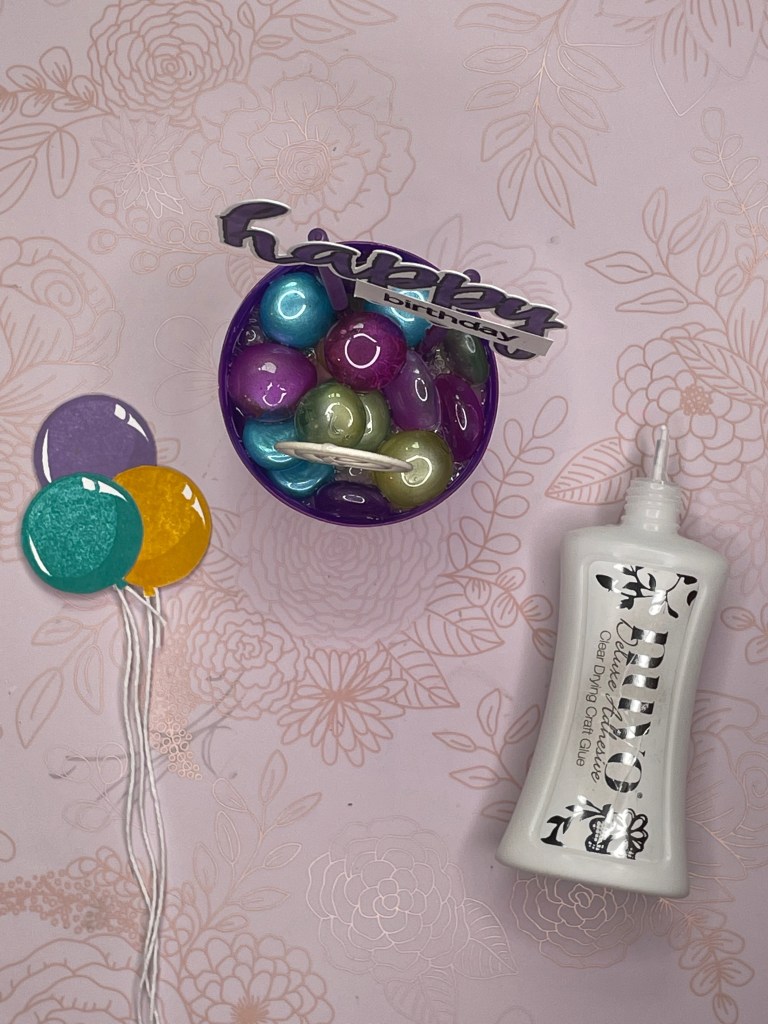
Apply sparkle to the flower image using you choice of product. I intended to use the SpectrumNoir Crystal Clear Sparkle pen but realized it was too dry for the class. I used a few drops of the champagne mist with 2 ounces of 70% isopropyl alcohol and spread with a paint brush. Apply the clear enamel dots.

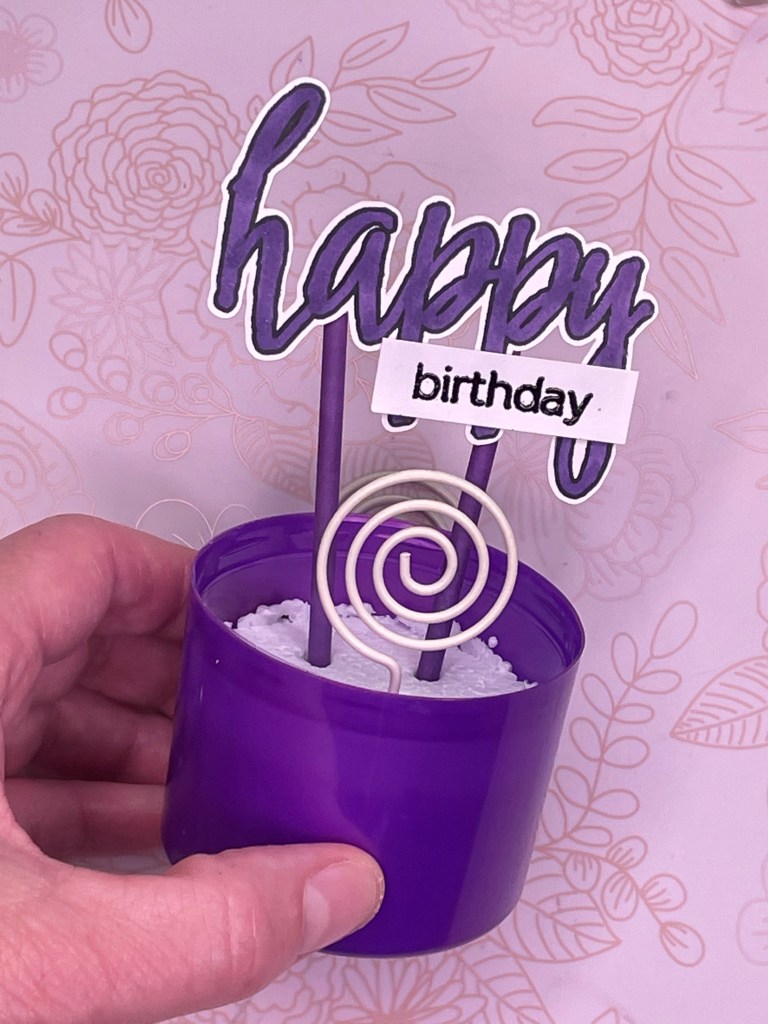
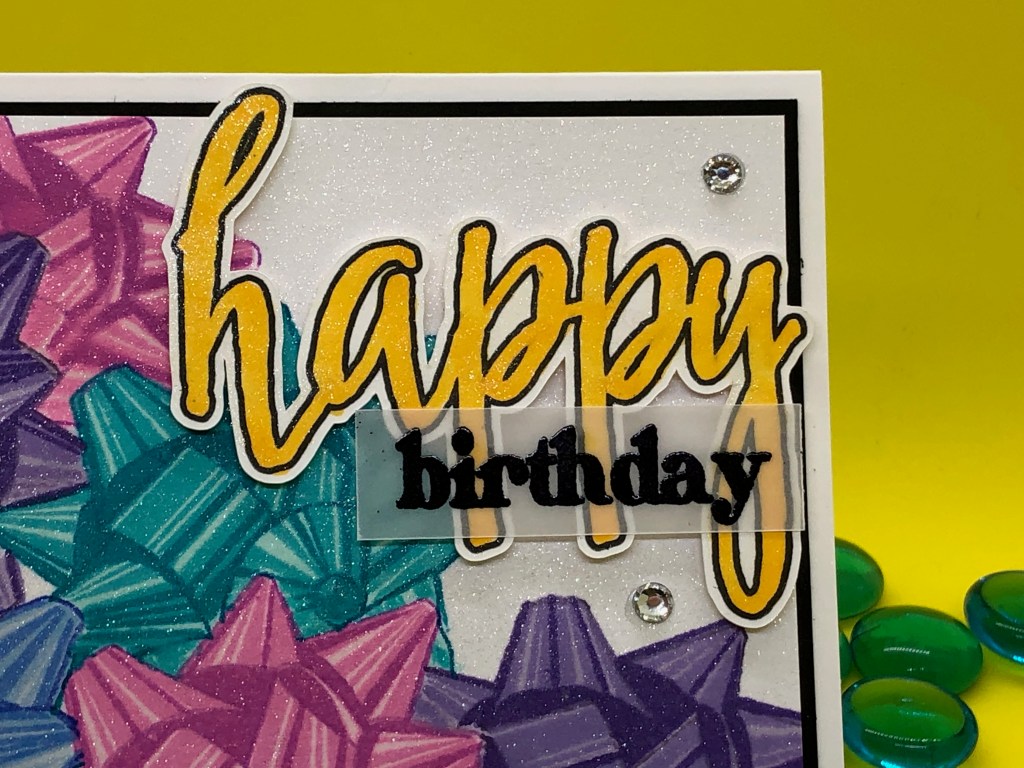
Attach the inked panel to a piece of 5 1/4″ x 4″ basic black card stock. Attach this to a Neenah white card base using foam tape. Stamp the Happy Birthday sentiment onto a piece of 2 5/8″ x 1/4″ of Neenah white card stock and attach to a 2 3/4″ x 3/8″ basic black card stock. Attach to card front.

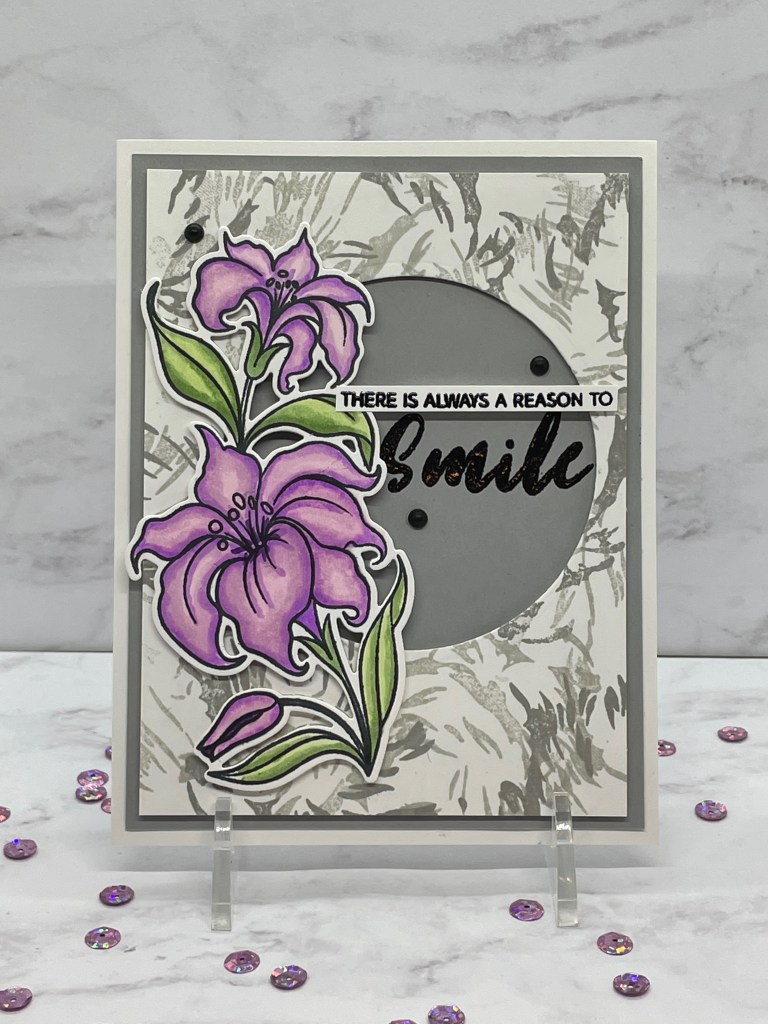
THERE IS ALWAYS A RESON TO SMILE

  • SUPPLIES
  • STAMP SETS: Altenew Fresh Bloom, Altenew Enjoy Life
  • CARD STOCK: Neenah White card stock, Stampin’Up! Sahara Sand
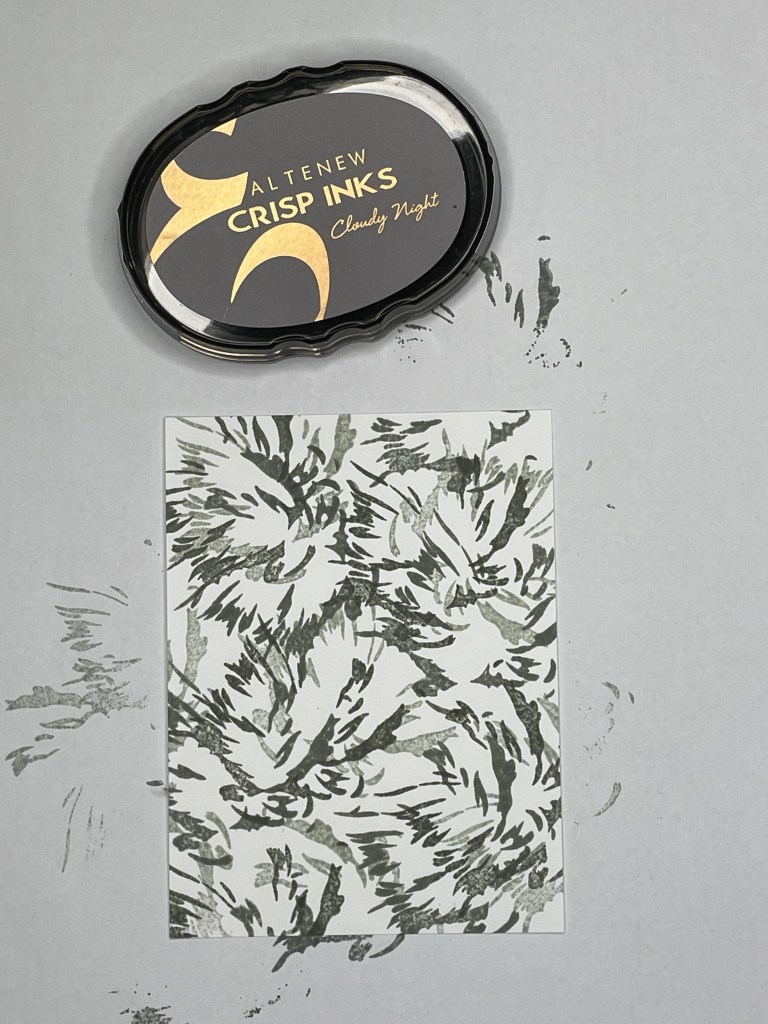
  • INKS: Altenew Silver Lake, Gray Denim, Cloudy Night, Versamark Watermark Ink, COPICS: V000, V01, V04, G20, G21, G24
  • DIES: Enjoy Life flower die, 3″ circle die
  • OTHER: black embossing powder, heat tool, foam tape, black matte dots

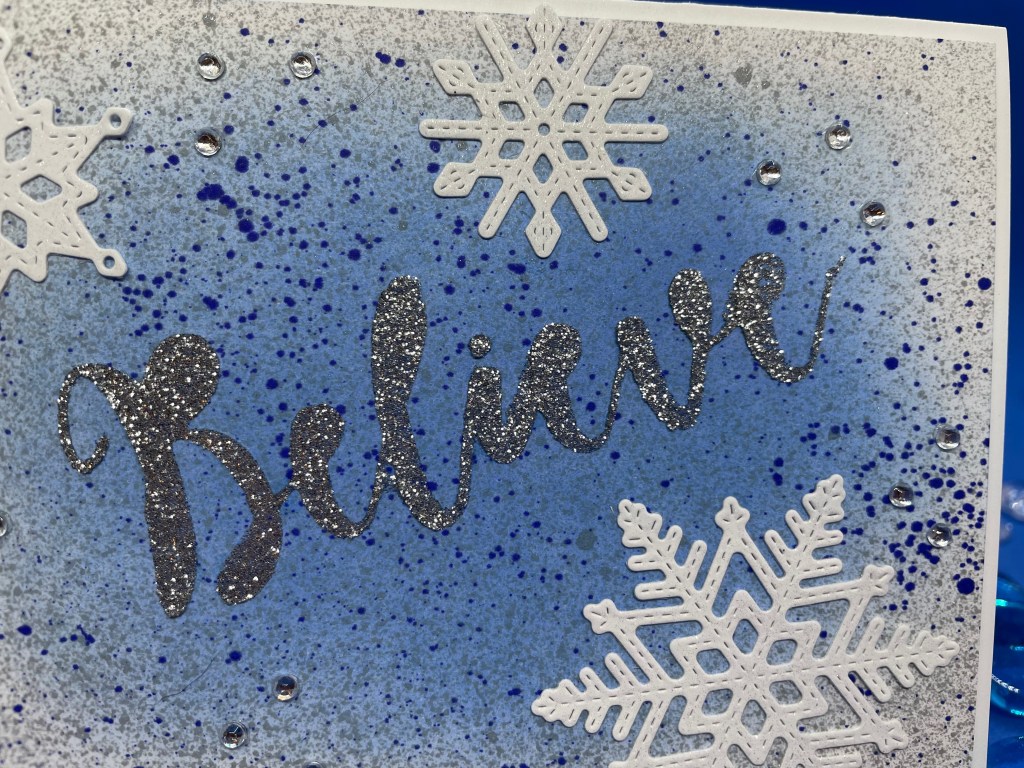
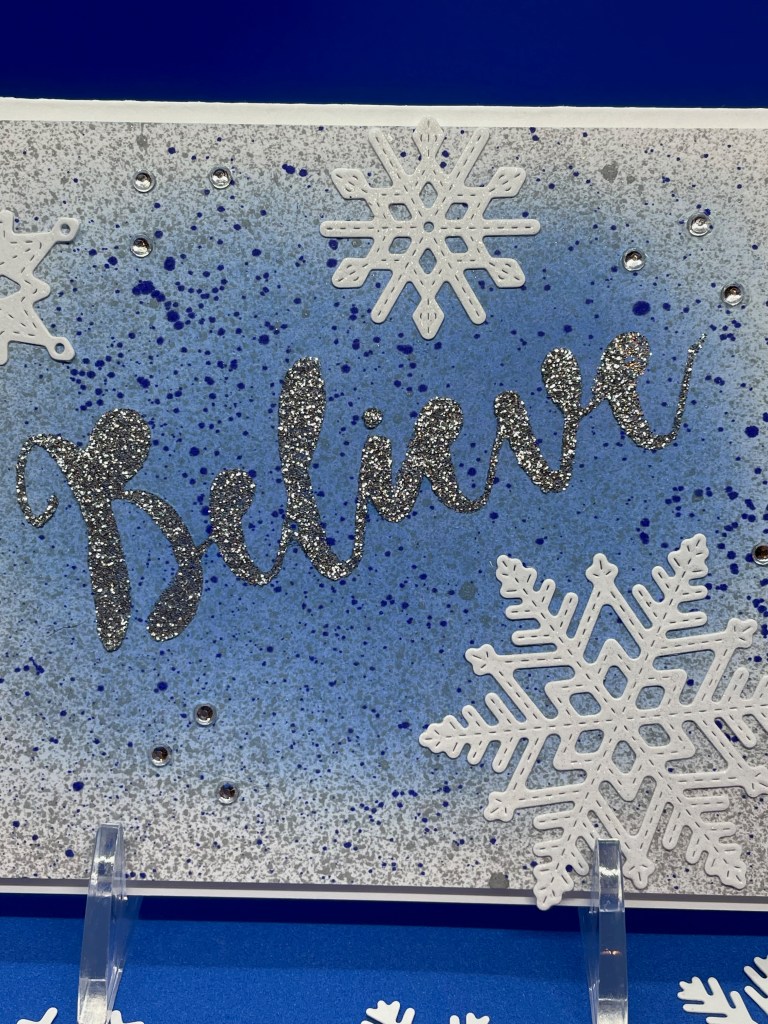
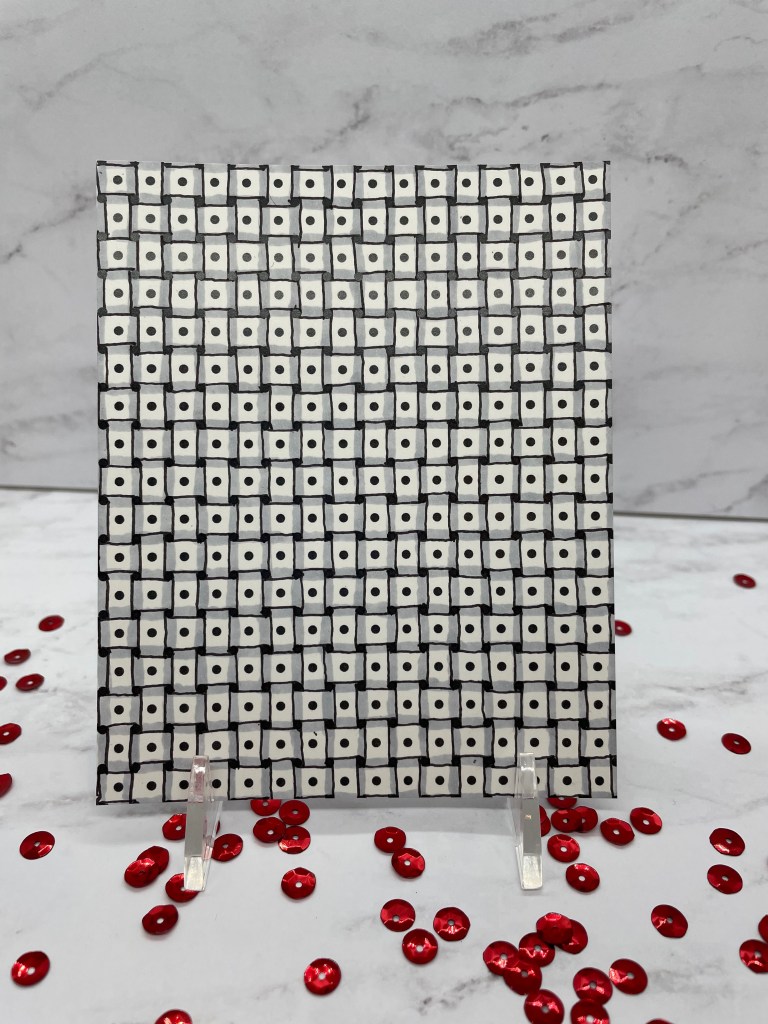
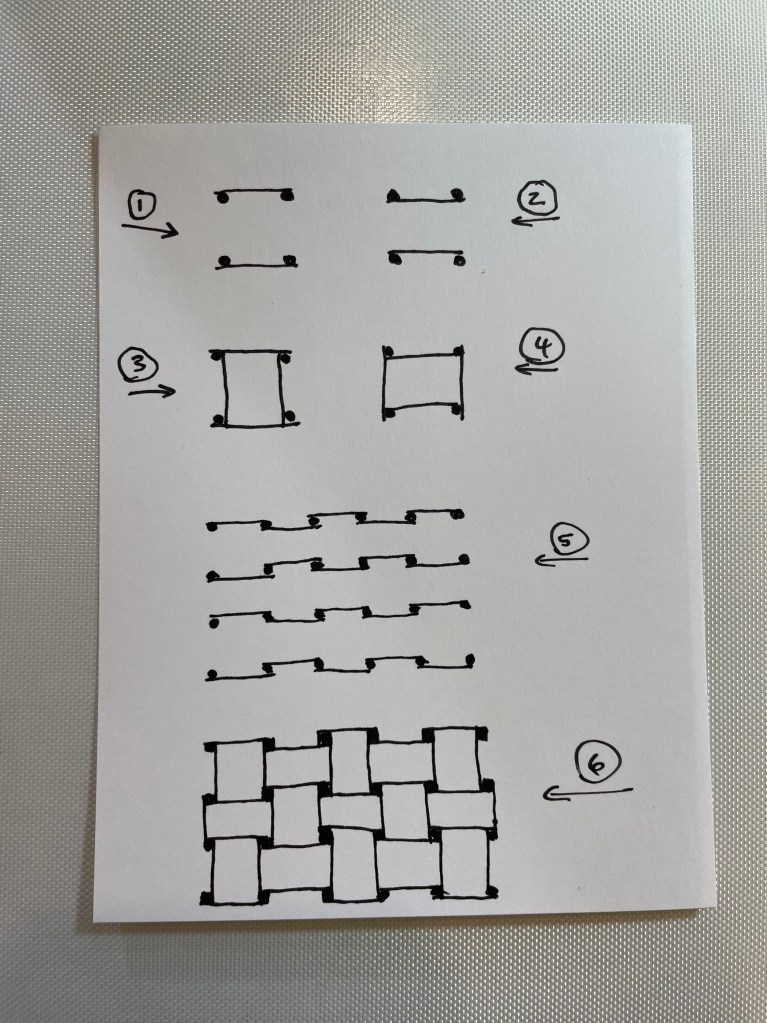
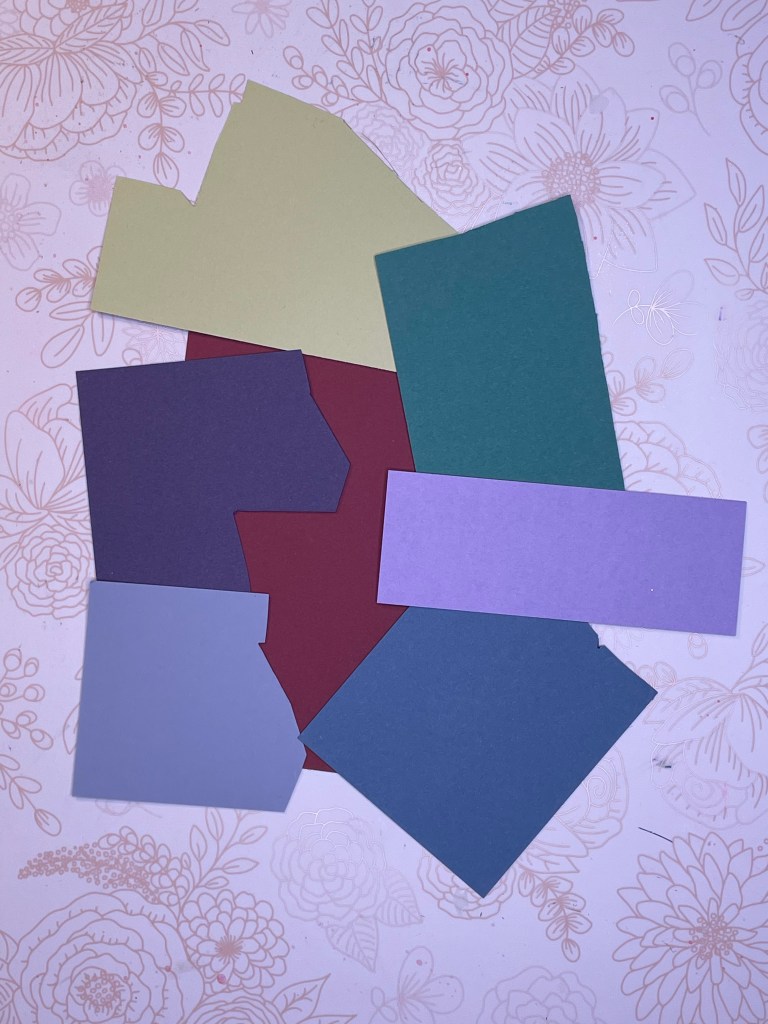
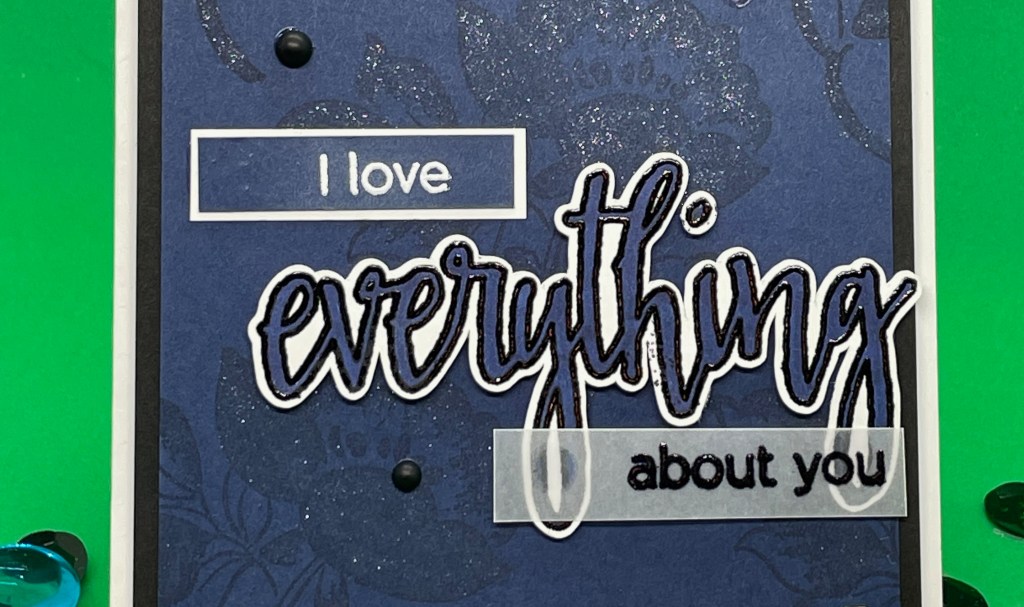
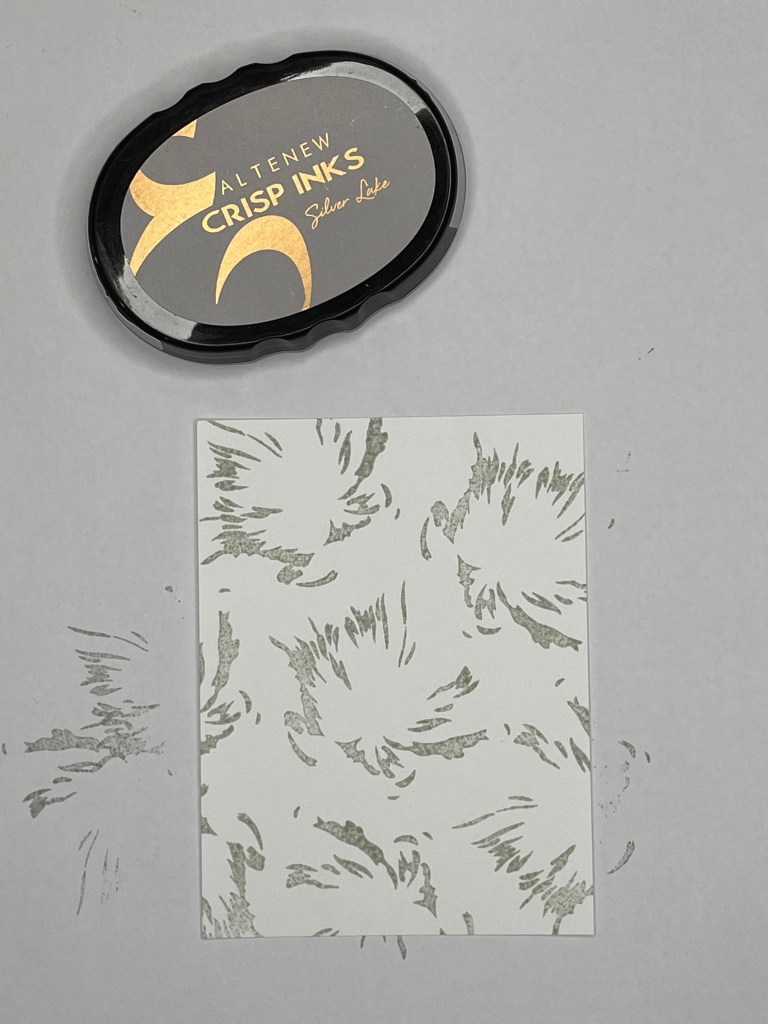
To create the background for this card I used the A5 layering flower stamp from Altenew’s Fresh Bloom stamp set.

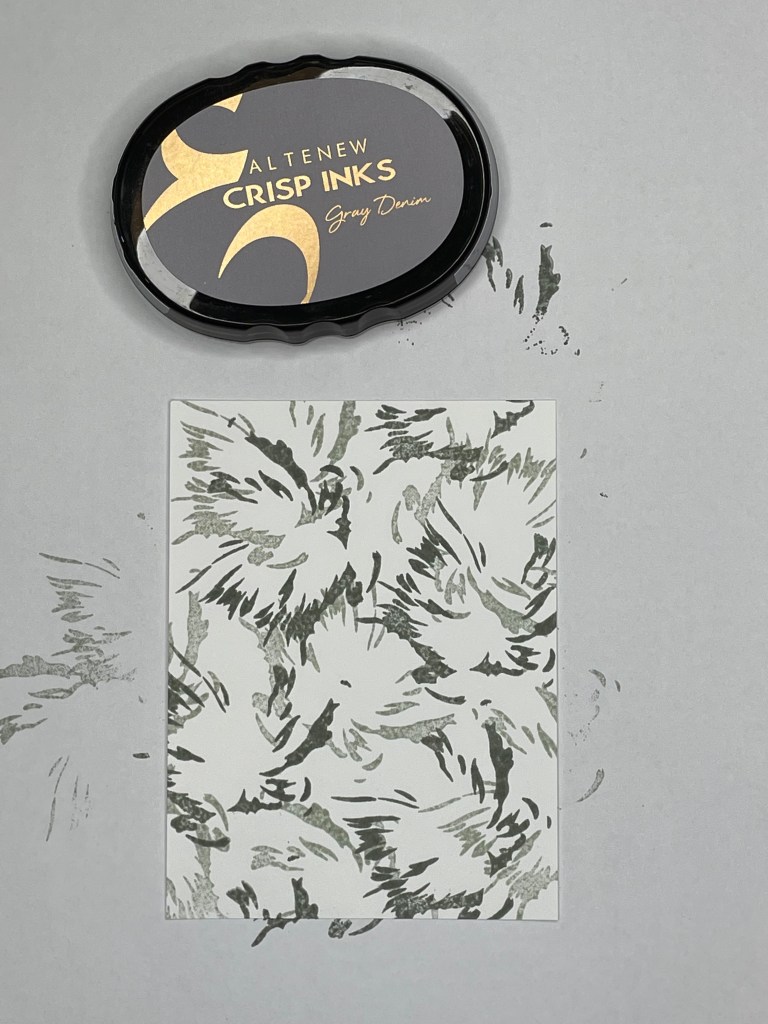
This image will be stamped randomly on a 5″ x 3 3/4″ Neenah White card stock with Silver Lake, Gray Denim, and Cloudy Night inks. Rotate the stamp each time you stamp to keep the pattern random. Also, stamp each color with enough spacing so the finished panel is not over-stamped.

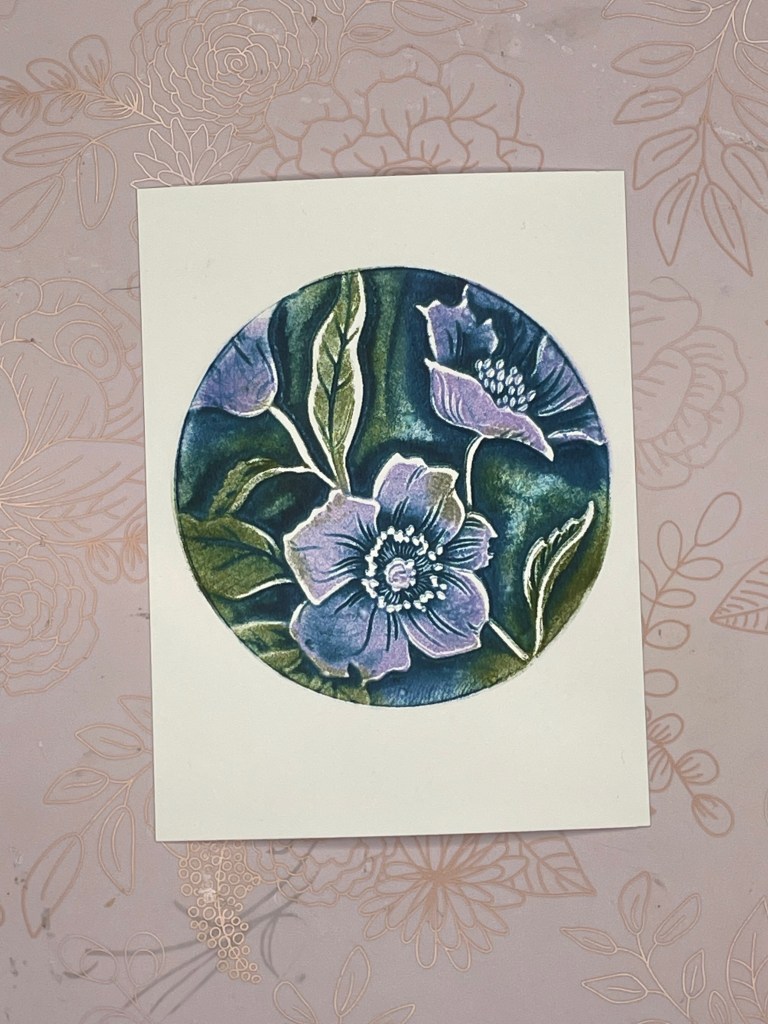
Using a 3″ circle die, die cut a circle just above the middle of the card. Place the panel on a piece of light gray card stock, in this case the Sahara Sand card stock. Using a pencil, make a light mark to the right edge of the circle to help guide you on where to stamp the “smile” sentiment.

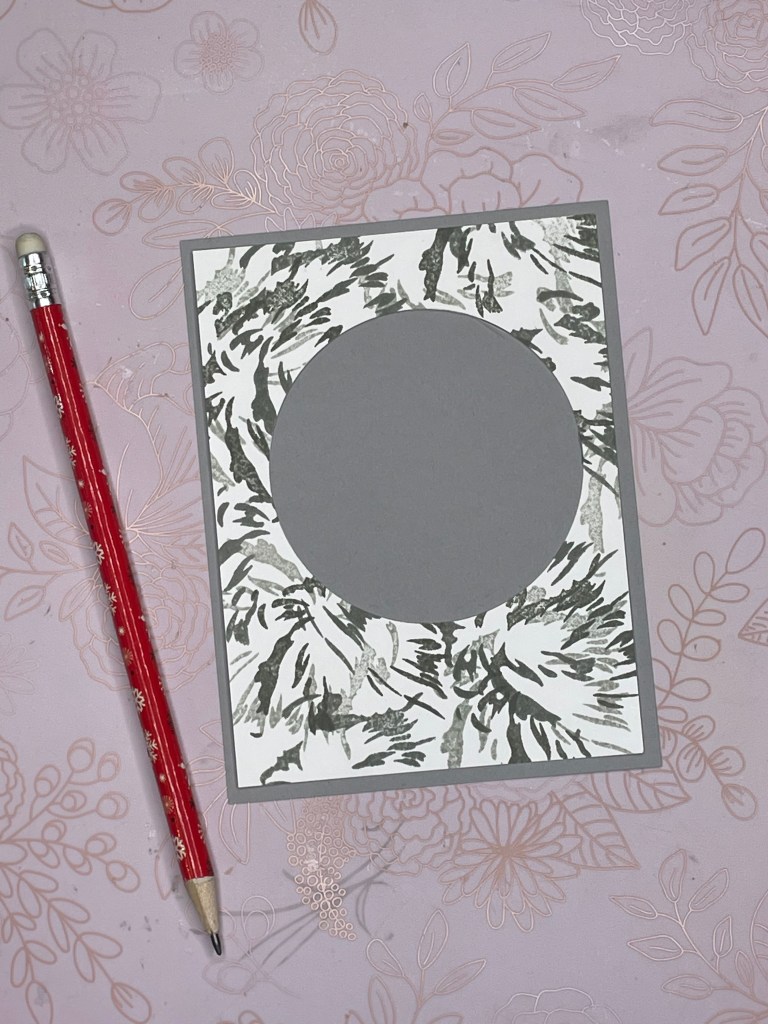
Once the flower is added to the card there is limited room for the “smile” sentiment. Stamp the “smile” stamp in Versamark Ink and heat emboss with black embossing powder. Hint: have you ever attempted to emboss on colored card stock only to end up with a partially shiny and partially dull stamped/embossed image? Card stock is more absorptive than white card stock, so the Versamark does not stay as sticky for as long on colored card stock. When using colored card stock, use a well inked Versamark pad, immediately apply powder and heat set. You will get beautifully embossed images each time.

Attach the stamped, die cut panel to the Sarah Sand card stock using foam tape. Stamp the flower image in Permanent black ink, color with COPIC V000, V01, V04, G20, G21, G24. Die cut the image. Attach to the above panel using foam tape. Heat emboss in black embossing powder on a 2 1/8″ x 1/4″ Neenah white card stock the sentiment “There is always a reason to”. Attache to card front. Attach this completed panel to the Neenah white card base. Apply black matte dots.

THE WORKSHOP

After completing the assignments for the three levels of the AECP program I was tasked with holding a workshop. The workshop would be 2 hours long, could be either in person or virtual, would need at least 4 attendees. The workshop would be attended virtually by Erum and Virginia. I chose an in person workshop and designed the three cards above. A lesson plan was submitted to Virginia for review along with photos of the card. I initially had 6 attendees but, as happens in life, 2 could not attend. During the workshop Erum and Virginia requested a view of the attendees and a view of the work area. I set up my computer on a high shelf pointed to the craft area to give a view of the attendees working. My phone was attached to a stand which was positioned on the corner of the craft table to give a view of the work area. Prior to the workshop I was nervous about Erum and Virginia “watching”. But they were wonderful, they talked with the attendees and me, putting me at ease. They shared some of their story and provided feedback and guidance throughout the workshop. I feel the attendees enjoyed their participation as much as I did.

I started the workshop with the “There is always a reason to smile” card as I knew this would be the most involved card. As it turns out it took the better part of an hour for everyone to complete this card. Virginia reminded me that 2 cards would complete the assignment, in case we didn’t get to the third card. I was anxious about this as I was tasked with creating a successful workshop to be done in 2 hours. I chose these three cards. I would have considered the workshop unsuccessful if we had not completed all three cards. I knew the other two cards would not take as much time to complete and as it turns out we had time to complete all cards, with a few minutes to spare.

I want to give a shout out the all the educators with Altenew who created the education videos for the program, to all the staff at Altenew and their wonderful products. And specifically to Erum and Virginia. Erum was available throughout the program for questions and guidance. Virginia was available throughout the workshop process for questions and guidance. The whole program is a quality production.

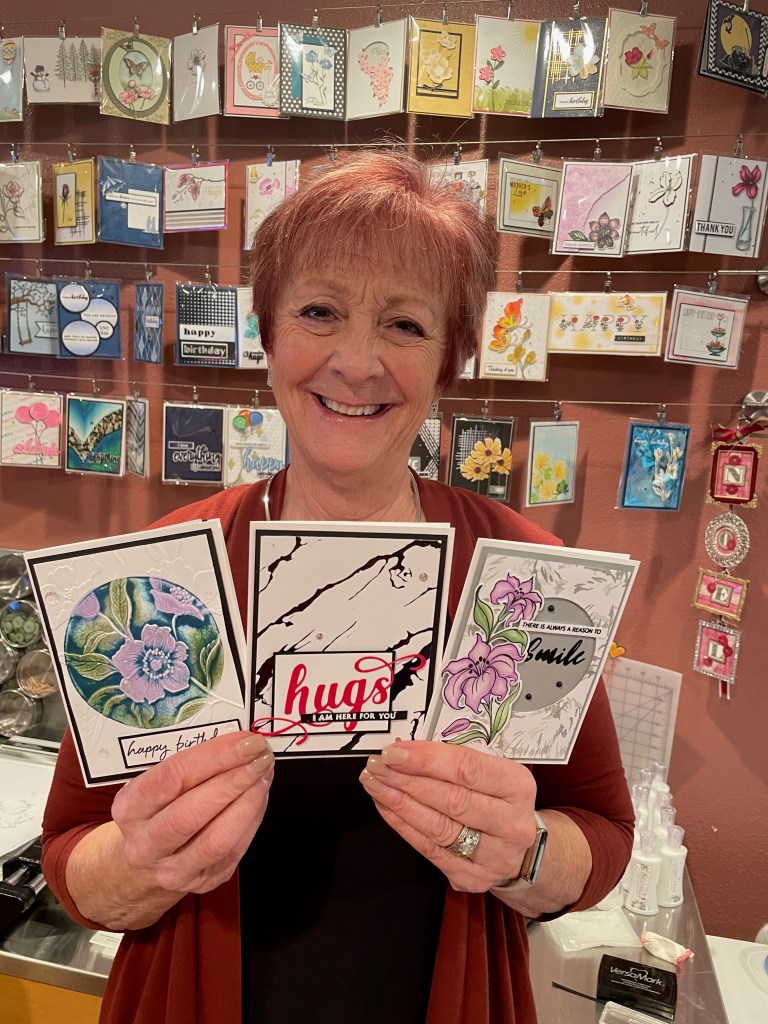
Next, thank you to the ladies who attended the workshop. See the completed projects below:

With a mild and friendly “push”, the ladies agreed to be photographed with their finished projects. Thanks to Sandy, Connie, Sharon, and Mickie…love you all!

I hope you have enjoyed the blog posts as I went through this program. I look forward to continuing to share with you. I now look forward to being an educator for Altenew. If you should choose to do the program perhaps I will be a part of your education.

Please feel free to reach out with any questions or comments.

Aimee

Mixed Media Happy Birthday

Hi everyone! It’s been a bit since I’ve posted a card. I want to give a shout out to Altenew before I move on to todays card. As many of you are aware, I am enrolled in the Altenew Educator Certification Program. This post is actually my last assignment before doing the on-line workshop that will be the “final exam”. As I said, it has been a while since I have posted. The certification program is self paced. I started early 2021. Initially I was able to post with regularity, moving through the program. In the fall the family practice I work in (I’m a family nurse practitioner) was purchased by a large medical corporation here in the Denver metro area. This change created a tremendous amount of work and I needed to remove some responsibilities off my plate to accommodate the amount of time I was spending at work. The Altenew Educator Certification Program, being self paced, allowed me to do this. A huge thank you to Altenew. This allowed me to do what I needed to do without pushing through the program, therefore learning less and not doing as good a job. A wonderful relief to some of my over-committed life.

To view a video of how this card was made, click HERE.

  • Supplies
    • Stamp sets:
      • Altenew Pen Sketched Flowers
      • Altenew Birthday Builder
      • Altenew Baroque Motifs
    • Card Stock:
      • Neenah White Card stock
      • Black card stock
      • Stampin’Up! Pacific Point Card stock
    • Inks:
      • Altenew Watercolor Brush Markers, Tropical Fiesta Set:
        • Desert Night
        • Turquoise
      • Altenew Watercolor Brush Markers, Winter Wonderland Set
        • Metallic Silver
      • Momento Tuxedo Black
      • White Embossing Powder
      • Versamark
      • Lawn Fawn white pigment ink
      • COPIC Y11, Y15, G40, G43
    • Other supplies:
      • Altenew Pen Sketched Flower Die
      • Heat Gun
      • Embossing paste
      • Foam tape
      • Black mat dots
      • MISTI stamp positioning tool

I started this card with the Altenew Turquoise and Desert Night from the Tropical Fiesta Watercolor Brush Markers laid down on a non-absorptive surface. These markers are highly pigmented so you do not need much. A trick to keep in mind is to not surround the lighter color with the darker color. You will see I put the Desert Night (the darker ink) only in the center and the upper outer corner. If the darker ink is surrounding the lighter ink, it will all mix together and you will not get enough definition between the two colors.

After the ink is down, spray the ink liberally with water.

The first picture above shows the paper after I have placed it on the ink the first time. I then used a heat gun to dry the ink and spread the ink. Be careful to not burn the paper. The paper will be somewhat warped after this step. Do not worry about this. The second picture above is after the second time I placed the card stock in the ink and dried the ink. This will look different every time you do this. That is the magic. The trick is knowing when to stop applying ink. Part of this is personal taste, part is just playing and learning. Get inky, do several samples, have fun. I really enjoyed this process.

Stamp the Image from Altenew Baroque Motif in Momento Black ink. I used a MISTI for this step for two reasons. First, the stamp is large and the MISTI allows you to re-stamp allowing you to fully stamp the image. Two, the paper is warped at this point. The MISTI removes the risk of the image not being fully stamped.

You will notice in this image I have spattered white craft ink on the card panel and I have stamped Happy Birthday in the upper left corner. I spattered the white craft ink using the Tim Holtz spatter tool. This spatter tool is amazing. The bristles are a stiff plastic and the clean up very well.

Use an embossing buddy to prep the panel. This helps to prevent excess embossing powder from sticking to the panel from moisture or static which would be heat set once you use the heat gun.

Mix the Metallic Silver watercolor ink with the embossing paste. Tape down your panel and stencil with a low tack tape.

I spread the colored embossing paste over the stencil using a plastic spatula. You will notice I spread the embossing past only to the upper right corner and the lower left quarter of the card.

I stamped the flower image from Altenew Pen Sketched Flowers in Momento black ink, then used the Die for the flower to cut out the image. I chose a yellow so it stands out from the blue and black background. Use the COPIC Y11 to lightly color the flower petals. Use the COPIC Y15 to shade the flowers. Use the G40 to lightly color the greenery then the G43 to shade. When coloring both the flowers and the greenery do not fully color the background with the lighter colors. Leave some white at the edges. The colored flower image is then attached to the card panel with foam tape.

Attach the card panel to the black card stock using glue. Place a heavy stamp block over this for several minutes to allow the glue to fully adhere the panel which has been warped by heating. It will also help flatten the card panel. Repeat these steps to attach the card panel to the card base.

Place black mat dots around the flower as shown.

I hope you enjoyed this card. Mixed media is outside my typical design style but I truly enjoyed it. I also enjoyed getting somewhat messy in the process, a nice side effect.

Aimee Pankau

Believe

To watch a video tutorial for making this card, click HERE.

  • Supplies:
    • Stamp Sets:
      • none
    • Paper:
      • Neenah white card stock
    • Ink:
      • Altenew Crisp Ink Persian Blue
      • Altenew Sapphire re-inker
      • Altenew Metalic Archival Antique Silver Ink Spray
      • All Purpose Champagne Mist Ink
    • Other supplies:
      • Gina K Glitz Glitter Gel, silver
      • 3mm rhinestones
      • Altenew Holiday Script Words Die
      • Stampin’ Up! Stitched Snowflakes Die set
      • Tim Holtz spatter brush
      • Pixie Spray
      • Foam Tape
      • 70% Isopropyl Alcohol

This card is my assignment for the Altenew On-Line Class called Stunningly Styled Stencils. I have to admit this was one of the most challenging designs I’ve had in a while. I don’t use stencils much, which is why I signed up for the class in the first place. Because I don’t use stencils much my supply of options for designing this card were limited. Throw in the holiday season, and I was stumped. I wanted to do a holiday card. I borrowed a few stencils from friends. In the end I made my own stencil. The rest just seemed to design itself.

The first step involved creating the background. Using a large make-up brush, which are becoming a favorite way for stampers including myself to blend inks, I blended a large oval in Altenew Persian Blue Crisp Ink. I then spattered Altenew Sapphire Re-inker using my Tim Holtz spatter brush. This is a great spatter brush. It has firm plastic bristles which spatter well and then clean easily. The third step in creating the background is to spray the whole background with Altenew Metalic Archival Antique Silver Ink Spray. This spray creates a wonderful spray of silver which you can see in the upper corner of the above picture. This ink takes a minute or two to dry so set the panel aside to allow it to dry.

As I did not have the stencil I wanted, I used the “Believe” die from Altenew’s Holiday Script Words Die set to create a stencil. I created the die using a thick piece of vellum. I’m sorry as I do not have the pound weight of the vellum. I compared the thickness of my vellum with a stencil I had to get as close as I could to a pre-made stencil. I ran the die “Believe” on vellum through my Big Shot then cleaned the edges of the embossed image with a sharp edge to remove any vellum slivers off the edges. Using Pixie Spray lightly on the back of the vellum, I set the embossed image over the blue blended ink. Using a smooth plastic spatula, I spread the Glitz Glitter Gel evenly and smoothly. This gel, like many stencil pastes, starts to set up quickly. Remove the stencil quickly and, if you plan to reuse it, clean it quickly.

Next I used the snowflake dies to create three different snowflakes. I sprayed them with a mix of All Purpose Champagne Mist ink and 70% rubbing alcohol creating a fine glitter on the snowflakes. The snowflakes were then glued to the card front.

The last step, because the card just needed more sparkle, I put several rhinestone embellishments grouped in 3 on the card front. The completed panel was attached to the card base with foam tape.

I was so pleased with how this card turned out, especially given the difficulty I had getting past the first design element in creating it. Have you ever had one of those creation struggles?

I hope you enjoy this card. Even more, I hope each of you have a wonderful holiday season and a very happy new year!

Aimee

Hello, My Friend

To view a video on this card, click HERE.

  • SUPPLIES:
    • Stamp Sets:
      • Altenew Paint a Flower African Daisy
    • Ink:
      • Versamark Watermark Stamp Pad
      • Altenew Watercolor Brush Marker: Lime
      • Altenew Artists’ Watercolor 24 Pan Set: Summer Afternoon, Fall Harvest, Delectable Delights, Deep Blue Seas
      • White embossing powder
    • Card Stock:
      • Canson Bristol Recycled paper, white
      • Neenah White card stock
      • Black card stock
    • Other:
      • Altenew Signature Words Die set: hello
      • Heat gun
      • Foam tape
      • 3mm embellishments
      • container for clean water
      • cloth used to clean brushes, dap extra moisture from project

Hi all! Today I am sharing my watercolor project made as part of my journey through the Altenew Educator Certification Program. For added inspiration and technique guidance, please visit “Exploring Watercolor Mediums” by Jen Rzasa and Ashlea Cornell. You can find this at Altenew.com, click ‘education’, then ‘online classes’. This one is definitely worth the watch.

First, a disclaimer: I am a watercoloring newbee…when I need to color, my default is to reach for my COPIC alcohol markers. Without the Altenew Education Certification Program I would likely have happily stayed in that one dimensional world. I am in the last “trimester”, if you will, of the program. As part of the last part of the program, I was able to choose the classes I wanted to participate in. So, I chose areas of weakness. Yup, watercoloring!! (One of my next classes is Mixed Media…yikes…I’m nervous just thinking about it 😳). OK, disclaimer over…

The flower image from the Paint a Flower African Daisy set is stamped in Versamark ink onto Canson Bristol paper, then covered with white embossing powder and heat set. Remember to prep your paper with a non-static powder. I use an “embossing buddy” There are many on the market, but you can also use corn starch brushed lightly on your paper. This helps prevent the embossing powder from sticking, through static, to areas not stamped. Because this is a white image on white paper, I stamped the image in black ink on a piece of scrap paper to keep as a guide while coloring. Side note: I especially like the Canson Bristol paper for watercoloring as it has a smoother side that is great for stamping, and it is thinner than many watercolor papers.

To create the flowers, I used two #4 round paint brushes. The first I kept as my “clean brush”, used to wet the area I wanted to color and to spread the ink, which I applied with my other #4 paint brush. When watercoloring, especially within an embossed image, work in one area, such as one pedal of the flower, at a time. Also, avoid painting the pedal next to the one just painted. The embossing of the image helps to prevent wet paint from one area contaminating the one you are working on, but it is best to not test this theory. Allow each area to dry before painting beside that area.

First, wet the petal. For the flowers, I wanted to create dimension and depth, so I was careful to wet the area only lightly, which gave me some control over the ink movement. Once wet, I used the second #4 brush to apply Summer Afternoon, from the Atrists’ Watercolor 24 pan set, to the center of the petal. Then, with my lightly damp “clean” brush, I moved the paint toward the end of the petal. I left the paint thicker/darker in the areas I wanted shadow and depth. Practice getting used to moving the paint like this. It is not hard, but it does require some technique. Once all the flowers were painted, I moved to the leaves.

I wanted to create a more natural watercolor look on the leaves. To accomplish this, I wet the leaves with more water than I used for the flowers, and I allowed the water to help me move the paint. I feel like this helped the whole image maintain that “watercolor” feel. I used the Lime Watercolor Brush Marker to paint the leaves. I just received these so I had not used them yet. They come with a yellow band near the top that needs to be removed before use. Just screw the top of the pen off and slide the band off. As I had not practiced with them, I placed a few drips of the color onto a paint board and picked the paint up off the board with my brush. I will be practicing with these for sure!

The flower centers were colored with Fall Harvest and Delectable Delights from the Atrists’ Watercolor 24 pan set. The stems were painted with Delectable Delights.

The beauty of watercolor is the ease of creating lighter and darker images, using water for control. One of the challenges in this piece was getting all the sky between the flowers to match the sky throughout the piece. I found this surprisingly easy using watercoloring.

I cut out the “hello” sentiment from Signature Words die set in black card stock and glued it to the bottom right corner. Then I applied three 3mm clear embellishments around the image. I glued the finished card front onto black card stock with only a 1/8″ border, enough to frame but not to over-power. I applied this to the card front using foam tape.

This was such a fun experience! I loved the outcome and can’t wait to do more with watercoloring. Thanks for reading along…

Aimee Pankau

Smile Everyone

To watch a video about making this card, press HERE

  • Supplies:
    • Stamp Sets:
      • Altenew Sohcahtoa
    • Card Stock:
      • Black card stock
      • Stampin’Up! Smoky Slate
      • Stampin’Up! Blackberry Bliss
      • Stampin’Up! Highland Heather
      • Stampin’Up! Mossy Meadow
      • Stampin’Up! Very Vanilla
      • Stampin’Up! Daffodil Delight
      • Stampin’Up! Crushed Curry
      • Neenah white card stock
    • Ink:
      • COPIC alcohol markers C1-C10
      • White embossing powder
      • Versamark Watermark Ink
      • Champagne Mist All Purpose Ink
      • Spectrum Noir Crystal Clear Sparkle pen
    • Other:
      • Altenew Stunning Cosmos Build-A-Flower Layering Dies
      • Altenew Burlap Texture Die
      • 70% Isopropyl Alcohol
      • Spritzer pen

The flowers for todays card were made with Altenew’s Stunning Cosmos Build-A-Flower Layering Dies. Layering Dies create depth with an image much like layering stamps do. They create a fun image with built in dimension. They are fun to use! You can mix and match colors or do a gradient color pallet like I have for this card.

The picture on the left shows the dies that were used to make this card. There are two flowers that come with this set, as well as the stem and leaf dies seen to the left. All the Build-A-Flower sets come with instructions for how to put the flowers together. On this flower, the first two layers fit together easily, but for the top layer I needed the guide.

Here is the assembled flower and the assembled flower center. Now lets get to building the card.

First, I prepped the background with Champagne Mist All Purpose Ink to give it a shiny, sparkling look. Place 6-8 drops of Champagne Mist All Purpose Ink in a spritzer pen. Then fill the pen with 70% isopropyl alcohol and shake well. Holding the pen about 6-8 inches away from the black card stock, spritz evenly until the card stock has been covered. Allow to dry. Drying time is 2-3 minutes. The card stock will curl some. Attaching it to the smoky slate card stock will help it to lie flat again.

On a piece of Neenah white card stock, I used COPIC markers C1-C2 to create an ombre grey image. I used Altenew’s Burlap Texture Die to die cut the background image for the card. Attach this to the prepped black card stock with glue in the upper left of the black card stock.

Assemble the flowers according to the instructions in the Stunning Cosmos Build-A-Flower Layering Dies. To fit the three flowers on the card, I decided to have one hang off the right edge, and cluster them in the middle of the card. The two side flowers were glued to the card front, the middle flower and stem are attached using foam tape. The card front is then attached to the card base with foam tape. After the flowers were attached to the card front, I colored them with a Spectrum Noir Crystal Clear Sparkle pen.

When choosing design elements for a card, choose the elements in odd numbers. This is a basic design rule. The brain finds it more interesting, making it more attractive.

After prepping the small strip of vellum with an embossing buddy, which removes static from the vellum thereby preventing embossing powder from sticking where it is not wanted, I stamped the “smile” sentiment in versamark ink, covered it with white embossing powder, and heat set it. This is the attached to the card front with foam tape. The foam tape is placed behind the sentiment so it is hidden from showing through the vellum.

Enjoy your Build-A-Flower dies, have fun and make some amazing cards!

Aimee Pankau

All My Crazy Friends

To watch a video on how to make this card, click HERE

  • SUPPLIES:
    • Stamp Sets:
      • Altenew Whimsical Flowers
      • Altenew Everything About You
    • Inks:
      • Momento Tuxedo Black Ink
      • COPIC C3, R29, Y08
      • Black embossing powder
      • White embossing powder
      • Versamark Watermark Stamp Pad
    • Card Stock:
      • Neenah white card stock
      • Black card stock
      • Vellum
    • Other:
      • Rhinestone embellishments
      • Heat gun
      • Foam Tape

Hi all! It’s been a while. I am excited to announce that I’ve passed Altenew’s Level 2 Educator Certification Program. One more level and I’m officially an educator!! I’m so very excited, it has been a wonderful journey! Today’s card is the first card for Level 3. The reason it’s been a while is because life keeps getting in the way of my crafting…I know you all understand. My practice (I’m a Family Nurse Practitioner) was purchased by a large hospital organization in town. So we have gone from being a local small family practice clinic to being part of a large health care system. The learning curve has taken ALL MY TIME and, if I’m being honest, has been daunting. But I’m getting the hang of it, and I’m back to crafting…ahhhhhhhh, big sigh of relief!!!

OK, I hear you…back to the card… Have you heard of Zentangle? If you’ve been on Pinterest I’m sure you have. Zentangle is an American created drawing style. It was designed by a monk named Rick Roberts and an artist named Maria Thomas. Their goal was to design a drawing style that is a combination of meditation and art. I have wanted to learn Zentangle for a long time. Altenew has a course called Zentangle for Card Makers, taught by Amber Davis, which I decided to take as part of my Level 3 course work. This course is very inexpensive and so worth the time to watch. Amber does an amazing job teaching, and for those of you who love watercoloring, there is a section where she shows us her amazing watercoloring abilities.

The image on the left is the true Huggins Zentangle design. The one on the right is the panel I made for this card…we’ll get to that in a moment. Amber Davis introduced this alteration of Huggins during her “Zentangle for Card Makers” course. The alteration is somewhat more simple than the true Huggins, which is one of the reasons I chose it. Much of this post will be talking about creating this design.

The picture on the left is the design paper I used to create this Zentangle design. You will notice every other line is offset from the line above it. In drawing this Zentangle, I skipped every other line, which then creates the dot in the middle of the design (see the completed card at the top of the post). To make demonstrating the “tangle”, the picture on the right breaks down the design on a larger dot scale and without the offset dots.

Please refer to the above image on the right, numbers one and two. When starting this design, draw a line either inside or outside the dots. If you draw outside the dots, the line below needs to be outside the dots as well (see image 1). If you draw the line inside the dots, the next line below needs to be inside the dots (see image 2). To continue the design, alternate inside the dots, outside the dots (see image 5). Once you have all the horizontal lines drawn (see image 5), turn you page 45 degrees to complete the pattern. The idea here is to create a rectangle, not a square. So, If you are at a point where the lines are outside the dots, draw the two lines to complete the rectangle inside the dots (see image 3). And the opposite, if your lines are inside the dots, then the completion lines are outside the dots (see image 4).

To shadow, use your shadowing of choice. I used Copic C3. Draw the shadow line along the long edge of the rectangle.

To complete the card, I used Altenew’s Diamond Frame Cover Die to die cut the image out of black card stock. This was glued to the Zentangle design. The center diamond shape was also glued back into the die cut image. The “LOVE”, from the Everything About You, is embossed in white onto Vellum and attached to the card using foam tape. The “Your Crazy Side” is embossed in black onto Neenah white card stock and is attached to the card by putting a little foam tape under the word “Side” and glue under the rest so it lays evenly on the card.

The flower is from Altenew’s Whimsical Flowers. I just love these flowers! They are playful and have a lot of depth to them even without coloring. In Zentangle, there is a concept called “aura”. To “aura” is to “trace around the inside or outside of a tangle”. If you have seen Zentangle designs, you have seen “aura” used in the drawing. The idea is to use the aura lines to create depth and direction of the image. So, with this flower, it is to emphasize the curves in the flower. Once done, the flower center is colored in COPIC Y08. Again, foam tape and glue are used to attach the flower to the card. The whole panel is then attached to a Neenah white card base.

I hope you enjoyed todays card. I sure enjoyed creating it, and LOVE that I am back in my craft room. In the process, I have learned a new love – Zentangle.

Aimee Pankau

AECP Level 2 Exam and Design Challenge

Hello and welcome everyone. In this post I am sharing my work that represents my final exam for the Altenew Education Certification Program for Level 2. This has been an amazing journey…I have learned so much, both in the form of design as well as sharing what I have learned. This blog, for example, is a direct result of this program. I’m excited to share this final exam and I’m eager to see what Level 3 has in store. Of course, I will continue to share what I learn with all of you!

As you can imagine, this will not be a typical post. I will share 4 card designs, one “altered or upcycled project”, and to answer the additional challenge of creating a new technique: some fun textured balloons…you’ll just have to wait and see… The cards presented are all masculine cards, one each for Birthday, Love/Thinking of You, Anniversary, and Encouragement. There will be a video for each of the cards and lots of pictures. So sit back and enjoy…

Before I begin I’d like to share some design components I have learned in the program thus far. These are: monochromatic card design, Inlay die cutting, using color confidently, faux embossed die cutting, and masking.

  • Monochromatic color design: This design technique uses one color to create the design of the card. This can be done with any other technique such as shadowing/blending, different shades of that color, but the end product is designed with one color focus.
  • Inlay Die Cutting: Using a die to create a space on your card stock that you then fill back in with the either the original die cut pieces or newly cut pieces of different color to create a bold and beautiful design.
  • Color Confidence: understanding color combinations and placing appropriate amounts of color for the desired design. This takes into account all aspects of color design. A general rule for the amount of color used is 70% for the main color, 20% for the secondary color, and 10% for white space or a neutral color. This design guide (as I don’t really see it as a technique but rather an overall guide to follow whenever designing) will be shown on the masculine encouragement card later in the video.
  • Die cutting with a twist: Using die cutting to create a “faux embossed” background.
  • Masking: OK, I’m not using a lot of masking in this group of cards but it does make a cameo appearance on the masculine happy birthday card. This technique uses a mask, created from either post it notes, washi tape, or masking paper, to either hide part of a stamp you do not want to use or to create layers in your design.

I’d like to share some design tips before I show you the work:

  • Don’t be afraid to try new things. You don’t have to come up with a final card or project every time you work with your supplies. Use some time to create, play, work on something new, or perfecting something that has given you difficulty. This is how you grow as a creative person.
  • Follow what inspires you. What I enjoy and feel is inspiring may not be what you find inspiring. Wouldn’t it be a boring world if it was? So create, use your world for inspiration, and then share with others.
  • Don’t be shy about accepting insight from others. They may see wonderful things in your work that you don’t see. It can help you grow as a creative stamper.

OK…on to the “FUN” stuff…

The four cards on the left are the cards designed for this project. The picture on the right is the Upcycled project. So let me share the details…

Inlay card technique: Masculine “Love/Thinking of You” card

To Watch a video of this card, click HERE

  • SUPPLIES
    • Stamps:
      • Altenew Everything About You
    • Ink:
      • Black embossing powder
      • White embossing powder
      • Versamark Watermark Stamp Pad
    • Card Stock:
      • Neenah white card stock
      • Stampin’ Up! Merry Merlot card stock
      • Stampin’ Up! Gorgeous Grape card stock
      • Stampin’ Up! Evening Evergreen card stock
      • Stampin’ Up! River Rock card stock
      • Stampin’ Up! Misty Moonlight card stock
      • Stampin’ Up! Wisteria Wonder card stock
      • Basic black card stock
    • Other:
      • Black matte dots
      • Altenew Shattered Triangle Die
      • ruler
      • pencil
      • heat gun
      • Big Shot
      • foam tape

Starting with the layout for this card is important as there are a lot of parts that need to be able to fit. The picture on the left displays the layout of the dies over a grid drawn in pencil that will later be erased. This grid started by laying all parts on the card front, drawing the lines for both vertical and horizontal guidance, then using post it notes to hold down the dies while running it through the Big Shot embossing machine. The picture on the right shows all the dies cut out. The next step is to emboss the word “LOVE” from the “I LOVE” stamp set out of the Altenew “Everything About You” stamp set. Once this is embossed, the next step will be laying the pieces back into the negative spaces created by the dies.

Select the colors you want to use for the inlay sections.

Glue or use double sided tape to attach the “LOVE” card panel to a piece of 5 1/4″ x 4″ black card stock. Next, for the top two triangles, die cut them out of black as well as the seven colors of card stock chosen for this card and shown in the picture above. Glue the triangle frame-like piece die cut from the black card stock that will hold the colored pieces into place. Then, one by one, glue in the colored pieces.

Using the bottom left triangle dies, die cut out a black triangle, and one each of the two purple colors. To create the bottom two triangles and the black diamond:

  • Place the black triangle, cut using the larger triangle die, into the bottom triangle space. Place the top purple triangle over it and trace the outline of the point. Remove both triangles and cut along this traced line. This diamond shape will be used to fill the space as seen.
  • To create this space:
    • Place the lower purple triangle into its space. Place the upper purple triangle into its space. Again, trace the tip of the upper triangle onto the lower triangle.
    • Remove each triangle. Place the upper triangle into its space. Place the lower triangle into its space. Trace the tip of the lower triangle onto the upper triangle.
    • Now cut the traced lines from each triangle to create the space for the diamond black card stock.

Glue these three pieces into place.

Next, using a strip of black card stock, prep your black card stock with an embossing buddy to prevent excess embossing powder from sticking to your project, stamp the sentiment in Versamark ink, and apply black embossing powder, then heat set. Use foam tape to attach this to the card panel over the embossed LOVE sentiment. Glue black matte dots into place. Attach this card panel with foam tape to a white card base.

——————————————————–

Monochromatic coloring: Masculine Anniversary Card

To Watch a video of this card, click HERE

  • SUPPLIES
    • Stamp Sets:
      • Altenew Halftone Everything stamp set
      • Altenew Frosted Garden stamp set
    • Ink:
      • Black embossing powder
      • White embossing powder
      • COPIC alcohol marker B39
      • Stampin’ Up! Night of Navy ink pad
      • Spectrum Noir Crystal Clear Sparkle pen
      • Versamark Watermark stamp pad
      • Momento Black ink
    • Card stock:
      • Stampin’ Up! Night of Navy card stock
      • Neenah White card stock
      • Basic black card stock
      • Velum
    • Other:
      • Heat tool
      • stamp positioning tool, MISTI
      • foam tape

The image from the Altenew “Frosted Garden” stamp set is stamped in Night of Navy ink onto Night of Navy card stock. This image is stamped several times in a repeated pattern as you see above. Be sure to space the stamps so they appear to be able to follow this pattern on a larger scale. You will see the middle line (the full flower in the center of the page and the two small partial images on the side edges) are slightly slanted downward from left to right. The flowers at the top and bottom of the page also follow this slight slant. Be sure to stamp off the edges as well to give the illusion that the image was taken from a larger piece of patterned paper. Complete the background by coloring each of the flowers with a Spectrum Noir Crystal Clear Sparkle pen.

Once the background is complete, using a stamp positioning tool, stamp the “everything” stamp onto white card stock in an alcohol friendly black ink. I used Momento Black ink. Die cut the image, or in this case I used my Scan and Cut machine, and color it in with the COPIC marker B39. Then put the colored sentiment back into the MISTI placing it into the negative pace of the card stock it was cut out of so it is in the same place as when it was first stamped, prep it with an embossing buddy, re-stamp it with Versamark ink, apply black embossing powder and heat set. This image is attached with foam tape to the bottom right of the card. On a small piece of Night of Navy card stock, emboss the “I love” sentiment in white embossing powder, and on Velum card stock emboss “about you” in black embossing powder. Attach these with glue as shown above. Glue black matte dots as shown. Attach this panel to a piece of black card stock. Then, using foam tape, attach the whole panel to a white card base.

________________________________________

Die cutting with a twist: masculine Happy Birthday card

To watch a video of this card, click HERE

  • SUPPLIES
    • Stamp Sets:
      • Altenew Halftone Happy stamp set
      • Altenew Sentiment Strips 2 stamp set
    • Ink:
      • COPIC YR18, B21, B23, Y32, G14
      • Momento Black ink
      • Black embossing powder
      • Versamark Watermark stamp pad
    • Card Stock:
      • Neenah White card stock
      • Altenew Pale Gray card stock
      • Stampin’ Up! Sahara Sand card stock
      • Stampin’ Up! Seaside Spray card stock
      • Spectrum Noir Crystal Clear Sparkle pen
    • Other:
      • Altenew Moroccan Lattice Die
      • heat gun
      • rubber bands of variety of colors
      • thin twine
      • foam tape

The first part of building this card is to create the balloons. Part of the final exam was to come up with a new technique. Now, I have to put a disclaimer in here: I did not do an internet search to see if this has been done before…if you recognize it or you have done this before, please reach out to me. I’d love to hear from you…

To create the balloons use the B23, G14, and YR18 to color an area about 3″ x 3″ on a piece of white card stock. Pinch the rubber band near the end, tie a piece of light weight twine at the pinch, cut the small loop created by tying this twine. Then use a small paint brush to apply glue to the back edge of the rubber band. Place the glue side of the rubber band on the respective color patches and hold in a balloon shape until dry enough to let stand. Please see the video to view how the balloons are made. Once dry, the excess colored card stock will be carefully trimmed away.

The next step in building this card is to create the background. Using the Altenew “Moroccan Lattice Cover Die”, cut the die out of white card stock. Use washi tape to attach this to a piece of white card stock of the same size. Cut die pieces out of Altenew Pale Gray card stock and Stampin’ Up! Seaside Spray and Sahara Sand card stock. Randomly place these in spaces created by the die cut. A word of caution: apply just a small amount of glue in the center of each space. You will need to be able to remove the die cut panel seen in the image on the left. Use caution to not inadvertently glue it to the card panel beneath it. Once the desired pattern is created with the three colored pieces, use the white pieces created when the first die cut panel was made to fill in the remaining spots. Once the open areas are filled, remove the die cut panel. Cut this down to 3 3/4″ x 5″. Attach to a piece of Altenew Pale Gray card stock cut to 5 1/4″ x 4″.

Stamp the “happy” from the Altenew “Halftone Happy” stamp set in an alcohol marker friendly ink. I used Momento Black. I then cut the “happy” out with my Scan and Cut machine. This stamp set also has an available die for you to use. Color the “happy” with COPIC markers B21 and B23. Attach to created card panel with foam tape. See below.

OK…here’s where the cameo appearance for the masking technique is found…The sentiment “You make me smile” comes from a longer sentiment, “Thoughts of you make me smile” from Altenew “Sentiment Strips 2” stamp set. Stamp the whole sentiment, then apply washi tape or a post it note over the “thoughts of” part of the sentiment, being sure the washi tape or post it note is wide enough to attach to the stamp block so it does not fall off. Stamp the remaining sentiment onto a strip of white card stock. Attach that sentiment strip to a strip of Altenew Pale Gray card stock as seen in the photos. Emboss “birthday” with black embossing powder onto a small strip of Velum card stock. Be sure to prep the Velum with an embossing buddy to avoid static attached embossing powder from ruining your image. Glue this to the legs of the “p’s” and the leg of the “y” of the “happy”.

Cut out the balloons with care and attach them to the top of the created card panel. The orange balloon is attached with glue, The blue and green balloons are attached with foam tape. The strings will hang freely down the left side of the card. Attach the “you make me smile” sentiment strip with foam tape. Put foam tape only on each end of the back of this strip so the balloon strings can hang freely behind this strip.

___________________________________

Color Confidence: Masculine Encouragement card

To watch a video of this card, click HERE

  • SUPPLIES:
    • Stamp Set:
      • Altenew Fancy Greetings stamp set
    • Ink:
      • Black embossing powder
      • Versamark Watermark Stamp pad
      • Altenew inks: Dusk, Desert Night, Ocean Waves, Sea Glass, Hunter Green Just Green
    • Card stock:
      • X-press It Blending Card stock
      • Black card stock
      • Strip of design paper
    • Other:
      • heat gun
      • foam tape
      • bling

As the details of creating this card are extensive, I recommend watching the video.

The inspiration for this card comes from the Bargello style patterns for quilting. I have always loved this look on a quilt. Knowing this love for Bargello designed quilts, my dad made the quilt on the left as my Master’s Program graduation gift. Needless to say, it is cherished!

I started with a piece of the “X-press It” blending card stock and, starting along the long edge, blending the above pattern with these inks: in order, Desert Night, Just Green, Desert Night, Dusk, Ocean Waves then Sea Glass. See the video for blending tips to create this panel.

Once the blending is done, cut the panel at 5 1/2″ and trim the non-inked card stock off the panels. You will end up with two panels as in the left picture. Then, using a piece of office copy paper (this is done to cut down on the bulk and weight of the finished card), glue the pieces of the panel along with a 1 1/2″ strip of chosen design paper and a 1/8″ strip of black card stock to create the panel on the right. It’s hard to see, but the 1/8″ strip of black card stock sits just below the designer paper.

Now, I haven’t lost my mind, at least not yet… :). Cut the panel from the above right picture into 1/8″ strips, cutting along the long edge.

On another piece of office copy paper, again to keep the bulk of the final card down, start placing the strips on the paper. The first step is to decide on a pattern. This card is an encouragement card so I wanted to create a check mark, symbolizing “check, yes, you can do anything!”. Once you have a pattern, choose a part of the strip as your pattern guide. I followed the strip of black card stock (look at the bottom of the check mark to see the small black squares that served as my guide). Lay the strips tightly to each other but not over-laying each other. Move along the pattern until you have a pattern about 4 inches wide. Once this is done, I cut the panel down to a 3 3/4″ x 5″ panel that you see on the final card. You can see it again below.

The remainder of the card goes quickly. Prep a piece of Velum card stock with an embossing buddy then stamp the “you can do anything” sentiment onto the velum in Versamark Watermark ink. Apply black embossing powder and heat set. Fussy cut the sentiment out with a narrow edge, apply to card panel with foam tape. Apply bling as shown.

___________________________________

The last part of this challenge was to create an Upcycled an item. This upcycle project started with the lids of my hairspray cans. They become the purple bottoms seen above. The end product, as you see, are place settings for a birthday party table.

  • SUPPLIES:
    • Stamp Set:
      • Altenew Balloon Bunch stamp set
    • Ink:
      • COPIC V17
      • Black Embossing Powder
      • Stampin’ Up! Highling Heather, Daffodil Delight, Bermuda Bay ink pads
      • Altenew Deep Iris ink
    • Card Stock:
      • Neenah white card stock
    • Other:
      • Mosaic Glass Gems
      • Name place holders – I found some wedding name place holders in the sale isle at Michaels for a little over $1.00 each. I cut the bottoms off to shorten them for the project.
      • Lollipop Sticks
      • Gorilla Epoxy drys clear
      • Styrofoam 1″ thick

Cut two pieces of 1″ thick styrofoam and place them in the bottom of the hairspray cap. Color two lollipop sticks with Altenew Deep Iris ink.

Cut the sticks down to desired length and place them into the styrofoam. I used some glue to secure them in place.

Emboss in black embossing powder the “birthday” sentiment onto a strip of white card stock. Color the die cut “happy” from Altenew “Halftone Happy” stamp set in COPIC V17. Glue these pieces together, then glue to the top of the sticks. Put the name card holder in the front of the cap.

Fill the remaining space in the lid with decorative glass beeds from Michael’s. I got these from the sale shelf for $1.50/bag. Fill the lid with clear drying epoxy to solidify the place setting.

Stamp and fussy cut 3 balloons using the Altenew “Balloon Bunch” stamp set. Glue white string to the back, glue the balloons together in a bunch as shown, then glue to the back of the “h” on the “happy”.

I took about 15 minutes to build each of these. They are so perfect for any party table. Make name plates, place them into the name holders, and celebrate!!

___________________________

I hope you enjoyed viewing these projects as much as I did making them. Thanks for hanging with me to the end.

Have a great day…

Aimee Pankau

Colorful Birthday Greetings

To watch a video of this card, click HERE

  • SUPPLIES:
    • Stamp Sets:
      • Altenew Balloon Bunch and Dies
      • Altenew Super Script and Dies
    • Inks:
      • Altenew Warm Sunshine
      • Altenew Sea Glass
      • Altenew Pinkalicious
      • Altenew Dusk
      • Altenew Pink Diamond
      • Altenew Permanent Black
      • Spectrum Noir Crystal Clear Sparkle pen
    • Card Stock:
      • Basic Black
      • Neenah White
    • Other Supplies:
      • Foam tape
      • Glue
      • Rhinestones

Notice the “happy birthday” sentiments are stamped in several colors. This is a relatively simple pattern to create. Using a ruler and pencil, at the top left corner of the 5 1/8″ x 3 7/8″ card stock, draw a line on an angle similar to the angle seen here. Then measuring 1/2 inch down, draw another line. Continue this until the entire card panel is covered with lines every half inch. Starting at the top of the card panel, stamp “happy birthday” spaced evenly and using each of the 5 ink colors, repeating the process until the whole card front is covered. The order I used was: Warm Sunshine, Sea Glass, Pinkalicious, Dusk, and Pink Diamond. A few things to remember when stamping a background: stamp off the edges so the final product gives the appearance that it was cut from a larger piece of designed paper and keep your stamping spaced evenly. If you notice your colors start to group (by this I mean line after line the same colors are on top of each other), then either eliminate one color or bring in another color so this does not happen. And lastly, stamp so the words are staggered from line to line. You don’t want the “happy birthdays” stamped directly on top of each other. Once the ink is completely dry, erase the pencil lines.

The balloons are stamped using Altenew Pinkalicious Crisp Dye ink. I used this color for both the shadowing and main balloon which looked nice until I added the Spectrum Noir Crystal Clear sparkle ink. This blended the color too much and the shadow detail was lost. I felt it still looked good so I did not remake them, In the future I would use one shade darker for the shadowing layer of this stamp. The balloon strings are a polymer stamp so they can be shaped any way you want. I stamped them in Altenew Permanent Black. The stamped balloons were die cut. I also die cut the black shadow balloons. These black balloons were glued to the back of the stamped balloons. The left and right balloons are glued to the card panel. The middle balloon is popped up using foam tape.

The “celebrate” sentiment from the Altenew Super Scripts stamp set is stamped in Altenew Pinkalicious and cut out using the matching dies from Super Script. I also die cut a black “celebrate” to use as shadowing. The stamped “celebrate” is attached to the black “celebrate” with foam tape, which is then glued to the card panel.

Next, I added rhinestones, glued the colored panel to a piece of 5 1/4″ x 4″ black card stock. This panel was then popped up with foam tape and attached to the card panel.

Using several complimentary colors is a great way to create your own background paper. Choosing which colors to use can be done ‘by eye’, which is what I did. If you are new to color matching, using a color wheel will take away any guessing in color choice. I hope you enjoyed todays card. Thank you for visiting…

Aimee Pankau

Happy Masking Technique

To Watch a Video of this card, press HERE

  • SUPPLIES
    • Stamp Sets:
      • Altenew Bells and Bows Stamp Set
      • Altenew Halftone Happy Stamp Set
      • Altenew Birthday Builder Stamp Set
    • Ink:
      • Altenew Permanent Black Stamp Set
      • Altenew Glacier Caves ink family: Arctic, Caribbean Sky, Persian Blue, Sapphire
      • Altenew Sweet Dreams ink family: Dew Drops, Aqualicious, Teal Cave, Galactic Stream
      • Altenew Rose Petal ink family: Rose Quartz, Puffy Heart, Purple Wine, Cosmic Berry
      • Altenew Enchanted Garden: Wisteria, Hydrangea, Ultraviolet, Andromeda
      • Copic marker Y18
      • Spectrum Noir Sparkle Crystal Clear
      • All Purpose For Fantast/x Champagne Mist
      • Versamark Watermark Ink
    • Card Stock:
      • Neenah White Card Stock
      • Basic Black Card stock
    • Other:
      • Rhinstones
      • Isopropyl Alcohol 70%
      • Heat Gun
      • Altenew Masking Paper
      • Spritzer Pen

This Happy Birthday card is created using a technique called masking. You may do this already and not even be aware of it. Basically, it involves covering a stamped image so you can stamp another image that will appear to be behind that previously stamped image. It allows you to create 3-D images and layers without adding bulk to your card. As I talk through building this card I will share several techniques which will help you use masking with success.

The image above is a guide for color and the stamping order to help create the final image. The first image stamped will be the image that appears to be closest to the front. So in this case, the lower pink bow will be the first stamped. Once the pink bow is stamped, a mask, or “cover”, is placed over it so the blue and purple bows along the lower edge of the card panel can be stamped. Because a mask is placed over pink bow, no ink is stamped over this bow. This creates an illusion that the blue and purple bow sit behind the pink bow, thus creating depth and layers.

To create a mask you can use any thin paper-like option. Included are post-it notes, regular copy paper, or masking paper created for this purpose. With this card I used Altenew Masking Paper. This paper comes in 2 layers. The masking layer is peeled off the base layer, which is made from a non-porous shiny paper. You can reuse masks. You can replace the mask after use to this non-porous shiny paper for storage. In this case, I did not separate the two layers from each other as I needed the non-absorptive, non-porous layer to keep ink from bleeding through to the underlying image. Generally, when masking, you will stamp over the mask once, perhaps twice. With this card, there are 4 stamping layers to create each bow. I used a MISTY stamp positioning tool. Some layers needed repeat inking and stamping to get good ink coverage. Prior to deciding to use both layers of the Altenew Masking Paper, I had several failed attempts in making this care as ink soaked through the mask onto the masked stamped image. So play with the stamping you need to do to determine what to use for masking.

A “mask” is made by stamping the image onto the paper you decide to use as your mask, then fussy cutting out the image. When fussy cutting the image, cut just inside the stamped image line to make the mask slightly smaller than the image. This is done because a mask creates bulk. This bulk interferes with the next stamped image coming in contact with the card stock right up against the inked and masked image. (see video – above). As you ink each bow, apply a mask so the next bow can be stamped.

The glitter on the card panel is created using 70% Isopropyl Alcohol and “All-Purpose For fantast/x Champagne Mist paint”. Four to five drops of the Champagne Mist paint are placed in a spritzer pen, then 70% Isopropyl Alcohol is added to fill the spritzer pen about half full. Shake well and spritz the entire card panel. Allow to dry. The card panel will curl when spritzed. As the spritzed alcohol dries, the card panel will lie flat again. This takes 2-3 minutes.

The “happy” is stamped using Altenew Permanent Black ink then colored in using Copic Y18 alcohol marker. I then cut it out using my “Scan and Cut” machine. It is then attached to the card panel using foam tape. The black heat-embossed “birthday” on vellum is the glued to the two “p’s” and the “y” of the “happy”. Then rhinestone embellishments are glued to the card panel. This card panel is glued to a piece of black card stock which is then glued to the card base.

Thanks for joining me today. I hope this inspires you to use masking on your cards to create depth to your images giving the appearance of 3-D and layers without adding bulk.

Aimee Pankau

Magical Birthday

To watch a video of this card, please click HERE

  • SUPPLIES
    • Stamp Sets:
      • Altenew Celebrations
      • Altenew Birthday Builder
    • Inks:
      • Copic: Y11, Y13, Y15, Y19, RV11, RV14, BG11, BG15, BG18, E34, E37, E39
      • Altenew Permanent Black
      • Micron 02 Archival Ink pen
      • Spectrum Noir Sparkle Crystal Clear pen
    • Paper:
      • Basic Black card stock
      • Neenah white card stock
    • Other Items:
      • Rhinestone embellishments
      • Foam tape
      • Brayer roller
      • Isopropyl Alcohol, 70%
      • Craft mat or other non-porous work surface
      • Quilter’s Plastic Template with Grid
      • MISTI stamp positioning tool.

Today I have the pleasure of sharing one of my favorite card design techniques. And it’s so simple but creates a wonderful framing for your stamped images. The focus to today’s card is to show you ways to use alcohol markers and inks “outside the box”. Yes, we color with alcohol markers, but we can also spatter or spread with tools such as a brayer. The possibilities are truly endless. I will share today the two techniques I just mentioned: spatter and a brayer.

I am going to digress here a little…when typing this post my husband and I got into the discussion of spatter vs splatter. I’m thrilled to say “I won” 🙂 Spatter is what we put on a card, splatter are large blobs of mess – like ketchup squirting on the counter top. Just thought I’d share my victory…

OK…back to the card.

To create the background panel of this card I used Copic RV14 to color an area of ink on a non-porous surface. I use an 8 1/2″ x 11″ piece of thick plastic. A crafters mat works great for this. I then spritz this area with 70% Isopropyl Alcohol and rolled a brayer in the ink. Then the brayer is then rolled over the card stock to spread the ink. For this card I repeated this step 3-4 times to get the coloring I wanted. I then used some Copic RV14 ink refill put into a water color tray. I also put some 70% Isopropyl Alcohol in the water color tray. I used a Tim Holtz spatter brush, dipped into the Isopropyl Alcohol then dipped into the RV14 re-inker and spattered onto the card panel until I was happy with the effect. The Tim Holtz spatter brush is new to me. I highly recommend it. The bristles are made from a stiff plastic and work very well. It will wash well and stand up to repeated use for years of spattering. (never thought I’d say that!!). Anyway, you can also use a toothbrush or paintbrush.

This is the top panel and is the next part of the project. Here is where I share what has become one of my favorite card design steps. You will need a positioning tool. Use a 3″ x 4″ piece of Neenah white card stock and trace it on a background piece of paper placed in the positioning tool. Take this paper out of the positioning tool and, using a corner ruler cut from quilters gridded template plastic, draw a line 3 blocks inside the traced 3″ x 4″ image. Put this paper back in the positioning tool and place your stamps so they will stamp over this line. (see the video for a demonstration of this). Ink the images with an alcohol marker friendly ink. In this case I used Altenew Permanent Black ink. Stamp the images on your 3″ x 4″ Neenah white card stock. Using the corner ruler made from the quilters gridded template plastic, draw a line with the 02 Archival Ink black marker 3 blocks from each edge of the card panel, skipping anywhere there is a stamped image (again, I recommend watching the video for this step). Next, using your alcohol markers, color your image. Using a low tack tape, mask off outside your drawn frame around the images. Again using the RV14 re-inker and Isopropyl Alcohol 70%, spatter desired amount of ink to the panel. Carefully remove the low tack tape, add embellishments and attach to first card panel with foam tape. Put foam tape on the back of the first panel and attach to the card base. I then colored the heart with a glitter pen.

Thanks for visiting today. I hope this inspires you to use your alcohol inks “outside the box”.

Aimee Pankau