Just Breathe…

Products used:

Altenew “Floral In ‘n’ Out Border Die”; Altenew “Bad Days Happen” stamp set; Altenew “Pattern Play Diamond Stamp” stamp set; white card stock; Stampin’Up! Night of Navy card stock and ink; Stampin’Up! card stock: Old Olive, Flirty Flamingo, Sweet Sugar Plum, Pink Pirouette, Rose Red; foam tape; pearl embellishments; Versamark Watermark Clear ink; white embossing powder; heat gun; transfer adhesive sheet.

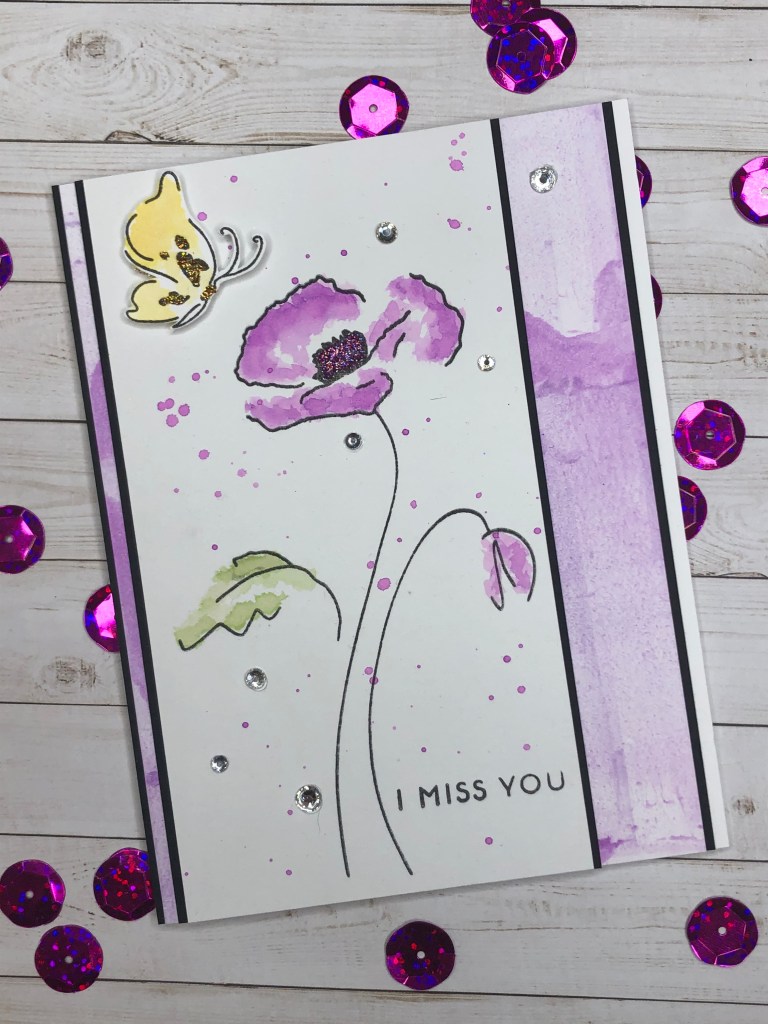
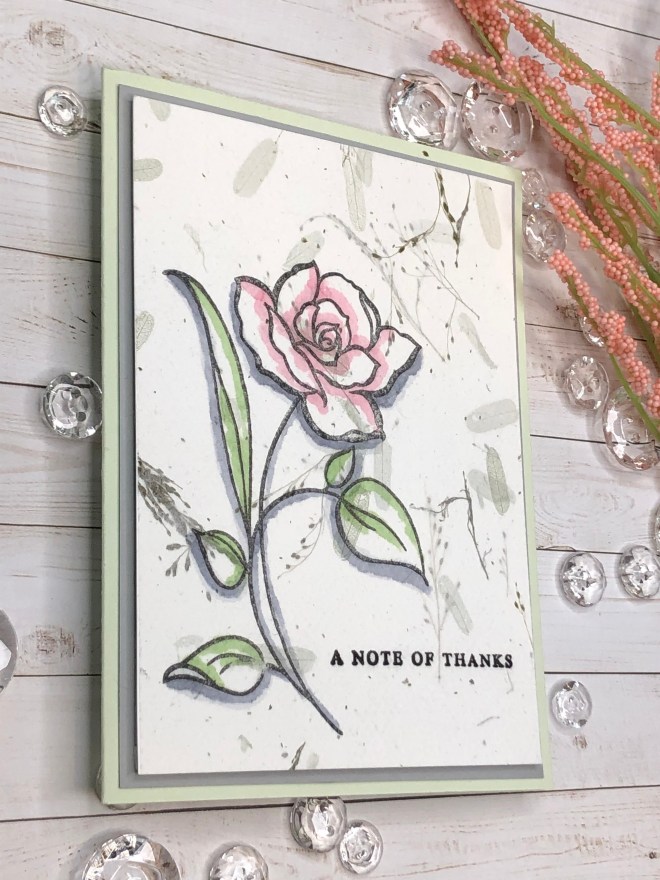
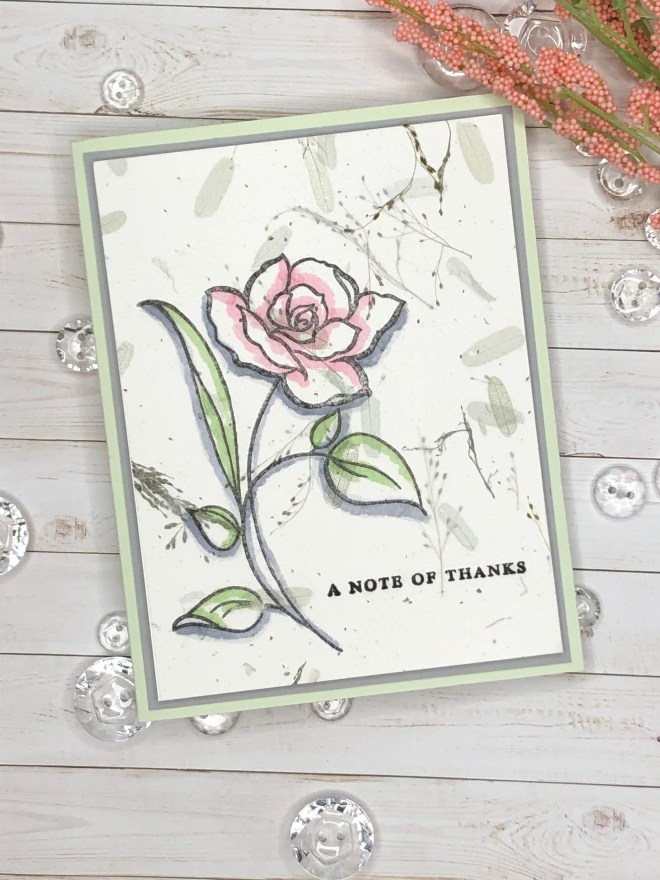
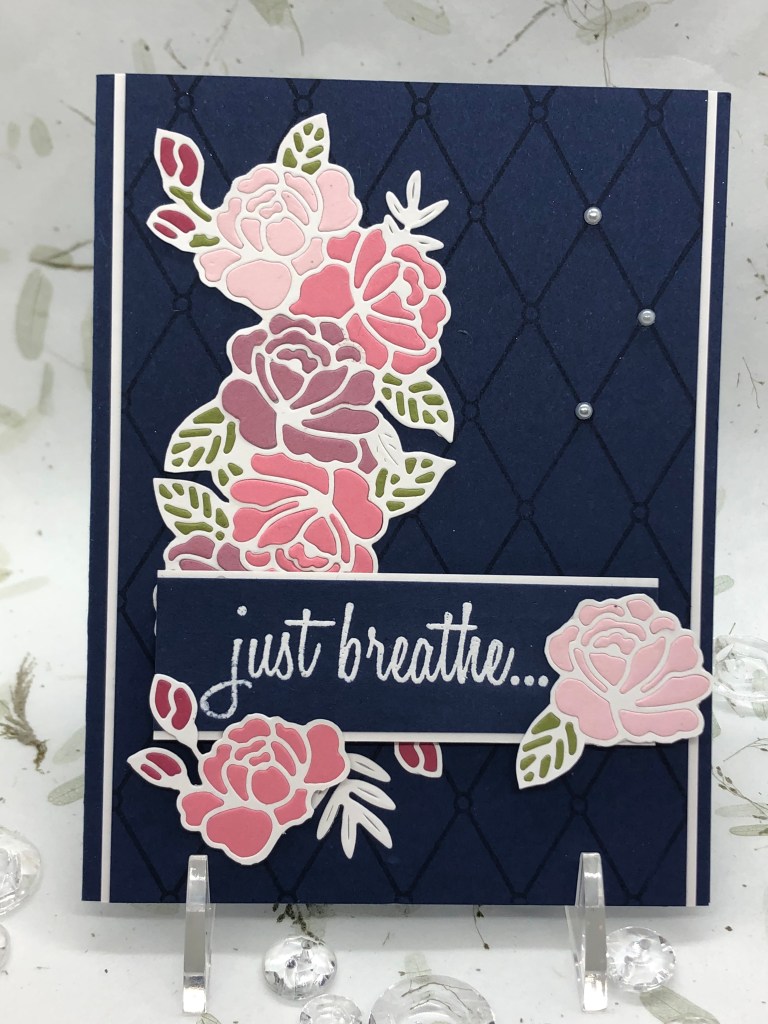
Today’s post is inspired by the challenge to use dies in creative ways. To meet this challenge, I decided to fill the “negative” of the die with colored card stock. The following pictures show the die cut I started with and a close up of the final piece. The Altenew “Floral In ‘n’ Out Border Die”, left, and the original die cut, right, are displayed in the picture on the left. The picture on the right shows the “negative” spaces that were then filled with colored card stock pieces.

When I started the project I though I would use it as a border die as shown. After I filled the negative spaces I decided to fussy cut it out. I also cut 2 of the roses out of the die image to add to the card sentiment strip. Can you pick out the rose displayed in the die?

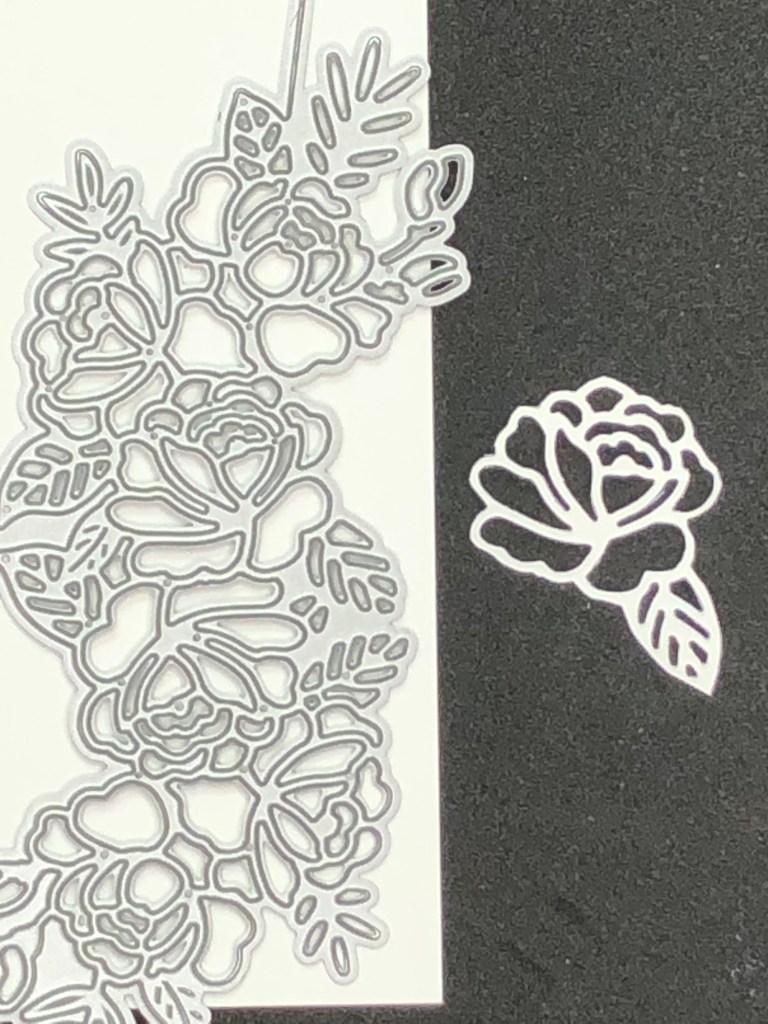
If you love puzzles and detail work, this is the project for you. There are some very small pieces of this die that were transferred to the final project. To accomplish this, I fussy cut a piece of double sided transfer adhesive sheet and attached it to the back of the die image. As I transferred each piece of card stock to the final product the adhesive sheet held it in place. To give you the sense of the process, I die cut the whole image in the Stampin’Up! Old Olive, then one small piece at a time, removed it from the die cut image and placed it in place on the card image. Eventually, each color is die cut and transferred to it’s place on the image.

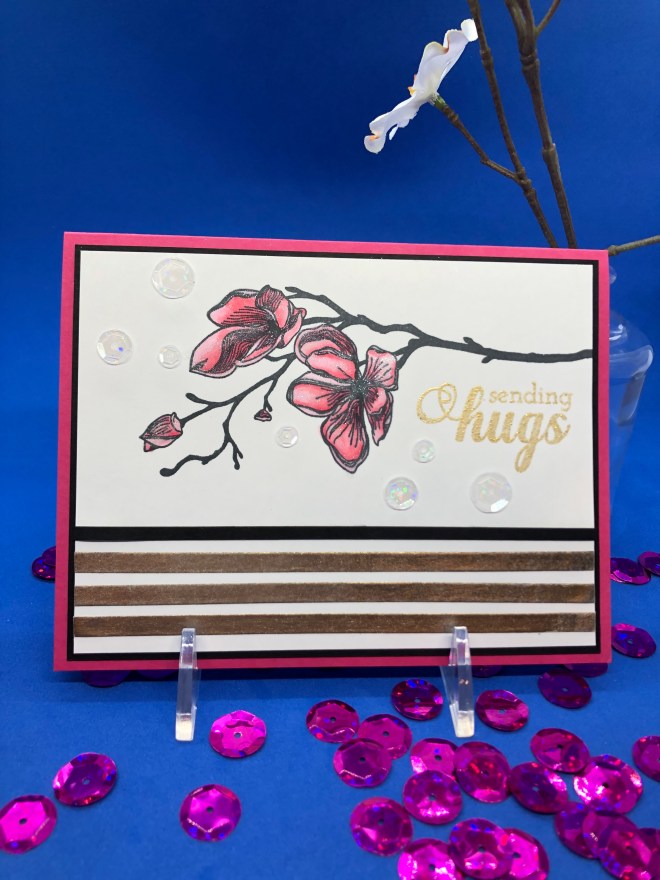
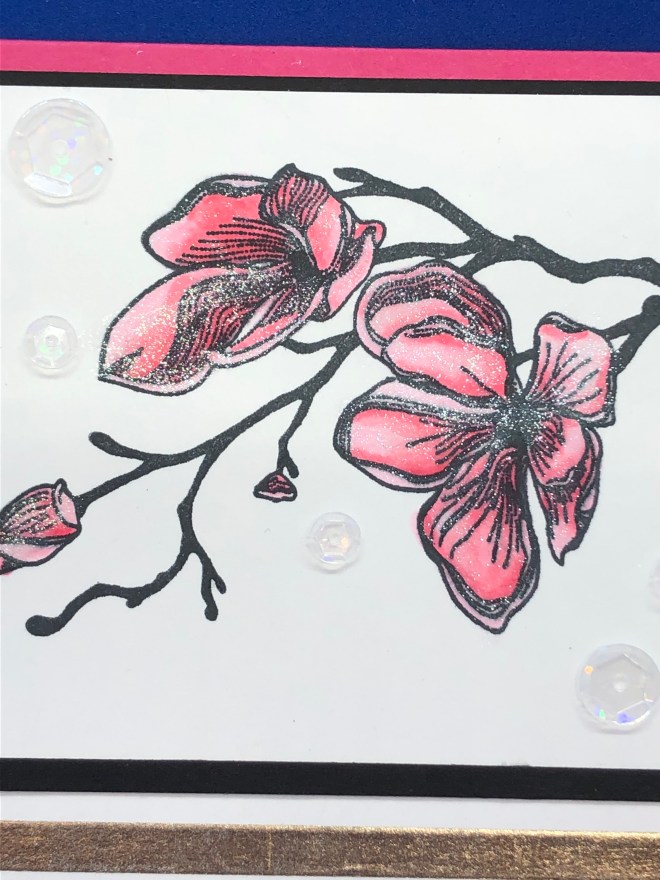
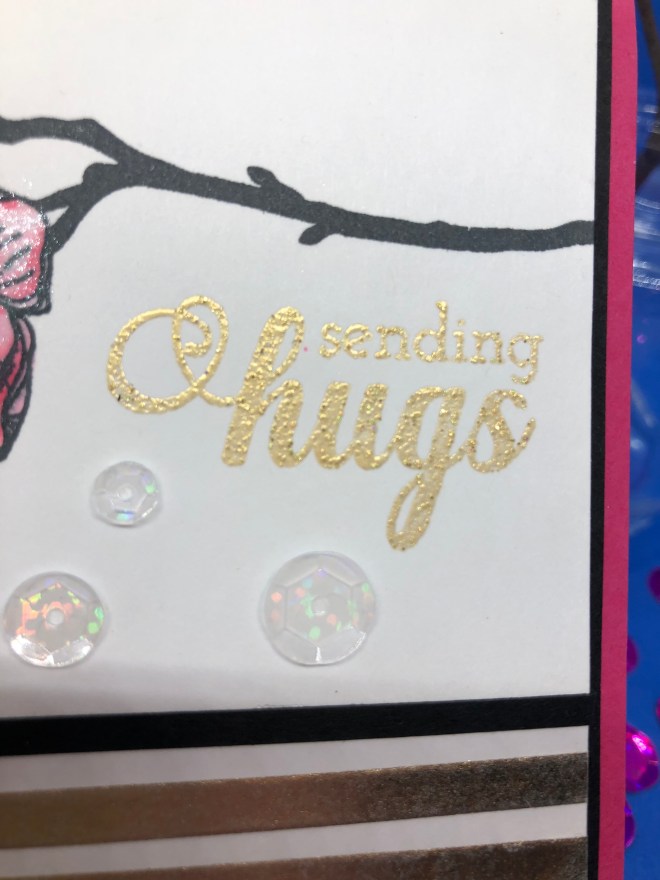
I stamped the Stampin’Up! Night of Navy card stock with the Altenew “Pattern Play Diamond Stamp” stamp in Night of Nave ink to make the background for the card. I then adhered the die image to the card front by removing the backing of the adhesive sheet. The “Just Breathe…” image is embossed in white on a piece of the Night of Navy card stock and the 2 separate die and fussy cut roses are attached. The “Just Breathe…” sentiment and individual roses are raised with foam tape. Three pearl embellishments were attached in the right upper corner to complete the image. It is then attached to white card stock and the Night of Navy card base.

When selecting the sentiment for the card, “Just Breathe…” seemed to be the only sentiment that I could use…to be sure, when the card was done, I was saying “just breathe” to myself…lol. Actually, a project like this is exactly how I would choose to spend an afternoon…details, fussy cutting…bring it on… Please enjoy the card – I hope it inspires you to use your dies in unique ways.

Aimee

Missing You

Products used:

Altenew Painted Poppy stamp set; Altenew Painted Butterflies stamp set; White card stock, Black card stock; Canson XL Recycled Bristol watercolor paper. Altenew Permanent Black Crisp Ink; Altenew Honey Drizzle Crisp Ink; Altenew Midnight Violet Crisp Ink; Altenew Frayed Leaf Crisp Ink; aqua-painter brush; water spritzer; glue; Nuvo Pure Sheen Gold Glitter; Nuvo Pure Sheen Hot Pink Glitter; rhinestone jewels; foam tape.

Todays post was inspired by the challenge to use our ink pads in ways beyond classic stamping. Included in the techniques are spreading ink with a brayer, using an aqua-painter to water color or spatter, and inking on the edge of paper. I have to be honest, even though I have known about these techniques for years, I don’t tend to reach for them when designing. After designing todays card, I can’t understand why I haven’t used these techniques more. I especially like the brayer technique. It makes such an interesting background for the card.

To do this technique, stamp your ink pad on a water proof surface such as a craft sheet or large acrylic block. Spritz the ink with water. There is no rule to how much water, it depends on the look you are going for. Roll the brayer through the watered down ink then roll the brayer on a piece of white card stock. Allow to dry.

Using Altenew Midnight Violet Crisp Ink, I watercolored the flowers and spattered the card front. These images are stamped on The Canson Bristol watercolor. This watercolor paper is very nice. It has a smooth surface which looks more like flat card stock than watercolor paper. It is also somewhat thinner than a lot of watercolor paper which makes it easier to use.

I hope enjoy the card as much as I enjoyed dusting off these tried and true techniques. I challenge you to play with these techniques and see what you create.

Aimee

Cherry Blossoms and Hugs

Supplies Used:

Altenew Dotted Blooms stamp set; Altenew Fancy Greetings stamp set; Altenew Golden Edge 5mm washi tape; Hammer Mill white 100lb color copy; Spectrum Noir Crystal Clear glitter pen; Versamark Watermark Clear Ink; Gold embossing powder; Stampin’Up! Melon Mambo card stock; Stampin’Up! Basic Black card stock; clear sequins 5mm, 8mm, 10mm; Copic markers RV10, RV11, RV13, RV14; heat gun.

Today’s project is about sparkle and shine. I love cherry blossoms. As soon as I saw the Altenew Dotted Blooms stamp set I knew I would love to create with it. I colored the blossoms with Copic Markers then applied the Spectrum Noir glitter to make them sparkle. They are spectacular in person. I then embossed the sentiment in gold embossing powder. This helps to pull in the Golden Edge Washi Tape into the image. The sequins help fill some of the white space without overwhelming the focus of the cherry blossoms.

I hope this inspires you to get out your glitter, embossing powder and glitter pens and see what kind of beautiful you come up with.

Aimee Pankau

Love and Crossroads

Supplies:

Altenew stamp set “Inked Bud”; Altenew stamp set “Best Mom”; Altenew Linear Crossroads Die; Versamark Watermark Clear Ink; Altenew Honey Drizzle Crisp Dye Ink; Momento Black Ink; Misti stamp positioning tool; Copic markers: V12, V15, V17, V99, YG03, YG17, YG67; 5mm clear sequins; foam tape; black card stock; X-press It Blending Card White card stock; Stampin’Up! Daffodil Delight card stock.; black embossing powder.

The card today has a focus on blending ink. I wanted to do an “Ombre” of Altenew Honey Drizzle Crisp Dye Ink from bold to white. While thinking about the card design (laying awake unable to sleep – such an issue when I’m trying to design) this “yin Yang” idea came to me and I was thrilled with the results. I have struggled to blend inks in the past, always struggling with lines and the appearance of uneven color. The key, I learned, is a light hand. Start with a light hand and add color as needed. This gives it the creamy smooth coloring cover you are looking for. I added the Linear Crossroads Die cut in black for balance and interest. I just purchased this die and I LOVE IT! I can see using it over and over. The flower is stamped with Momento Black Ink using my Misti, I then colored it with Copic Markers, then re-stamped it with Versamark Watermark and embossed with black embossing powder. If you are coloring anything with alcohol markers and you want the image embossed, stamp it first with a black, alcohol-marker compatible ink using a stamp positioning tool like the Misti, color the image, then emboss it. If you emboss it first, the alcohol markers will pick up the color from the embossing and spread that color into your project.

I hope you learned a couple new tips today. Try blending with a light hand and see how much more easily the color spreads.

Thanks for visiting! See you next time.

Aimee

Guys Need Love Too

Products:

Altenew Dots and Boxes stamp set; Altenew Dancing in the Rain stamp set; Hammermill 100lb white card stock; Stampin’Up! Blueberry Bushel card stock; Black card stock; Copic B32, B34, B97, 0; foam tape; Momento Black ink; Stampin’Up! Bashful Blue ink; Versamark Watermark Clear Ink; Black Emobssing powder; heat gun.

Todays card, as you may have guessed, is about the men in our lives. After all, they need love too. I thought I was truly in trouble when I set out to do a masculine card with the Altenew stamps I own. This card proves that even “feminine” stamps sets can be used for our guys. Now, Altenew’s Dancing in the Rain stamp set has the perfect saying to turn this card into a masculine card. I think in a lot of cases, when designing a card for a man, it’s all about color and what you focus on. I have to share this personal note: My husband has heard me beg for 22+ years to dance…he will dance with me in the house but not in front of others. When I showed him this card he just smiled…is there hope?

Here are the details of making this card. I used Versamark and black embossing powder to make the Altenew Dots and Boxes stamp stand out. I love black, can you tell by my previous cards? Black is wonderful on a masculine card. I then colored the umbrella from the Dancing in the Rain set with Copic Markers. I find umbrella’s a challenge to color. I feel this turned out well.

The rain and the people are stamped in Stampin’Up! Bashful Blue ink. The sentiment is stamped in Momento Black in. The remaining of assembly is pretty straight forward. I used foam tape to attach the couple, sentiment and umbrella to the card front.

I hope you enjoy this card. I also hope it inspires you to make cards for the men in your life. Please visit again…

Aimee

Clean and Simple Boutique

Today’s post presents two cards using the Clean and Simple Boutique style stamping and layout. The basic idea is to create a clean, simple card while capturing a certain elegance seen in Boutique cards. Each card uses a different technique from this style of stamping. There are many other techniques including doodling, spatters of ink on the background, embossing with either heat set powders or indentations into the paper, to name a few. These techniques are wonderful to create beautiful cards without a lot of layering or extensive time. I hope you agree that to receive either of these cards from someone would be special.

“A Note Of Thanks” is created stamping an image over a background paper. In this case I used a sheet of Artist Patterned Paper. You can find large sheets of Artist paper at many art stores. This one I found at Guiry’s Art Supply Store. Once the Artist paper is attached to a piece of white card stock using transfer adhesive sheets, the image is stamped and just a little color is used to bring out the flower and leaves. I also shaded the image making it come off the page. The sentiment is stamped directly onto the Artist paper as well. The image is popped up using foam tape and is attached to a grey border then directly to the card base.

“Thanks a Bunch” uses one stamped image repeated and placed in a pattern until the background is fully stamped creating what appears to be designer paper. The challenge here is following a pattern. This image was colored with Copic markers. This was then spritzed with a mix of rubbing alcohol and Champagne Mist ink. The top right picture, taken a with a little less light, shows the shimmer effect created. The thanks a Bunch sentiment was popped up with foam tape.

Productes Used:

A Note of Thanks: Altenew Many Thanks stamp set; Altenew Amazing You stamp set; Artist Patterned Paper; Altenew Permanent Black Crisp Ink; Copic markers C3, YG03, R81; foam tape; transfer adhesive sheets; Stampin’ Up! Soft Sea Foam card stock; Stampin’ Up! Smoky Slate card stock; white card stock.

Thanks A Bunch: Altenew Amazing You stamp set; Altenew Label Love stamp set; White X-Press It Blending card stock; Altenew Permanent Black Crisp Ink; Copic Markers YG03, YG17, YG67, Y15, Y17, Y38; All Purpose Ink #74 Champagne Mist; Rubbing Alcohol; foam tape.

Thanks for visiting. I hope this has inspired you to try something new!

Aimee Pankau

Airbrushed Love

Supplies Used:

Altenew “Airbrushed Flowers” stamp set; Altenew “Sentiment Strips 2” stamp set; Altenew “Stunning Cosmos” stamp set; Altenew Permanent Black Crisp Ink; Altenew Frayed Leaf Crisp Ink; Altenew Razzleberry Crisp Ink; Black card stock; whisper white card stock; Stampin’ Up! Gold Foil Sheet; foam tape; glue; rhinestones; Tattered Angels Glimmer Mist in Aspen Yellow.

I am thrilled to hear feedback on this card as it is definitely a step out of my comfort zone. When designing a card I often start with the stamp set I want to use and allow that stamp set to help shape the card: to be my design focus. It’s hard to explain, but for me, while I design, often the stamp set is designing for me…it dictates the best layout. Does anyone feel this way? This time I wanted a black card. The black card stock became my design focus. I used several different stamp sets attempting to find the one that worked. The black card stock kept rejecting what I was doing. When I started playing with the flower from “Airbrushed Flowers” I knew I had found the perfect stamp. This flower has enough white space to stand on it’s own against such a bold background. I think it works beautifully. I learned that when I choose to be bold, the whole card needs to be bold. This stamp is bold enough to match with the black background. I hope you enjoy this card and become inspired by it. Please read further for details to build this card. If you are just enjoying the card, please send feedback and come back often.

This is another slim line card. The black card base is 7″ x 7″, then scored at 3.5″. The top layers of the card are: Black cardstock 7″ x 3″; Gold foil sheet 7″ x 3 1/8″. The sentiment is stamped on white card stock of 1 2/8″ x 3/8″. Each layer under the sentiment gets larger by 1/8″: so the black card stock is 1 3/8″ x 1/2″; Foil is 1 1/2″ x 5/8″. The two flowers are stamped with Aletnew Razzelberry Crisp ink on white card stock. They are then fussy cut. I used a stem from Altenew Stunning Cosmos stamped in Frayed Leaf Crisp Ink. You will notice the stems when stamped do not have a black border but flower and leaves in the image do. To balance and make it look uniform I used a black 0.5mm felt tip marker to free hand draw lines down each side of the stem. I then fussy cut these out as well. I placed two stamped leaves, fussy cut, along the stem for balance. The leaves are stamped with Frayed Leaf Crisp Ink and Forest Glades Crisp Ink. Prior to putting the card together I used Tattered Angels Glimmer Mist in Aspen Yellow to mist the whole front black card stock panel. A used a paint brush to pick up more Aspen Yellow to add splotches of color randomly on the black card stock. I used foam tape to raise the flower on the left, then double foam tape to raise the flower on the right. The stems, leaves and sentiment are directly attached to the card with glue. The final touch was 5 scattered rhinestones.

I hope you enjoy this card. I hope it inspires you to step out of your comfort zone and challenge yourself. Thanks again for visiting and come back soon.

Aimee Pankau

Confetti and Kindness

Products Used:

Altenew stamp sets “Stunning Cosmos” and “Kind Confetti”. Altenew Cutting Die for stamp set Stunning Cosmos. Inks used: Altenew Crisp Inks Moss, Olive, Butternut, Yellow Ochre, Sand Dunes, Pink Diamond, Pinkalicious, Permanent Black. Paper: X-Press It Blending Card white, Sweet Sugarplum (Stampin’ Up!). Other: Rhinestone embellishments.

I am focusing on layering techniques with Altenew stamps. Many of their stamp sets come with two to three layering stamps to create the wonderful end product without being an expert at coloring. This is the first time I used the Stunning Cosmos stamp set. At first I inked the large most background flower stamp with Pink Diamond Crisp Dye Ink. What I learned was although the resulting flower is beautiful, this is a very light ink making lining up the second layer of stamping a challenge. When you use these layering stamps, practice on scrap paper first. If the background is difficult to see, stamp the layering stamp first then stamp the background stamp using the first stamped image as a guide. Once I did this, lining up the stamps was easy and beautiful. I have fallen in love with this stamp set! I hope you agree…Continue reading to learn details of making this card.

This is a “slimline” card. Perhaps you have seen them on Pinterest or other social media. I use a smaller measurement starting with a 7″ x 7″ card base scored at 3.5″. This then fits into a number 7 envelope. You will notice I like a very slim border on my background colors rather than the standard 1/4 inch border. This background card stock is called Sweet Sugarplum from Stampin’ Up! For the card front I stamped the background flower first in Pinkalicious Crisp Dye Ink, using the second layer stamp first for ease in lining up the stamps. The base layer of the flowers is Pink Diamond Crisp Dye Ink. I then masked this flower and used Sand Dunes Crisp Dye Ink to stamp the confetti stamp from the Kind Confetti stamp set as a background for the focus flowers. The stems are then stamped and the 2 additional flowers are stamped then cut out using the coordinating die cut for Stunning Cosmos. The are attached to the card using foam tape. Note that the flowers fall outside the border created by the background Sweet Sugarplum border. This gives the flowers dimension and life. The sentiment is stamped in the Permanent Black Crisp Dye Ink. I added Rhinestone embellishments for sparkle.

I hope you enjoy this card as much as I do. Feel free to make one for yourself. Thanks for visiting…Aimee

You’re So Special

Supplies used:

Altenew Stamp Set: Versatile Vases and Golden Garden

Inks: Razzelberry Altenew Crisp Dye Ink; Hunter Altenew Crisp Dye Ink; Permanent Black Altenew Crisp Ink; VeraMark Watermark Ink

5mm Clear Sequins; foam tape; white embossing powder; craft glue

I created this card looking for a simple, elegant card for a friend. I started with larger leaf stamp from Golden Garden, randomly stamping with the VersaMark Ink being carful to not overlap the images while evenly covering the card. If you look closely, you will see partial images stamped at the edges. Your end product always looks better if it appears as though it was cut from a larger piece of stamped paper. I then applied white embossing powder and heated it until the powder was shiny. Be careful with this step as you can overheat and end up burning your paper. The flower is then attached using foam tape to the bottom right edge of the card. The sentiment, “You’re So Special”, comes from the Altenew Versatile Vases set and is a wonderful elegant and attractive font. This was inked with Altenew Permanent Black Crisp Ink, which can also be used with coloring techniques such as Copic Markers. The sentiment is attached to a black background and attached to the card front with foam tape. The top is then attached to black card stock and attached to a white card base. The last step was to attach the clear sequins with glue.

This was a fun card to create. It took some practice with the layering to get it right. What I learned is that even if I was off with the layering, the image was very pretty. I used ink cubes to ink the flower so I could have a green stem and a pink flower.

I hope you feel free to create this image for yourself and send the card to someone you care about.

Thank you for visiting… Aimee