To Watch a Video of this card, press HERE
- SUPPLIES
- Stamp Sets:
- Altenew Bells and Bows Stamp Set
- Altenew Halftone Happy Stamp Set
- Altenew Birthday Builder Stamp Set
- Ink:
- Altenew Permanent Black Stamp Set
- Altenew Glacier Caves ink family: Arctic, Caribbean Sky, Persian Blue, Sapphire
- Altenew Sweet Dreams ink family: Dew Drops, Aqualicious, Teal Cave, Galactic Stream
- Altenew Rose Petal ink family: Rose Quartz, Puffy Heart, Purple Wine, Cosmic Berry
- Altenew Enchanted Garden: Wisteria, Hydrangea, Ultraviolet, Andromeda
- Copic marker Y18
- Spectrum Noir Sparkle Crystal Clear
- All Purpose For Fantast/x Champagne Mist
- Versamark Watermark Ink
- Card Stock:
- Neenah White Card Stock
- Basic Black Card stock
- Other:
- Rhinstones
- Isopropyl Alcohol 70%
- Heat Gun
- Altenew Masking Paper
- Spritzer Pen
- Stamp Sets:
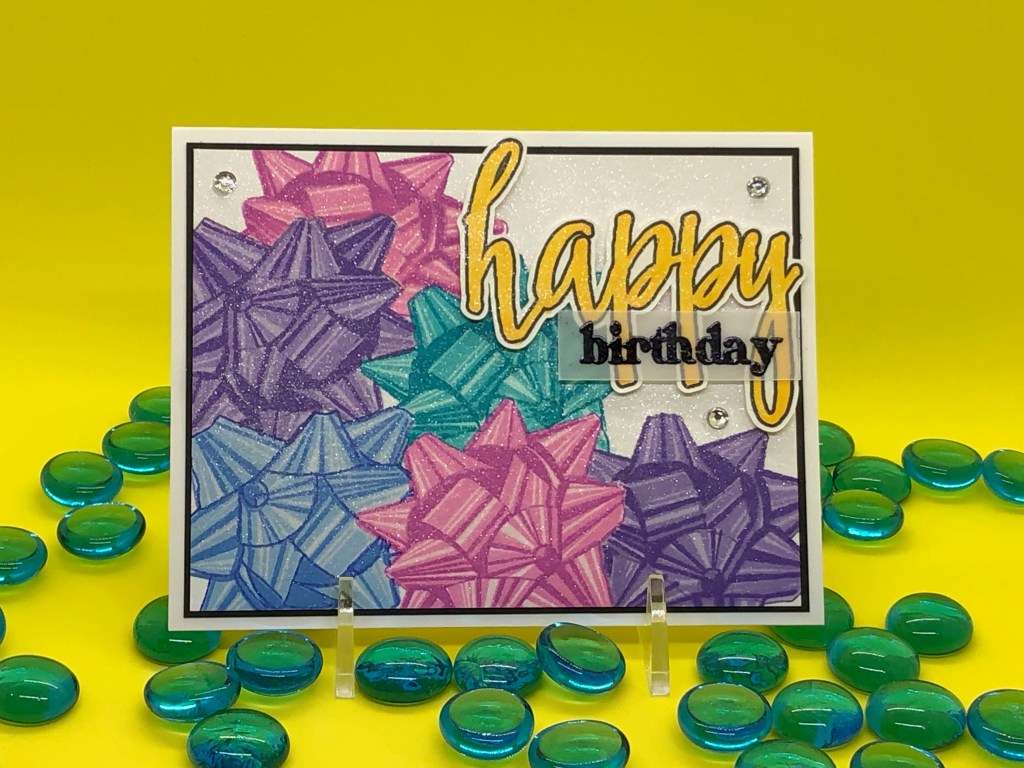
This Happy Birthday card is created using a technique called masking. You may do this already and not even be aware of it. Basically, it involves covering a stamped image so you can stamp another image that will appear to be behind that previously stamped image. It allows you to create 3-D images and layers without adding bulk to your card. As I talk through building this card I will share several techniques which will help you use masking with success.
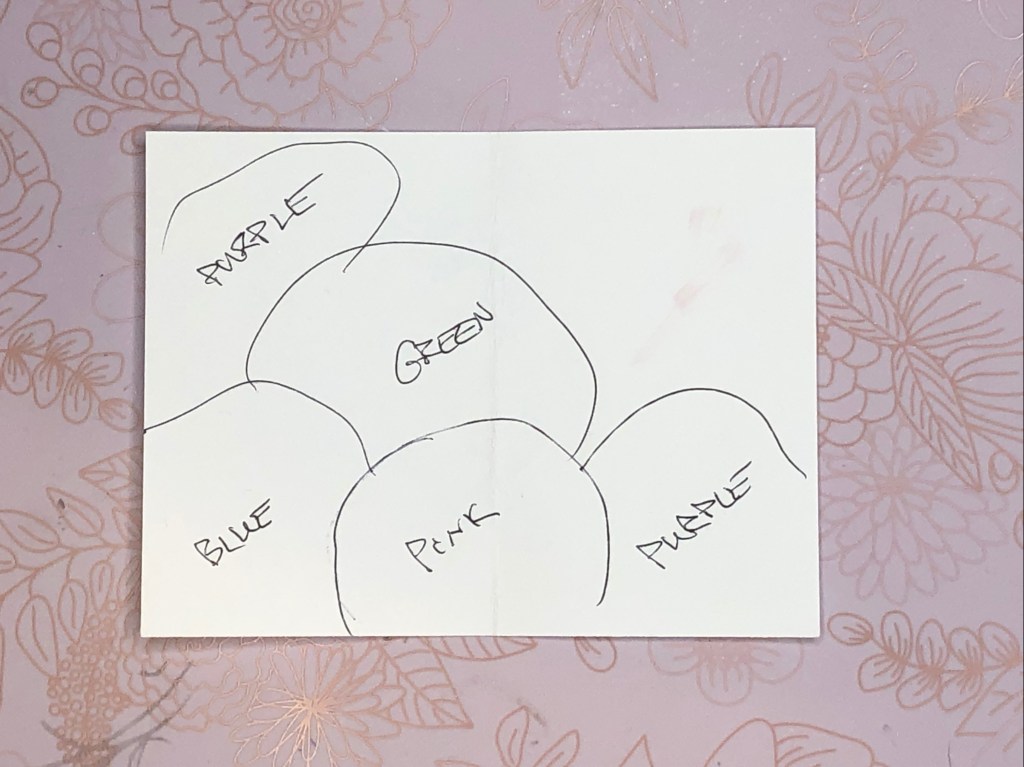
The image above is a guide for color and the stamping order to help create the final image. The first image stamped will be the image that appears to be closest to the front. So in this case, the lower pink bow will be the first stamped. Once the pink bow is stamped, a mask, or “cover”, is placed over it so the blue and purple bows along the lower edge of the card panel can be stamped. Because a mask is placed over pink bow, no ink is stamped over this bow. This creates an illusion that the blue and purple bow sit behind the pink bow, thus creating depth and layers.
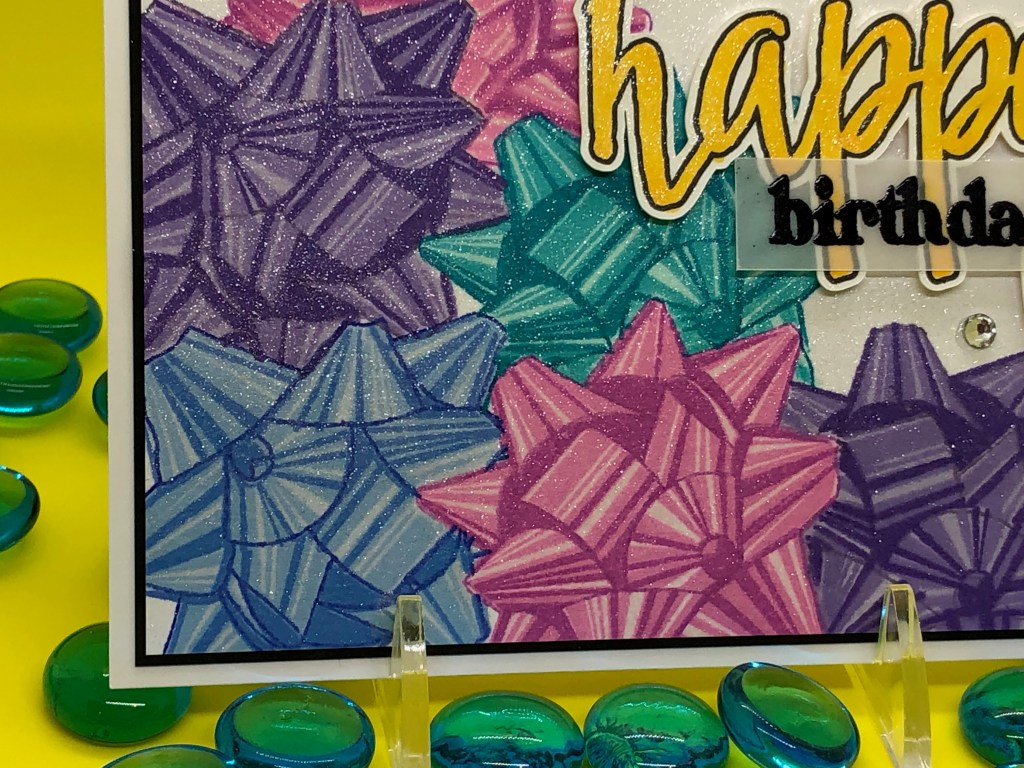
To create a mask you can use any thin paper-like option. Included are post-it notes, regular copy paper, or masking paper created for this purpose. With this card I used Altenew Masking Paper. This paper comes in 2 layers. The masking layer is peeled off the base layer, which is made from a non-porous shiny paper. You can reuse masks. You can replace the mask after use to this non-porous shiny paper for storage. In this case, I did not separate the two layers from each other as I needed the non-absorptive, non-porous layer to keep ink from bleeding through to the underlying image. Generally, when masking, you will stamp over the mask once, perhaps twice. With this card, there are 4 stamping layers to create each bow. I used a MISTY stamp positioning tool. Some layers needed repeat inking and stamping to get good ink coverage. Prior to deciding to use both layers of the Altenew Masking Paper, I had several failed attempts in making this care as ink soaked through the mask onto the masked stamped image. So play with the stamping you need to do to determine what to use for masking.
A “mask” is made by stamping the image onto the paper you decide to use as your mask, then fussy cutting out the image. When fussy cutting the image, cut just inside the stamped image line to make the mask slightly smaller than the image. This is done because a mask creates bulk. This bulk interferes with the next stamped image coming in contact with the card stock right up against the inked and masked image. (see video – above). As you ink each bow, apply a mask so the next bow can be stamped.
The glitter on the card panel is created using 70% Isopropyl Alcohol and “All-Purpose For fantast/x Champagne Mist paint”. Four to five drops of the Champagne Mist paint are placed in a spritzer pen, then 70% Isopropyl Alcohol is added to fill the spritzer pen about half full. Shake well and spritz the entire card panel. Allow to dry. The card panel will curl when spritzed. As the spritzed alcohol dries, the card panel will lie flat again. This takes 2-3 minutes.
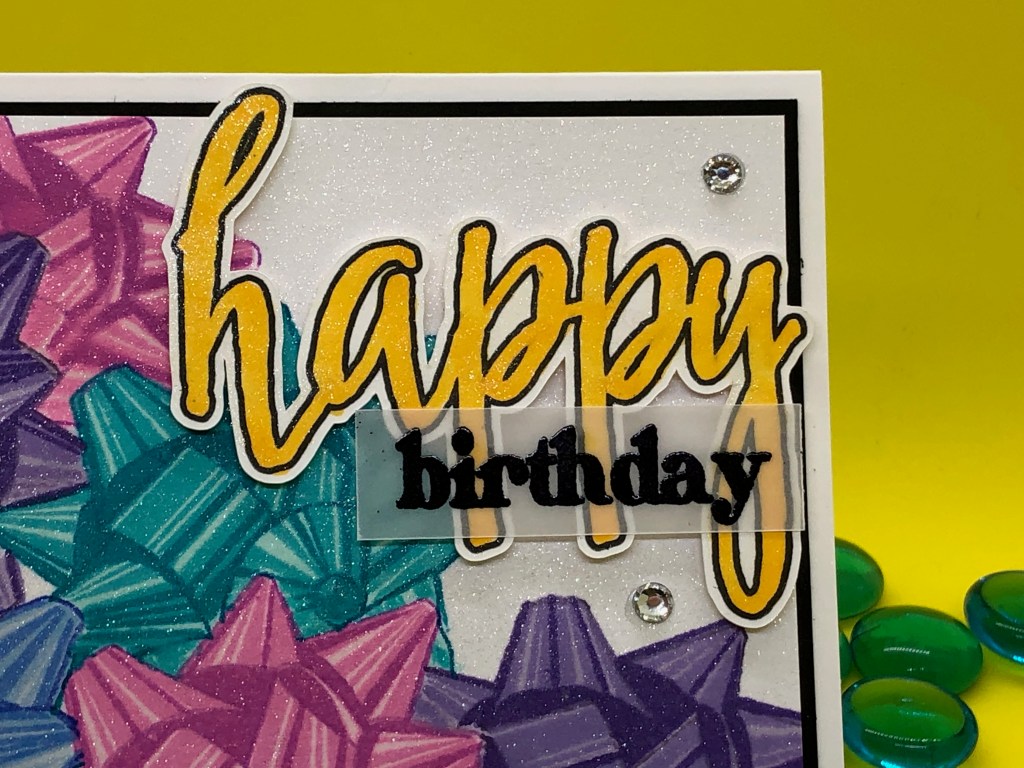
The “happy” is stamped using Altenew Permanent Black ink then colored in using Copic Y18 alcohol marker. I then cut it out using my “Scan and Cut” machine. It is then attached to the card panel using foam tape. The black heat-embossed “birthday” on vellum is the glued to the two “p’s” and the “y” of the “happy”. Then rhinestone embellishments are glued to the card panel. This card panel is glued to a piece of black card stock which is then glued to the card base.
Thanks for joining me today. I hope this inspires you to use masking on your cards to create depth to your images giving the appearance of 3-D and layers without adding bulk.
Aimee Pankau

That’s SOME masking!!
Thank you for submitting your wonderful work to the AECP assignment gallery.
LikeLike
So colorful and bold, love it, Sandy
LikeLike
I LOVE this, Aimee!
LikeLike