Hello and welcome everyone. In this post I am sharing my work that represents my final exam for the Altenew Education Certification Program for Level 2. This has been an amazing journey…I have learned so much, both in the form of design as well as sharing what I have learned. This blog, for example, is a direct result of this program. I’m excited to share this final exam and I’m eager to see what Level 3 has in store. Of course, I will continue to share what I learn with all of you!
As you can imagine, this will not be a typical post. I will share 4 card designs, one “altered or upcycled project”, and to answer the additional challenge of creating a new technique: some fun textured balloons…you’ll just have to wait and see… The cards presented are all masculine cards, one each for Birthday, Love/Thinking of You, Anniversary, and Encouragement. There will be a video for each of the cards and lots of pictures. So sit back and enjoy…
Before I begin I’d like to share some design components I have learned in the program thus far. These are: monochromatic card design, Inlay die cutting, using color confidently, faux embossed die cutting, and masking.
- Monochromatic color design: This design technique uses one color to create the design of the card. This can be done with any other technique such as shadowing/blending, different shades of that color, but the end product is designed with one color focus.
- Inlay Die Cutting: Using a die to create a space on your card stock that you then fill back in with the either the original die cut pieces or newly cut pieces of different color to create a bold and beautiful design.
- Color Confidence: understanding color combinations and placing appropriate amounts of color for the desired design. This takes into account all aspects of color design. A general rule for the amount of color used is 70% for the main color, 20% for the secondary color, and 10% for white space or a neutral color. This design guide (as I don’t really see it as a technique but rather an overall guide to follow whenever designing) will be shown on the masculine encouragement card later in the video.
- Die cutting with a twist: Using die cutting to create a “faux embossed” background.
- Masking: OK, I’m not using a lot of masking in this group of cards but it does make a cameo appearance on the masculine happy birthday card. This technique uses a mask, created from either post it notes, washi tape, or masking paper, to either hide part of a stamp you do not want to use or to create layers in your design.
I’d like to share some design tips before I show you the work:
- Don’t be afraid to try new things. You don’t have to come up with a final card or project every time you work with your supplies. Use some time to create, play, work on something new, or perfecting something that has given you difficulty. This is how you grow as a creative person.
- Follow what inspires you. What I enjoy and feel is inspiring may not be what you find inspiring. Wouldn’t it be a boring world if it was? So create, use your world for inspiration, and then share with others.
- Don’t be shy about accepting insight from others. They may see wonderful things in your work that you don’t see. It can help you grow as a creative stamper.
OK…on to the “FUN” stuff…

The four cards on the left are the cards designed for this project. The picture on the right is the Upcycled project. So let me share the details…

Inlay card technique: Masculine “Love/Thinking of You” card
To Watch a video of this card, click HERE
- SUPPLIES
- Stamps:
- Altenew Everything About You
- Ink:
- Black embossing powder
- White embossing powder
- Versamark Watermark Stamp Pad
- Card Stock:
- Neenah white card stock
- Stampin’ Up! Merry Merlot card stock
- Stampin’ Up! Gorgeous Grape card stock
- Stampin’ Up! Evening Evergreen card stock
- Stampin’ Up! River Rock card stock
- Stampin’ Up! Misty Moonlight card stock
- Stampin’ Up! Wisteria Wonder card stock
- Basic black card stock
- Other:
- Black matte dots
- Altenew Shattered Triangle Die
- ruler
- pencil
- heat gun
- Big Shot
- foam tape
- Stamps:

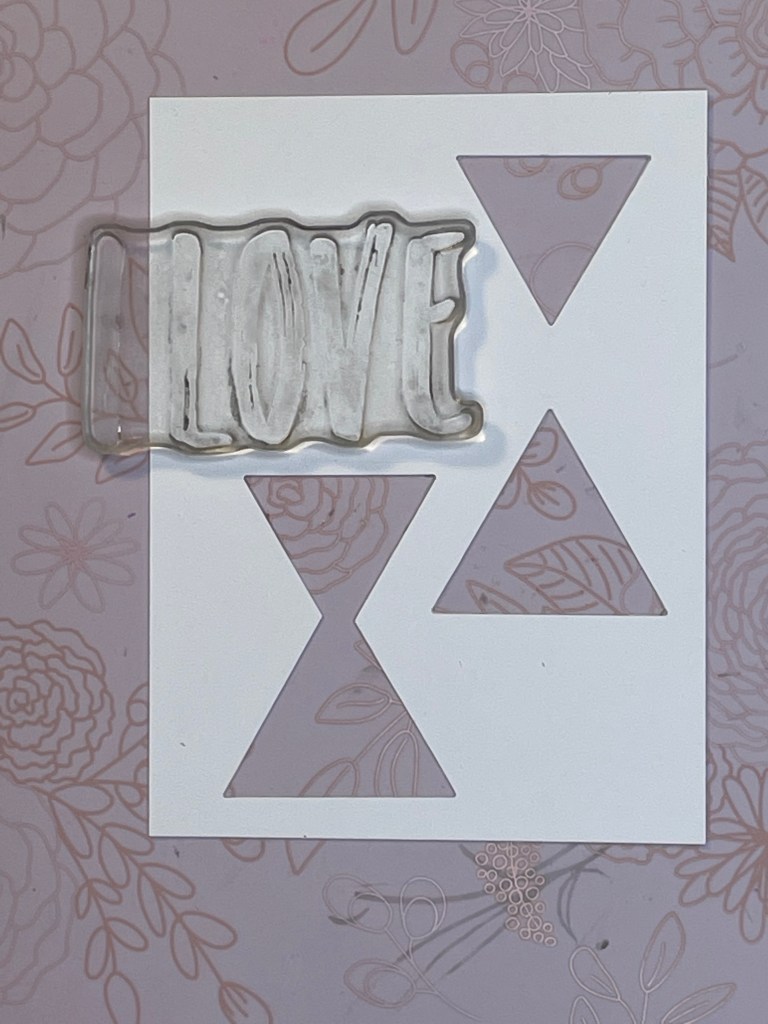
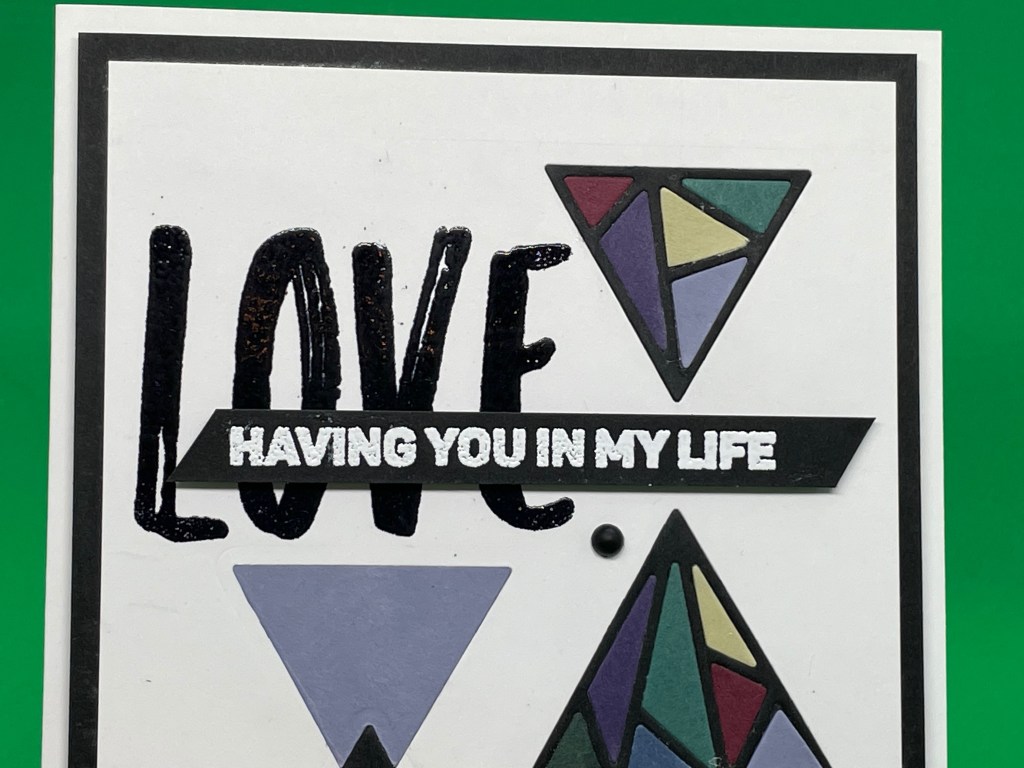
Starting with the layout for this card is important as there are a lot of parts that need to be able to fit. The picture on the left displays the layout of the dies over a grid drawn in pencil that will later be erased. This grid started by laying all parts on the card front, drawing the lines for both vertical and horizontal guidance, then using post it notes to hold down the dies while running it through the Big Shot embossing machine. The picture on the right shows all the dies cut out. The next step is to emboss the word “LOVE” from the “I LOVE” stamp set out of the Altenew “Everything About You” stamp set. Once this is embossed, the next step will be laying the pieces back into the negative spaces created by the dies.
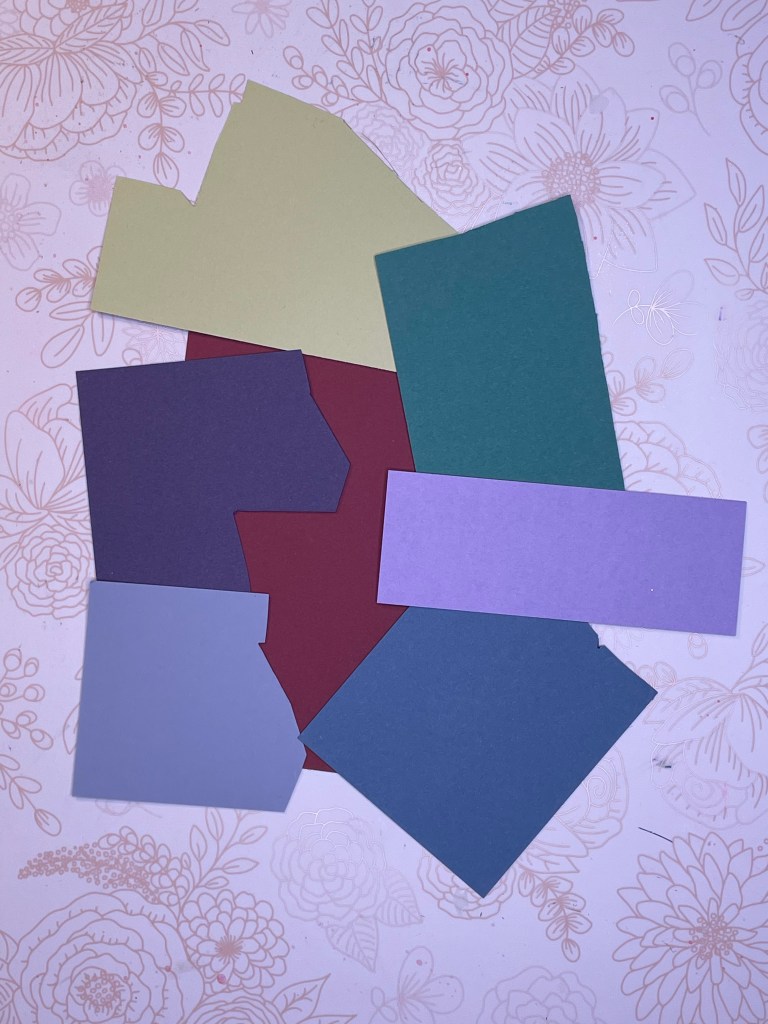
Select the colors you want to use for the inlay sections.
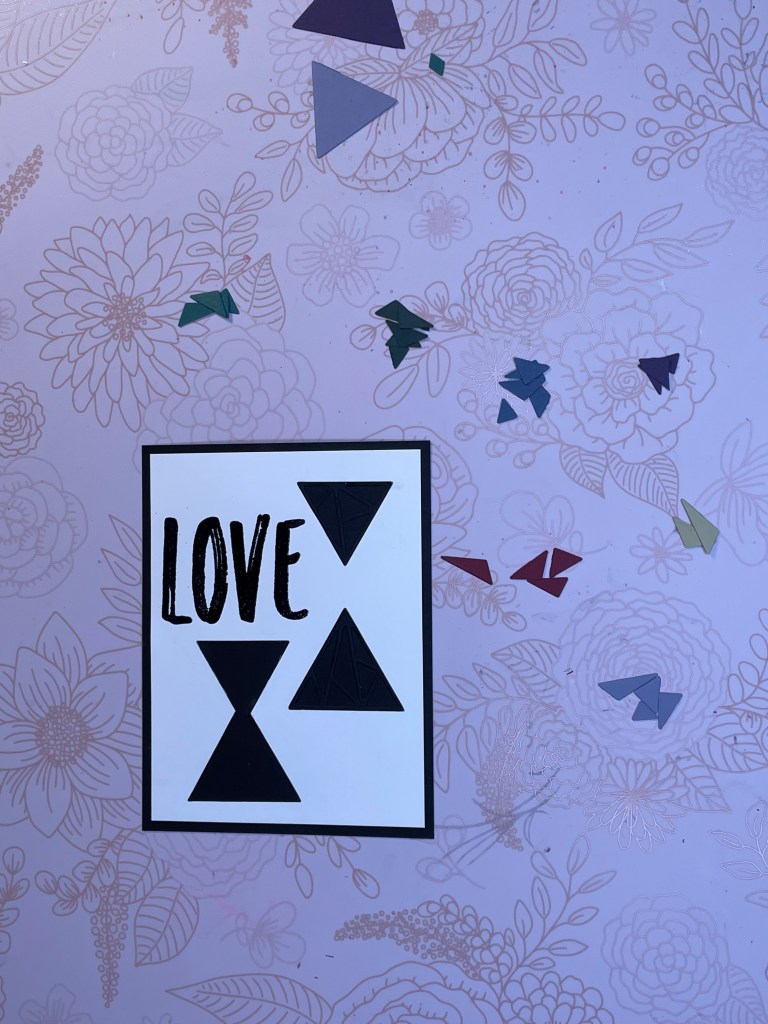
Glue or use double sided tape to attach the “LOVE” card panel to a piece of 5 1/4″ x 4″ black card stock. Next, for the top two triangles, die cut them out of black as well as the seven colors of card stock chosen for this card and shown in the picture above. Glue the triangle frame-like piece die cut from the black card stock that will hold the colored pieces into place. Then, one by one, glue in the colored pieces.
Using the bottom left triangle dies, die cut out a black triangle, and one each of the two purple colors. To create the bottom two triangles and the black diamond:
- Place the black triangle, cut using the larger triangle die, into the bottom triangle space. Place the top purple triangle over it and trace the outline of the point. Remove both triangles and cut along this traced line. This diamond shape will be used to fill the space as seen.
- To create this space:
- Place the lower purple triangle into its space. Place the upper purple triangle into its space. Again, trace the tip of the upper triangle onto the lower triangle.
- Remove each triangle. Place the upper triangle into its space. Place the lower triangle into its space. Trace the tip of the lower triangle onto the upper triangle.
- Now cut the traced lines from each triangle to create the space for the diamond black card stock.
Glue these three pieces into place.
Next, using a strip of black card stock, prep your black card stock with an embossing buddy to prevent excess embossing powder from sticking to your project, stamp the sentiment in Versamark ink, and apply black embossing powder, then heat set. Use foam tape to attach this to the card panel over the embossed LOVE sentiment. Glue black matte dots into place. Attach this card panel with foam tape to a white card base.
——————————————————–

Monochromatic coloring: Masculine Anniversary Card
To Watch a video of this card, click HERE
- SUPPLIES
- Stamp Sets:
- Altenew Halftone Everything stamp set
- Altenew Frosted Garden stamp set
- Ink:
- Black embossing powder
- White embossing powder
- COPIC alcohol marker B39
- Stampin’ Up! Night of Navy ink pad
- Spectrum Noir Crystal Clear Sparkle pen
- Versamark Watermark stamp pad
- Momento Black ink
- Card stock:
- Stampin’ Up! Night of Navy card stock
- Neenah White card stock
- Basic black card stock
- Velum
- Other:
- Heat tool
- stamp positioning tool, MISTI
- foam tape
- Stamp Sets:

The image from the Altenew “Frosted Garden” stamp set is stamped in Night of Navy ink onto Night of Navy card stock. This image is stamped several times in a repeated pattern as you see above. Be sure to space the stamps so they appear to be able to follow this pattern on a larger scale. You will see the middle line (the full flower in the center of the page and the two small partial images on the side edges) are slightly slanted downward from left to right. The flowers at the top and bottom of the page also follow this slight slant. Be sure to stamp off the edges as well to give the illusion that the image was taken from a larger piece of patterned paper. Complete the background by coloring each of the flowers with a Spectrum Noir Crystal Clear Sparkle pen.
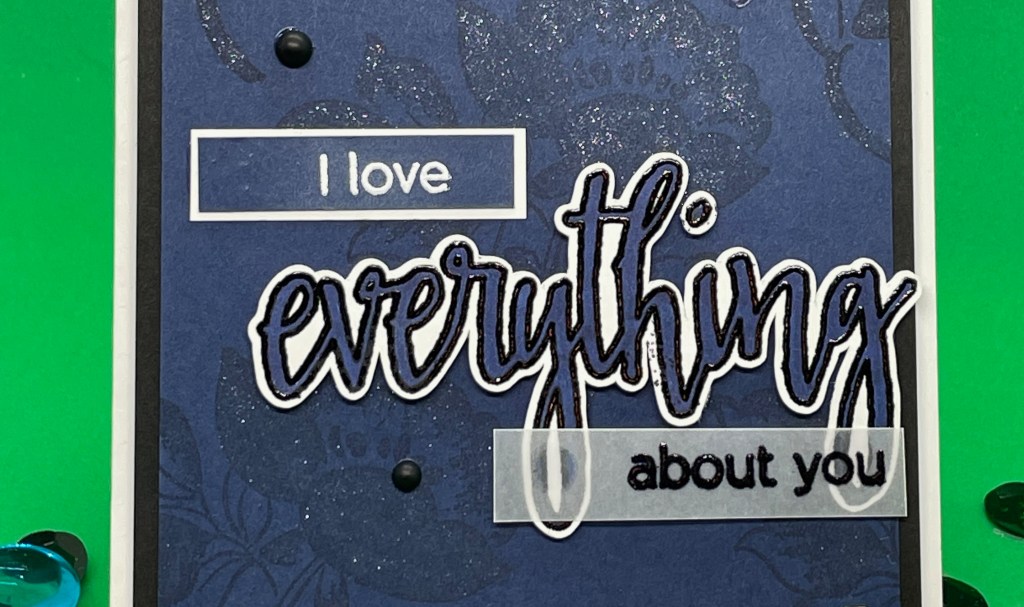
Once the background is complete, using a stamp positioning tool, stamp the “everything” stamp onto white card stock in an alcohol friendly black ink. I used Momento Black ink. Die cut the image, or in this case I used my Scan and Cut machine, and color it in with the COPIC marker B39. Then put the colored sentiment back into the MISTI placing it into the negative pace of the card stock it was cut out of so it is in the same place as when it was first stamped, prep it with an embossing buddy, re-stamp it with Versamark ink, apply black embossing powder and heat set. This image is attached with foam tape to the bottom right of the card. On a small piece of Night of Navy card stock, emboss the “I love” sentiment in white embossing powder, and on Velum card stock emboss “about you” in black embossing powder. Attach these with glue as shown above. Glue black matte dots as shown. Attach this panel to a piece of black card stock. Then, using foam tape, attach the whole panel to a white card base.
________________________________________
Die cutting with a twist: masculine Happy Birthday card
To watch a video of this card, click HERE
- SUPPLIES
- Stamp Sets:
- Altenew Halftone Happy stamp set
- Altenew Sentiment Strips 2 stamp set
- Ink:
- COPIC YR18, B21, B23, Y32, G14
- Momento Black ink
- Black embossing powder
- Versamark Watermark stamp pad
- Card Stock:
- Neenah White card stock
- Altenew Pale Gray card stock
- Stampin’ Up! Sahara Sand card stock
- Stampin’ Up! Seaside Spray card stock
- Spectrum Noir Crystal Clear Sparkle pen
- Other:
- Altenew Moroccan Lattice Die
- heat gun
- rubber bands of variety of colors
- thin twine
- foam tape
- Stamp Sets:
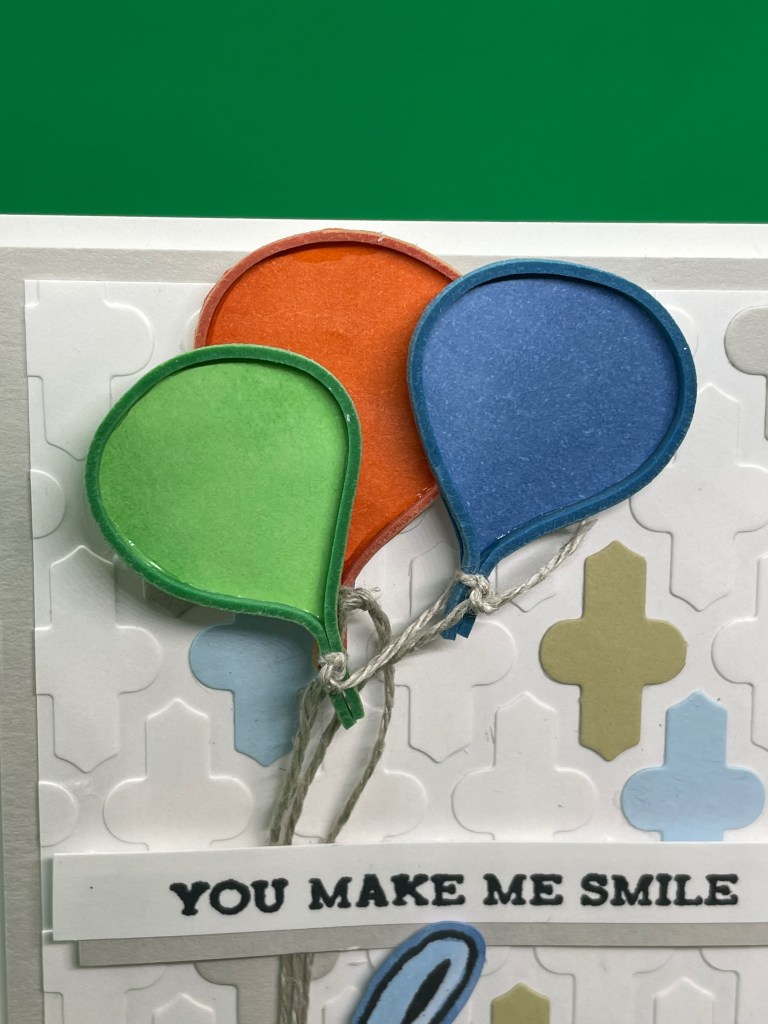
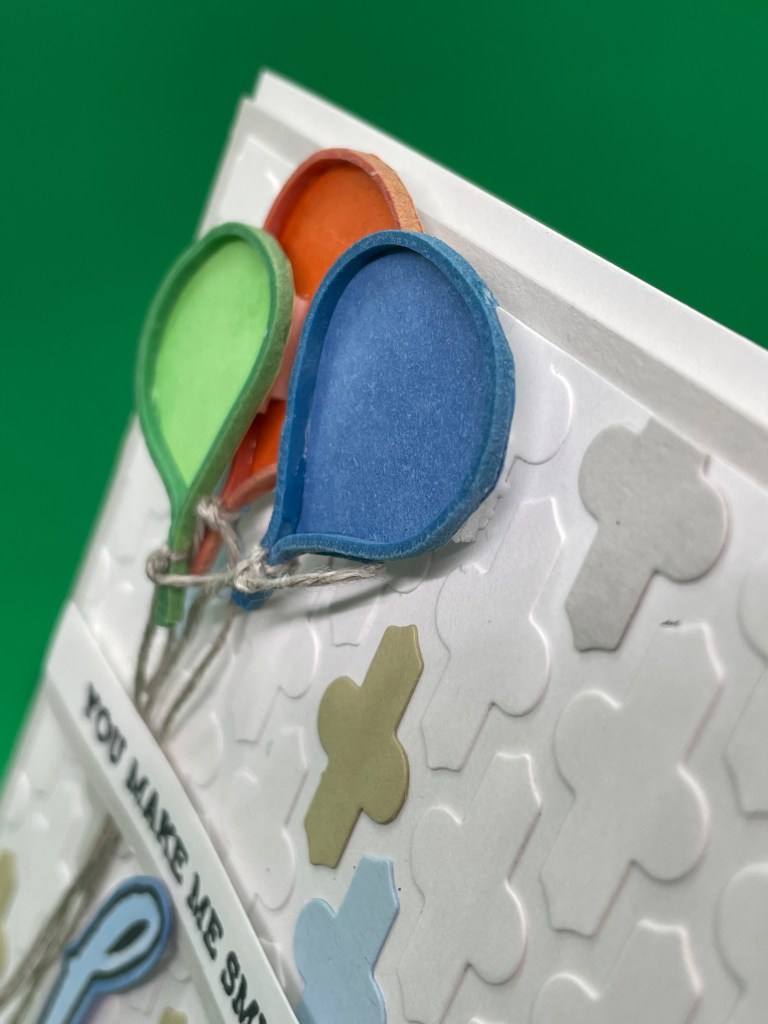
The first part of building this card is to create the balloons. Part of the final exam was to come up with a new technique. Now, I have to put a disclaimer in here: I did not do an internet search to see if this has been done before…if you recognize it or you have done this before, please reach out to me. I’d love to hear from you…
To create the balloons use the B23, G14, and YR18 to color an area about 3″ x 3″ on a piece of white card stock. Pinch the rubber band near the end, tie a piece of light weight twine at the pinch, cut the small loop created by tying this twine. Then use a small paint brush to apply glue to the back edge of the rubber band. Place the glue side of the rubber band on the respective color patches and hold in a balloon shape until dry enough to let stand. Please see the video to view how the balloons are made. Once dry, the excess colored card stock will be carefully trimmed away.
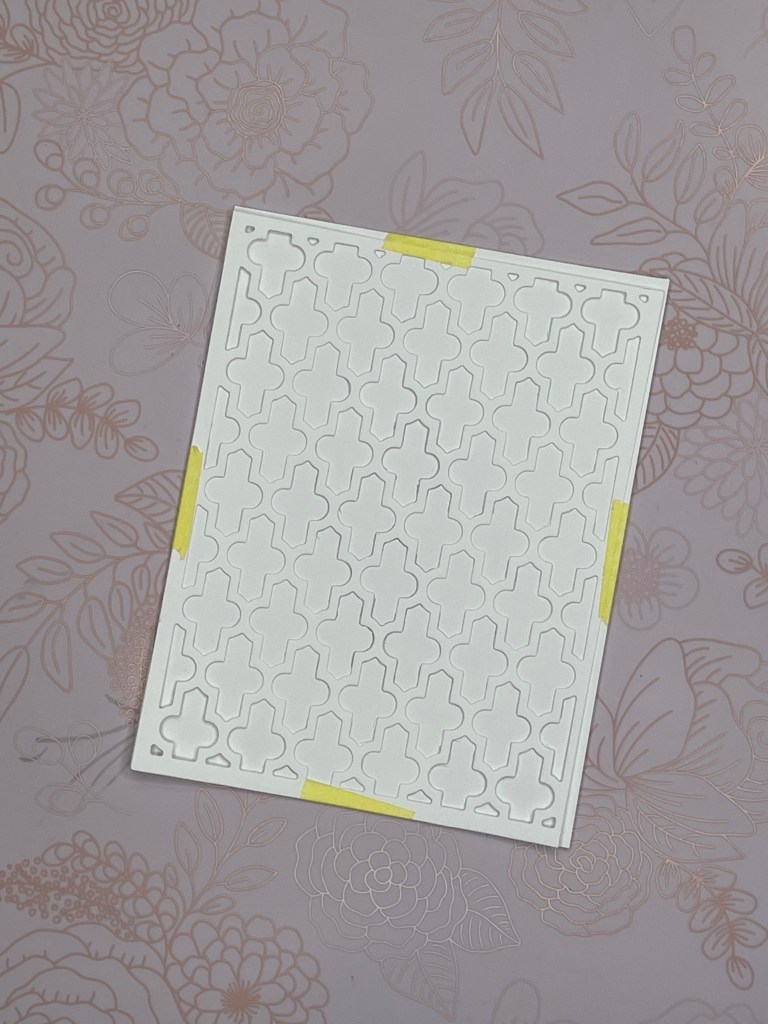
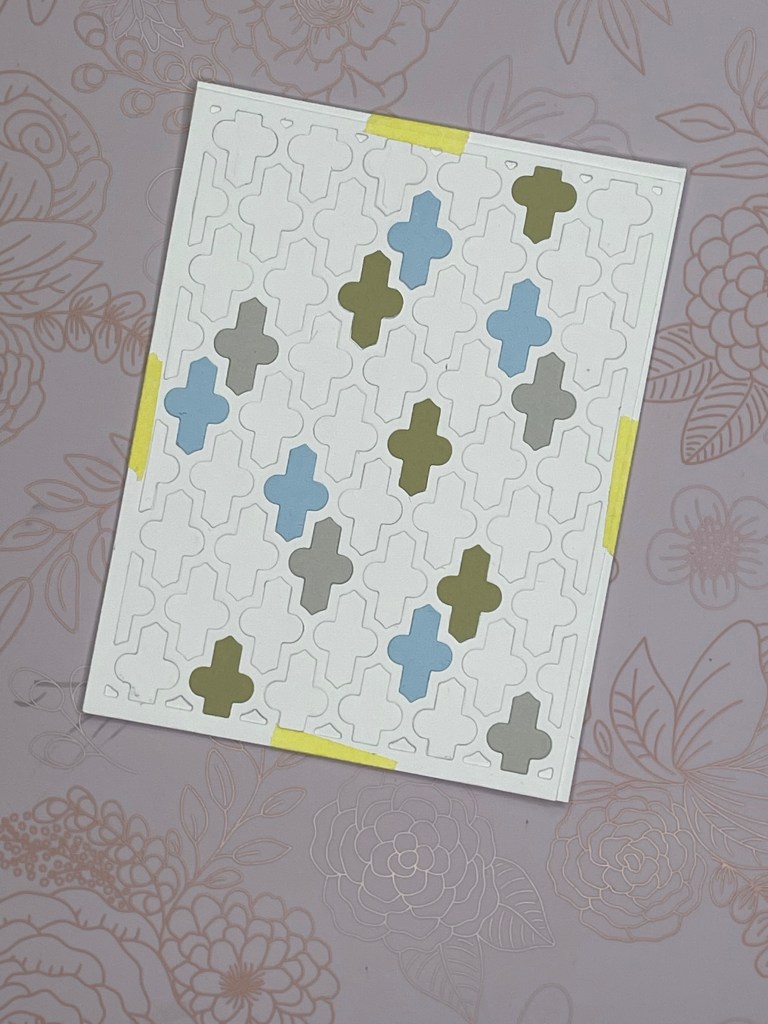
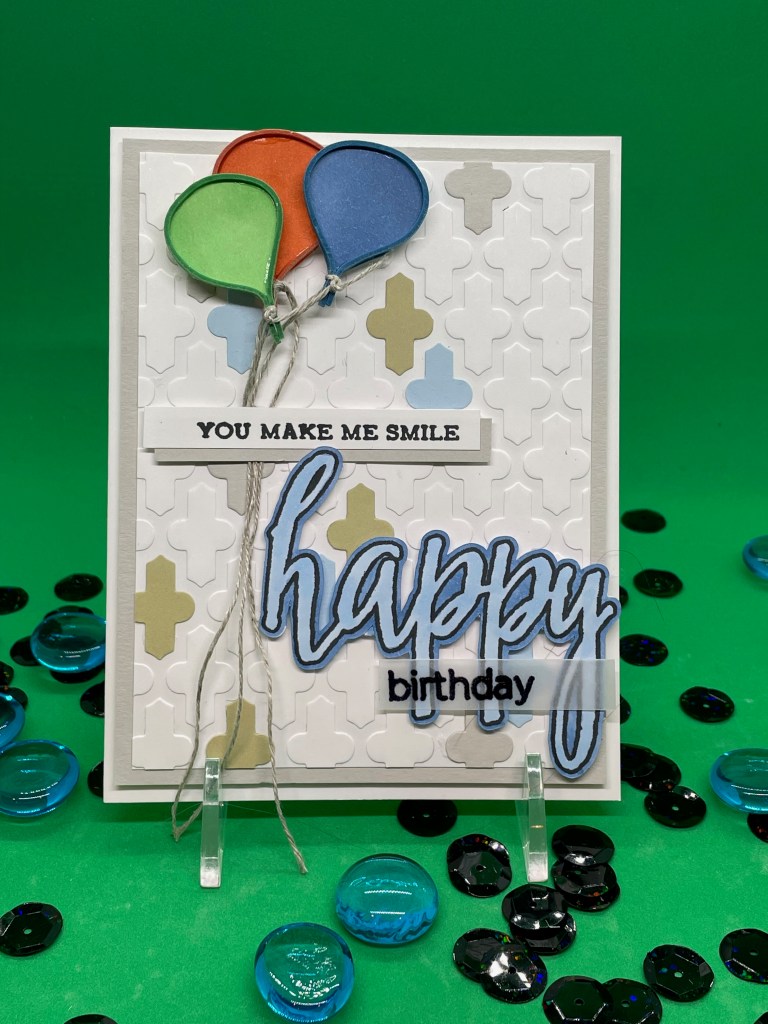
The next step in building this card is to create the background. Using the Altenew “Moroccan Lattice Cover Die”, cut the die out of white card stock. Use washi tape to attach this to a piece of white card stock of the same size. Cut die pieces out of Altenew Pale Gray card stock and Stampin’ Up! Seaside Spray and Sahara Sand card stock. Randomly place these in spaces created by the die cut. A word of caution: apply just a small amount of glue in the center of each space. You will need to be able to remove the die cut panel seen in the image on the left. Use caution to not inadvertently glue it to the card panel beneath it. Once the desired pattern is created with the three colored pieces, use the white pieces created when the first die cut panel was made to fill in the remaining spots. Once the open areas are filled, remove the die cut panel. Cut this down to 3 3/4″ x 5″. Attach to a piece of Altenew Pale Gray card stock cut to 5 1/4″ x 4″.
Stamp the “happy” from the Altenew “Halftone Happy” stamp set in an alcohol marker friendly ink. I used Momento Black. I then cut the “happy” out with my Scan and Cut machine. This stamp set also has an available die for you to use. Color the “happy” with COPIC markers B21 and B23. Attach to created card panel with foam tape. See below.
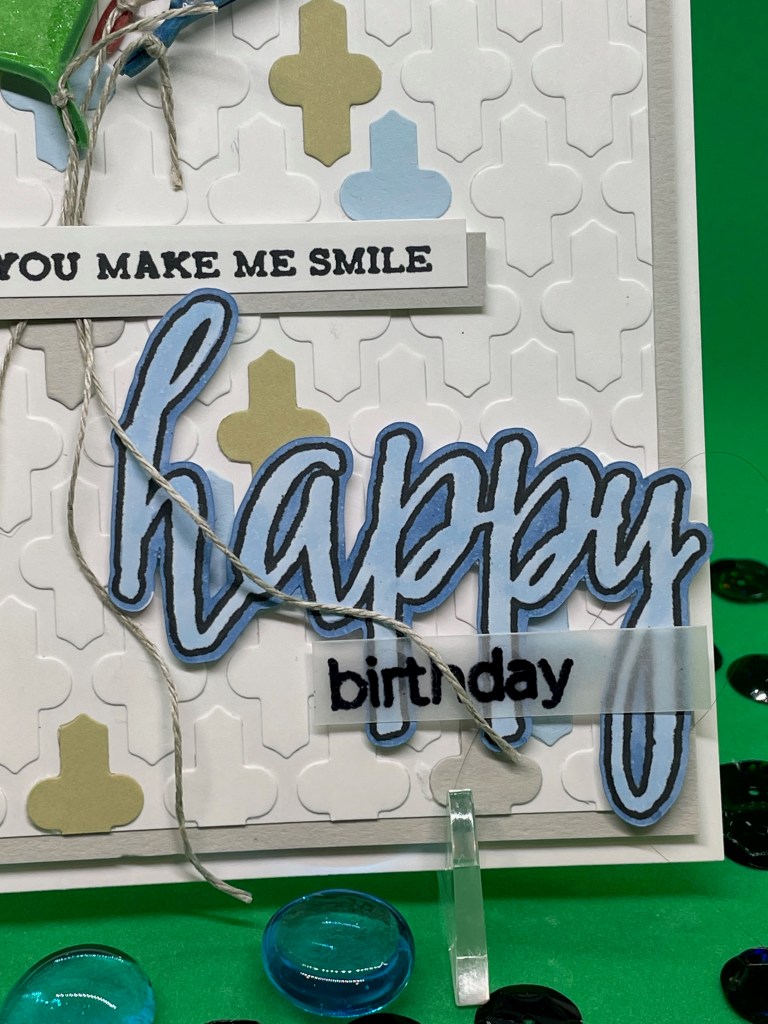
OK…here’s where the cameo appearance for the masking technique is found…The sentiment “You make me smile” comes from a longer sentiment, “Thoughts of you make me smile” from Altenew “Sentiment Strips 2” stamp set. Stamp the whole sentiment, then apply washi tape or a post it note over the “thoughts of” part of the sentiment, being sure the washi tape or post it note is wide enough to attach to the stamp block so it does not fall off. Stamp the remaining sentiment onto a strip of white card stock. Attach that sentiment strip to a strip of Altenew Pale Gray card stock as seen in the photos. Emboss “birthday” with black embossing powder onto a small strip of Velum card stock. Be sure to prep the Velum with an embossing buddy to avoid static attached embossing powder from ruining your image. Glue this to the legs of the “p’s” and the leg of the “y” of the “happy”.
Cut out the balloons with care and attach them to the top of the created card panel. The orange balloon is attached with glue, The blue and green balloons are attached with foam tape. The strings will hang freely down the left side of the card. Attach the “you make me smile” sentiment strip with foam tape. Put foam tape only on each end of the back of this strip so the balloon strings can hang freely behind this strip.
___________________________________

Color Confidence: Masculine Encouragement card
To watch a video of this card, click HERE
- SUPPLIES:
- Stamp Set:
- Altenew Fancy Greetings stamp set
- Ink:
- Black embossing powder
- Versamark Watermark Stamp pad
- Altenew inks: Dusk, Desert Night, Ocean Waves, Sea Glass, Hunter Green Just Green
- Card stock:
- X-press It Blending Card stock
- Black card stock
- Strip of design paper
- Other:
- heat gun
- foam tape
- bling
- Stamp Set:
As the details of creating this card are extensive, I recommend watching the video.

The inspiration for this card comes from the Bargello style patterns for quilting. I have always loved this look on a quilt. Knowing this love for Bargello designed quilts, my dad made the quilt on the left as my Master’s Program graduation gift. Needless to say, it is cherished!
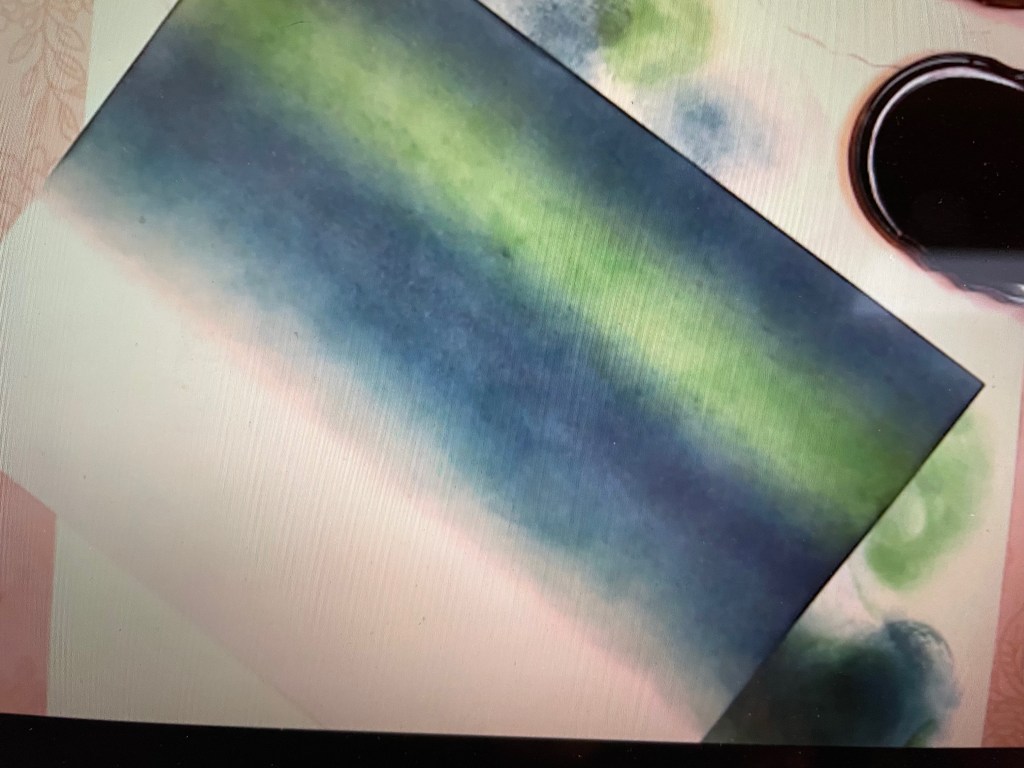
I started with a piece of the “X-press It” blending card stock and, starting along the long edge, blending the above pattern with these inks: in order, Desert Night, Just Green, Desert Night, Dusk, Ocean Waves then Sea Glass. See the video for blending tips to create this panel.


Once the blending is done, cut the panel at 5 1/2″ and trim the non-inked card stock off the panels. You will end up with two panels as in the left picture. Then, using a piece of office copy paper (this is done to cut down on the bulk and weight of the finished card), glue the pieces of the panel along with a 1 1/2″ strip of chosen design paper and a 1/8″ strip of black card stock to create the panel on the right. It’s hard to see, but the 1/8″ strip of black card stock sits just below the designer paper.

Now, I haven’t lost my mind, at least not yet… :). Cut the panel from the above right picture into 1/8″ strips, cutting along the long edge.

On another piece of office copy paper, again to keep the bulk of the final card down, start placing the strips on the paper. The first step is to decide on a pattern. This card is an encouragement card so I wanted to create a check mark, symbolizing “check, yes, you can do anything!”. Once you have a pattern, choose a part of the strip as your pattern guide. I followed the strip of black card stock (look at the bottom of the check mark to see the small black squares that served as my guide). Lay the strips tightly to each other but not over-laying each other. Move along the pattern until you have a pattern about 4 inches wide. Once this is done, I cut the panel down to a 3 3/4″ x 5″ panel that you see on the final card. You can see it again below.
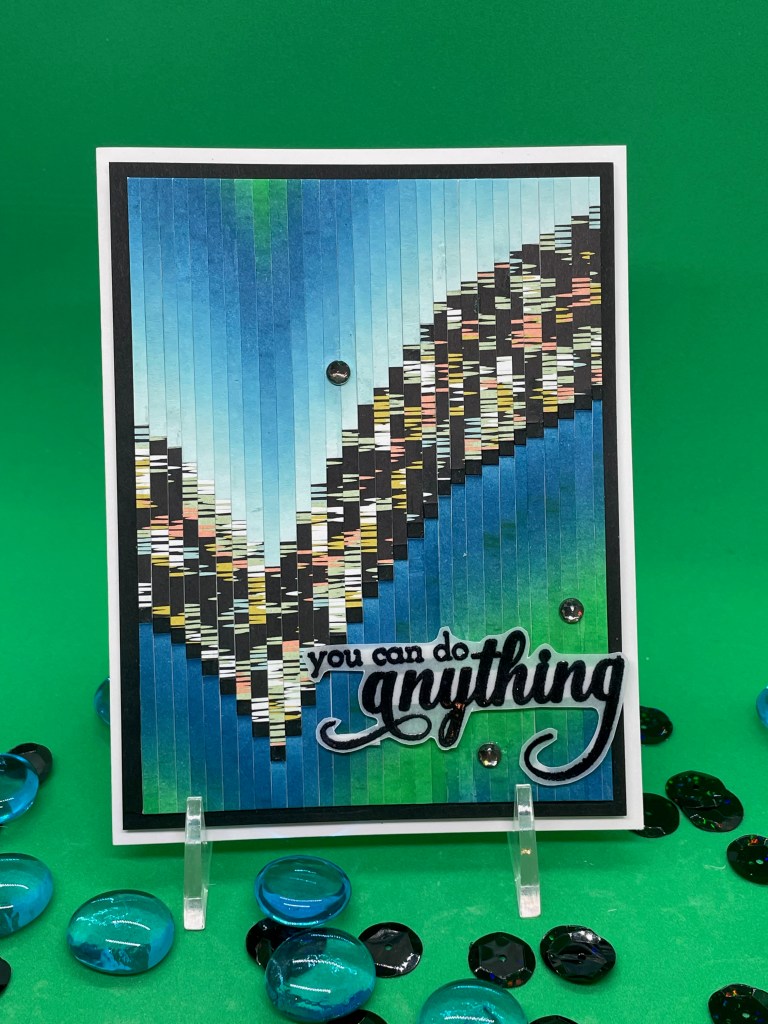
The remainder of the card goes quickly. Prep a piece of Velum card stock with an embossing buddy then stamp the “you can do anything” sentiment onto the velum in Versamark Watermark ink. Apply black embossing powder and heat set. Fussy cut the sentiment out with a narrow edge, apply to card panel with foam tape. Apply bling as shown.
___________________________________

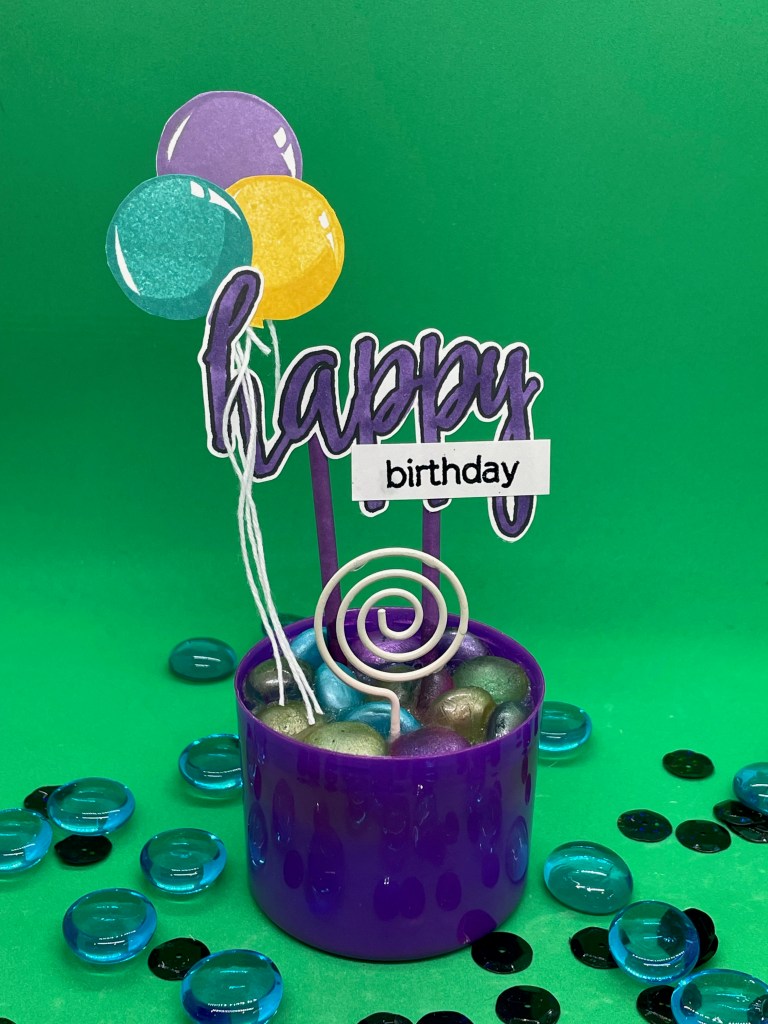
The last part of this challenge was to create an Upcycled an item. This upcycle project started with the lids of my hairspray cans. They become the purple bottoms seen above. The end product, as you see, are place settings for a birthday party table.
- SUPPLIES:
- Stamp Set:
- Altenew Balloon Bunch stamp set
- Ink:
- COPIC V17
- Black Embossing Powder
- Stampin’ Up! Highling Heather, Daffodil Delight, Bermuda Bay ink pads
- Altenew Deep Iris ink
- Card Stock:
- Neenah white card stock
- Other:
- Mosaic Glass Gems
- Name place holders – I found some wedding name place holders in the sale isle at Michaels for a little over $1.00 each. I cut the bottoms off to shorten them for the project.
- Lollipop Sticks
- Gorilla Epoxy drys clear
- Styrofoam 1″ thick
- Stamp Set:
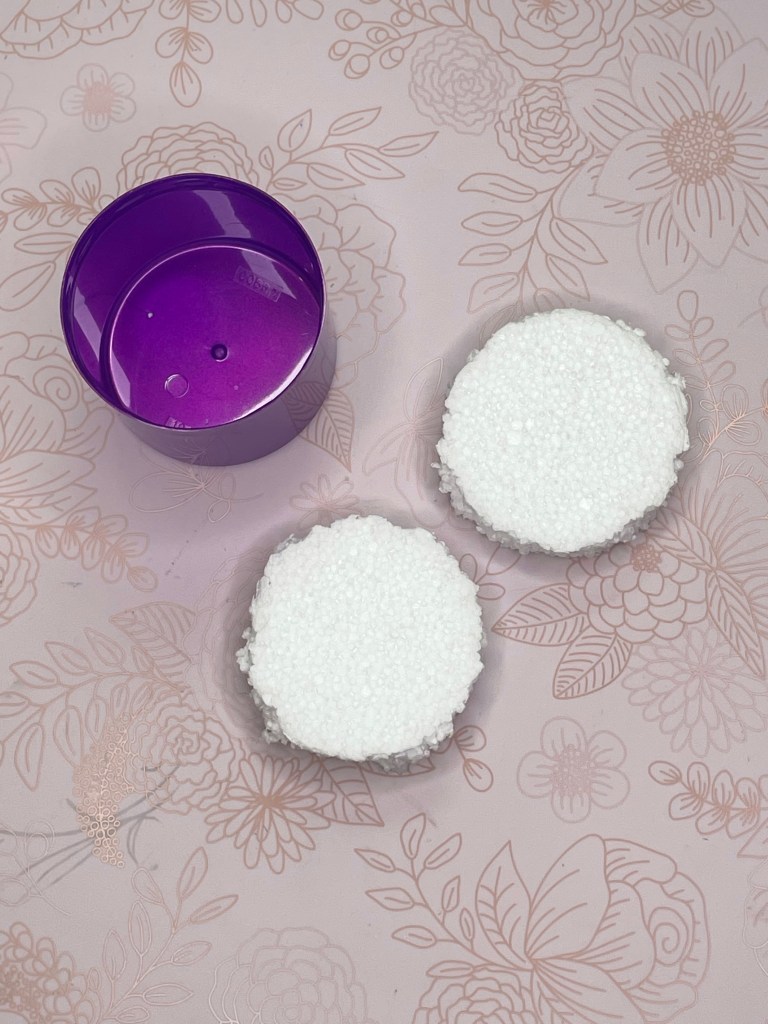
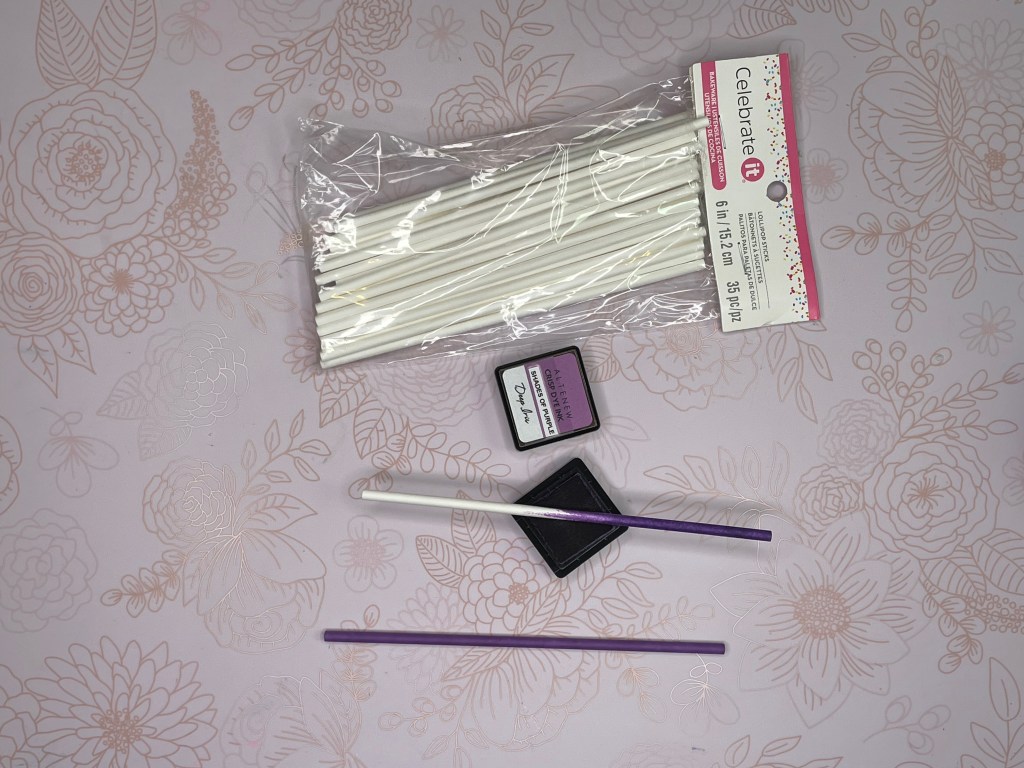
Cut two pieces of 1″ thick styrofoam and place them in the bottom of the hairspray cap. Color two lollipop sticks with Altenew Deep Iris ink.
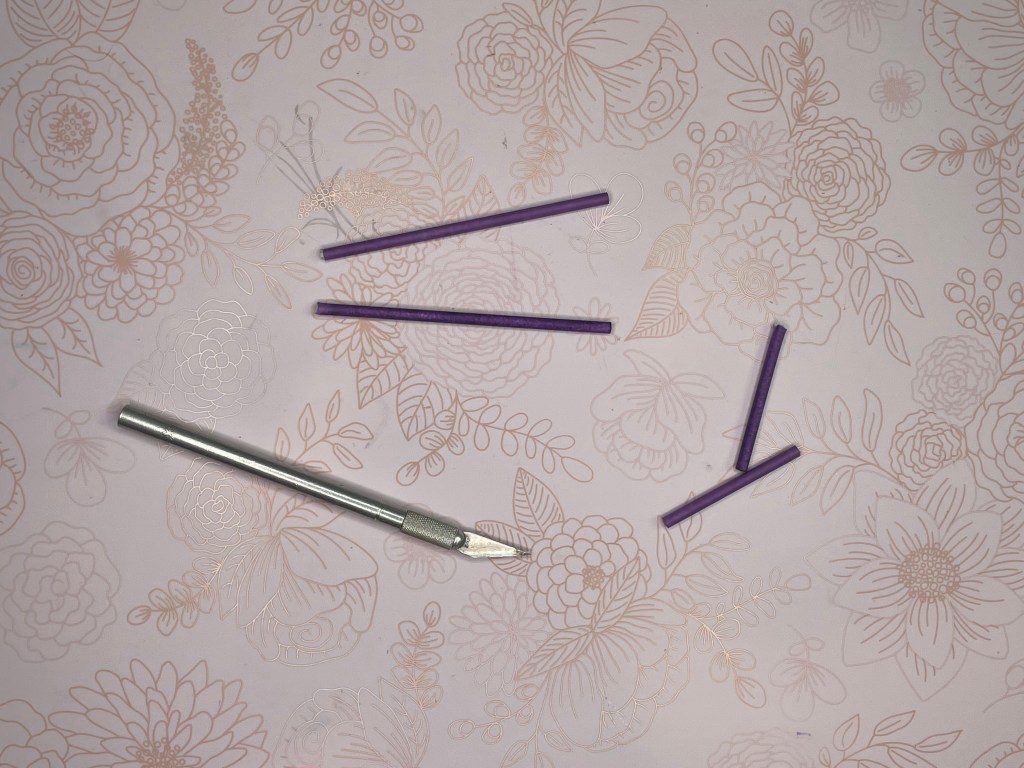

Cut the sticks down to desired length and place them into the styrofoam. I used some glue to secure them in place.

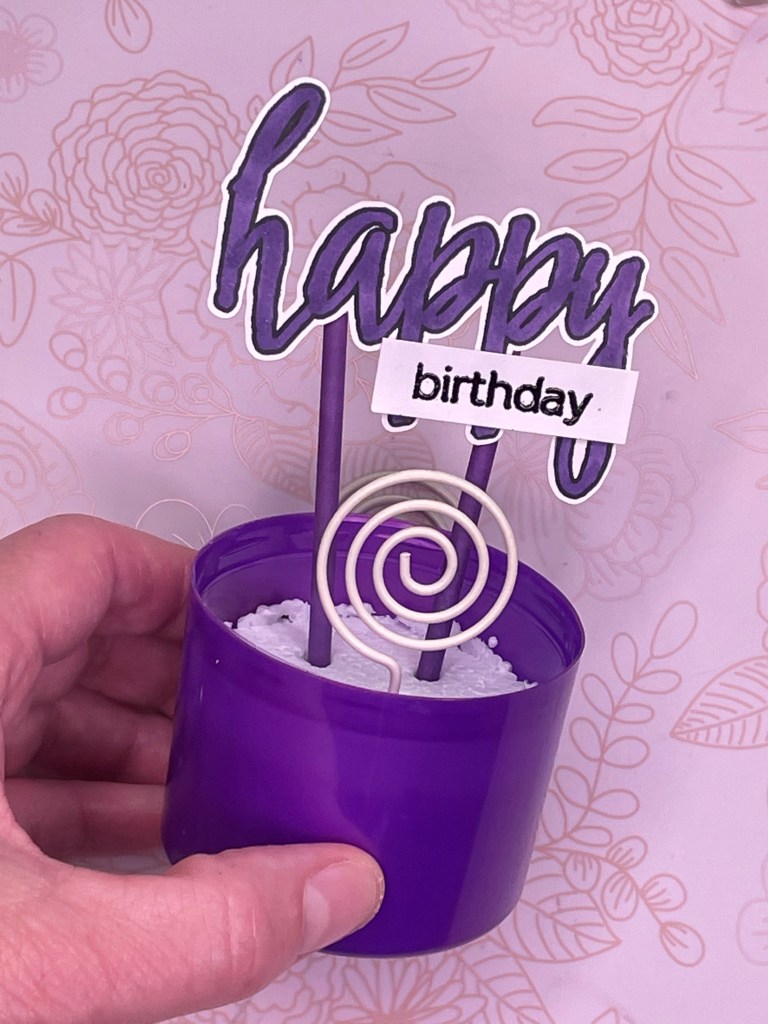
Emboss in black embossing powder the “birthday” sentiment onto a strip of white card stock. Color the die cut “happy” from Altenew “Halftone Happy” stamp set in COPIC V17. Glue these pieces together, then glue to the top of the sticks. Put the name card holder in the front of the cap.
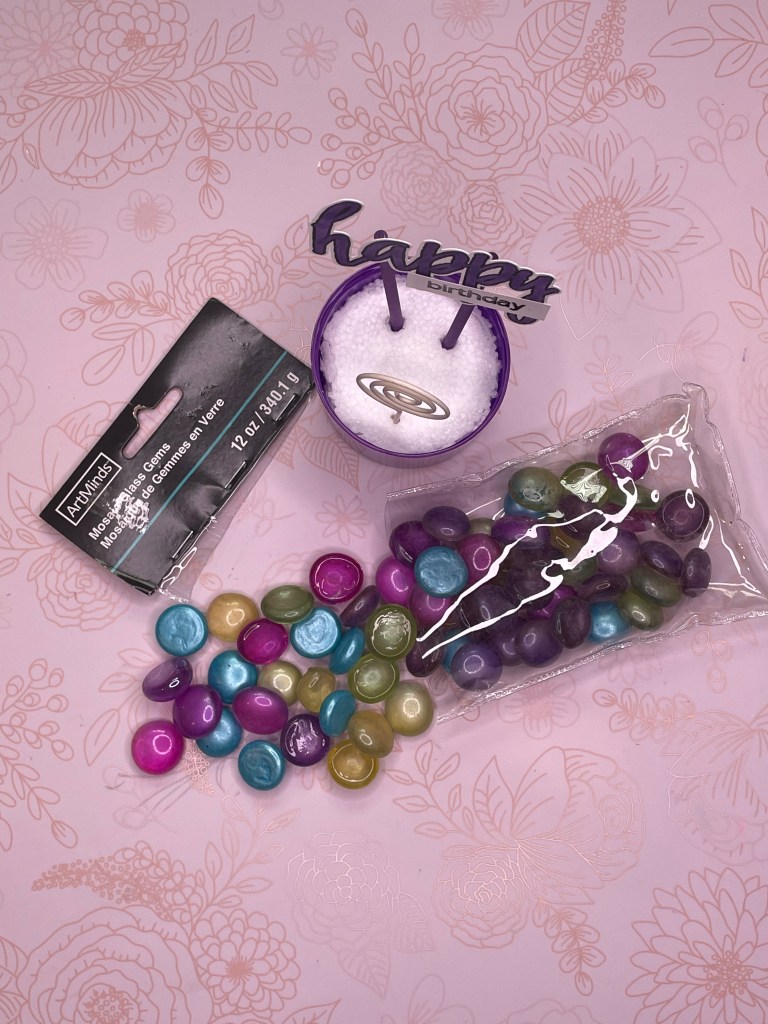
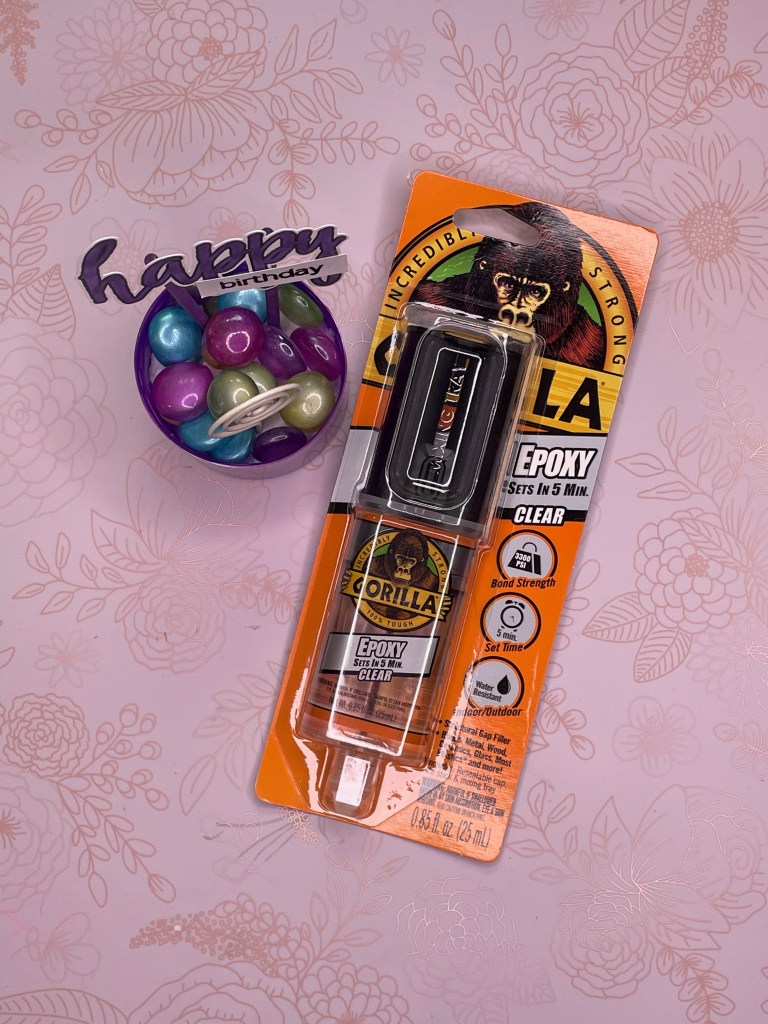
Fill the remaining space in the lid with decorative glass beeds from Michael’s. I got these from the sale shelf for $1.50/bag. Fill the lid with clear drying epoxy to solidify the place setting.
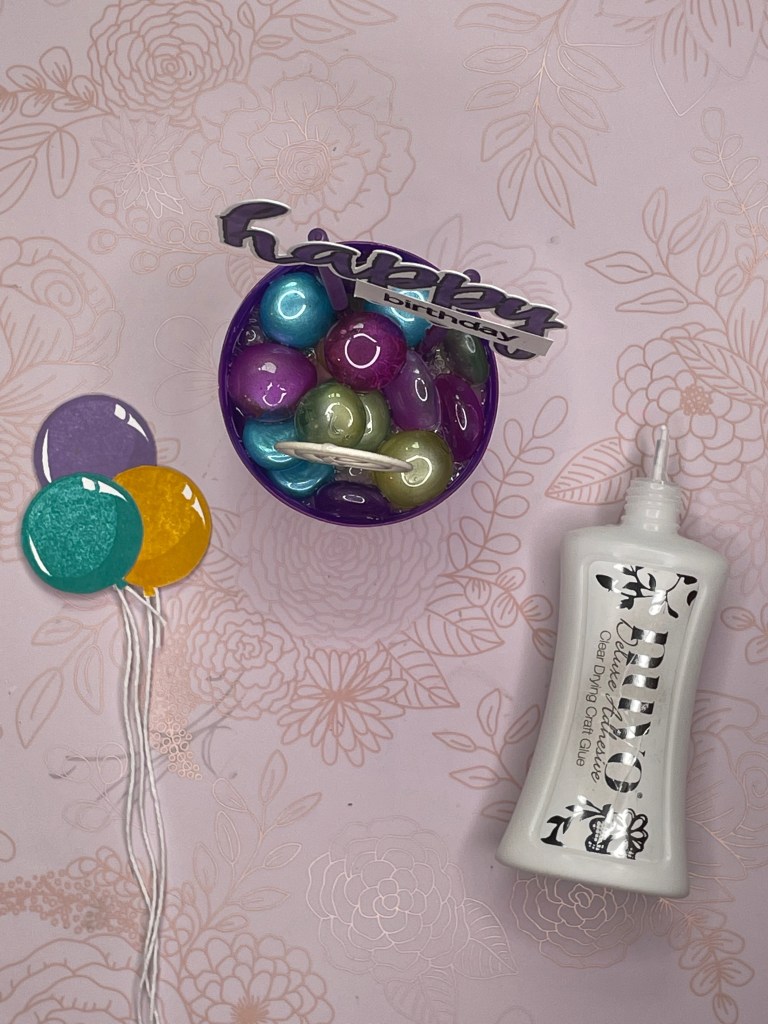
Stamp and fussy cut 3 balloons using the Altenew “Balloon Bunch” stamp set. Glue white string to the back, glue the balloons together in a bunch as shown, then glue to the back of the “h” on the “happy”.
I took about 15 minutes to build each of these. They are so perfect for any party table. Make name plates, place them into the name holders, and celebrate!!
___________________________
I hope you enjoyed viewing these projects as much as I did making them. Thanks for hanging with me to the end.
Have a great day…
Aimee Pankau

WOW!!! Aimee, you are fantastic! Your cards are incredible! it would be extremely hard to pick a favorite! thank you for sharing!!!!
LikeLike
okay, so that card with the hundred thousand strips is amazing!! So clever!! Your cards look fabulous and so does your project!
Thank you for submitting your work to the AECP assignment gallery.
LikeLike
YOU are amazingly talented and creative! I’m in AWE!
LikeLike
WOW WOW WOW! Absolutely love these!!!
LikeLike