To view a video on this card, click HERE.
- SUPPLIES:
- Stamp Sets:
- Altenew Paint a Flower African Daisy
- Ink:
- Versamark Watermark Stamp Pad
- Altenew Watercolor Brush Marker: Lime
- Altenew Artists’ Watercolor 24 Pan Set: Summer Afternoon, Fall Harvest, Delectable Delights, Deep Blue Seas
- White embossing powder
- Card Stock:
- Canson Bristol Recycled paper, white
- Neenah White card stock
- Black card stock
- Other:
- Altenew Signature Words Die set: hello
- Heat gun
- Foam tape
- 3mm embellishments
- container for clean water
- cloth used to clean brushes, dap extra moisture from project
- Stamp Sets:
Hi all! Today I am sharing my watercolor project made as part of my journey through the Altenew Educator Certification Program. For added inspiration and technique guidance, please visit “Exploring Watercolor Mediums” by Jen Rzasa and Ashlea Cornell. You can find this at Altenew.com, click ‘education’, then ‘online classes’. This one is definitely worth the watch.
First, a disclaimer: I am a watercoloring newbee…when I need to color, my default is to reach for my COPIC alcohol markers. Without the Altenew Education Certification Program I would likely have happily stayed in that one dimensional world. I am in the last “trimester”, if you will, of the program. As part of the last part of the program, I was able to choose the classes I wanted to participate in. So, I chose areas of weakness. Yup, watercoloring!! (One of my next classes is Mixed Media…yikes…I’m nervous just thinking about it 😳). OK, disclaimer over…
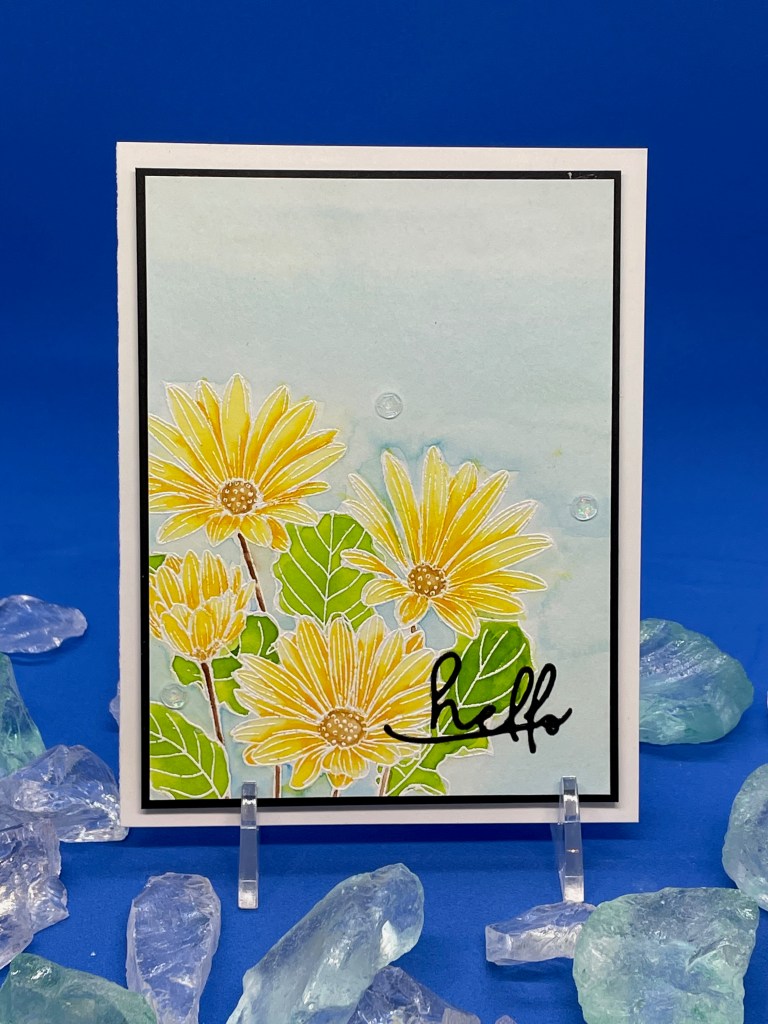
The flower image from the Paint a Flower African Daisy set is stamped in Versamark ink onto Canson Bristol paper, then covered with white embossing powder and heat set. Remember to prep your paper with a non-static powder. I use an “embossing buddy” There are many on the market, but you can also use corn starch brushed lightly on your paper. This helps prevent the embossing powder from sticking, through static, to areas not stamped. Because this is a white image on white paper, I stamped the image in black ink on a piece of scrap paper to keep as a guide while coloring. Side note: I especially like the Canson Bristol paper for watercoloring as it has a smoother side that is great for stamping, and it is thinner than many watercolor papers.
To create the flowers, I used two #4 round paint brushes. The first I kept as my “clean brush”, used to wet the area I wanted to color and to spread the ink, which I applied with my other #4 paint brush. When watercoloring, especially within an embossed image, work in one area, such as one pedal of the flower, at a time. Also, avoid painting the pedal next to the one just painted. The embossing of the image helps to prevent wet paint from one area contaminating the one you are working on, but it is best to not test this theory. Allow each area to dry before painting beside that area.
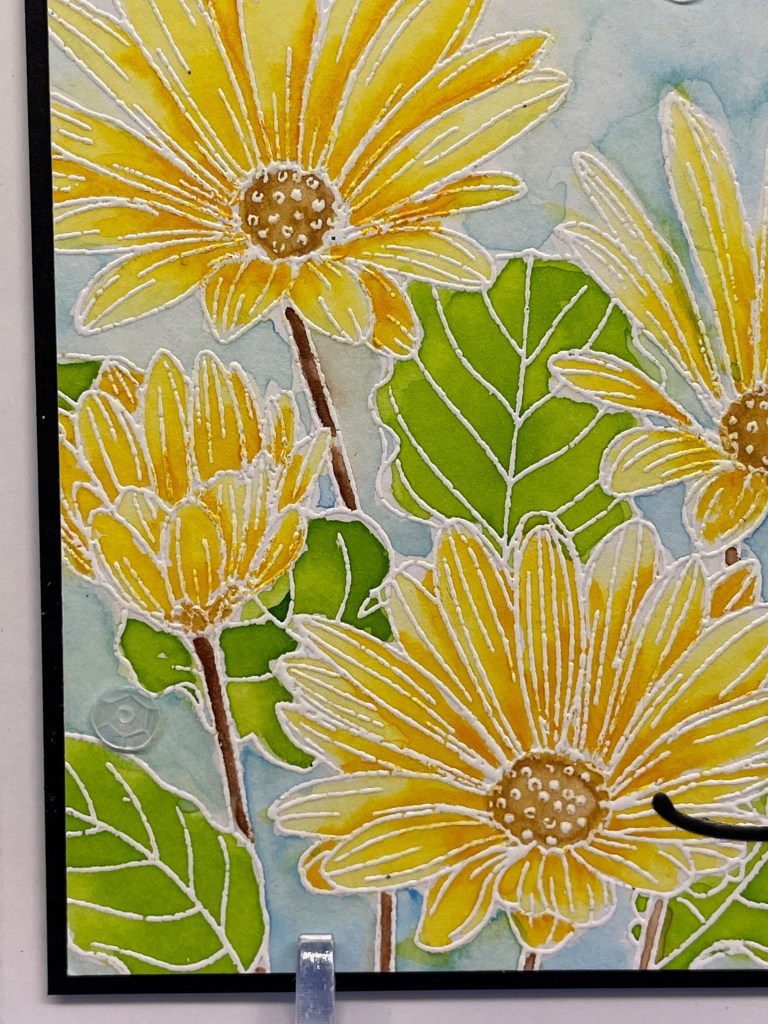
First, wet the petal. For the flowers, I wanted to create dimension and depth, so I was careful to wet the area only lightly, which gave me some control over the ink movement. Once wet, I used the second #4 brush to apply Summer Afternoon, from the Atrists’ Watercolor 24 pan set, to the center of the petal. Then, with my lightly damp “clean” brush, I moved the paint toward the end of the petal. I left the paint thicker/darker in the areas I wanted shadow and depth. Practice getting used to moving the paint like this. It is not hard, but it does require some technique. Once all the flowers were painted, I moved to the leaves.
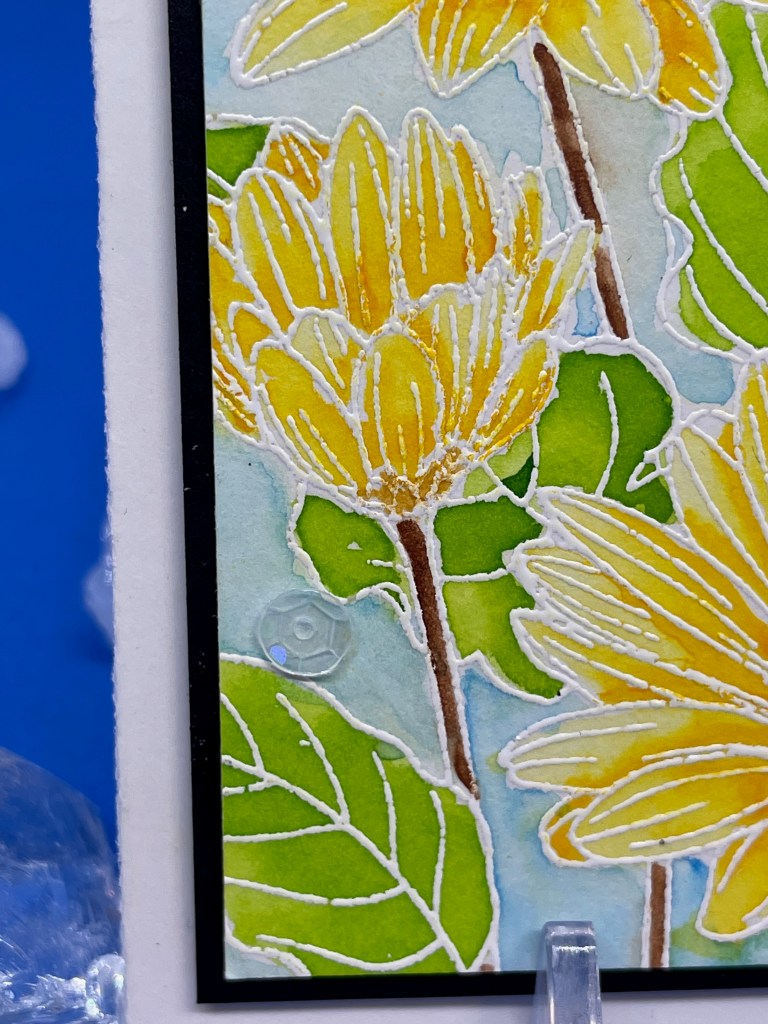
I wanted to create a more natural watercolor look on the leaves. To accomplish this, I wet the leaves with more water than I used for the flowers, and I allowed the water to help me move the paint. I feel like this helped the whole image maintain that “watercolor” feel. I used the Lime Watercolor Brush Marker to paint the leaves. I just received these so I had not used them yet. They come with a yellow band near the top that needs to be removed before use. Just screw the top of the pen off and slide the band off. As I had not practiced with them, I placed a few drips of the color onto a paint board and picked the paint up off the board with my brush. I will be practicing with these for sure!
The flower centers were colored with Fall Harvest and Delectable Delights from the Atrists’ Watercolor 24 pan set. The stems were painted with Delectable Delights.
The beauty of watercolor is the ease of creating lighter and darker images, using water for control. One of the challenges in this piece was getting all the sky between the flowers to match the sky throughout the piece. I found this surprisingly easy using watercoloring.
I cut out the “hello” sentiment from Signature Words die set in black card stock and glued it to the bottom right corner. Then I applied three 3mm clear embellishments around the image. I glued the finished card front onto black card stock with only a 1/8″ border, enough to frame but not to over-power. I applied this to the card front using foam tape.
This was such a fun experience! I loved the outcome and can’t wait to do more with watercoloring. Thanks for reading along…
Aimee Pankau

Looks so pretty, Aimee! Thank you for submitting your work to the AECP assignment gallery.
LikeLike
Love this Aimee, beautiful water coloring!
LikeLike