To watch a video tutorial for making this card, click HERE.
- Supplies:
- Stamp Sets:
- none
- Paper:
- Neenah white card stock
- Ink:
- Altenew Crisp Ink Persian Blue
- Altenew Sapphire re-inker
- Altenew Metalic Archival Antique Silver Ink Spray
- All Purpose Champagne Mist Ink
- Other supplies:
- Gina K Glitz Glitter Gel, silver
- 3mm rhinestones
- Altenew Holiday Script Words Die
- Stampin’ Up! Stitched Snowflakes Die set
- Tim Holtz spatter brush
- Pixie Spray
- Foam Tape
- 70% Isopropyl Alcohol
- Stamp Sets:
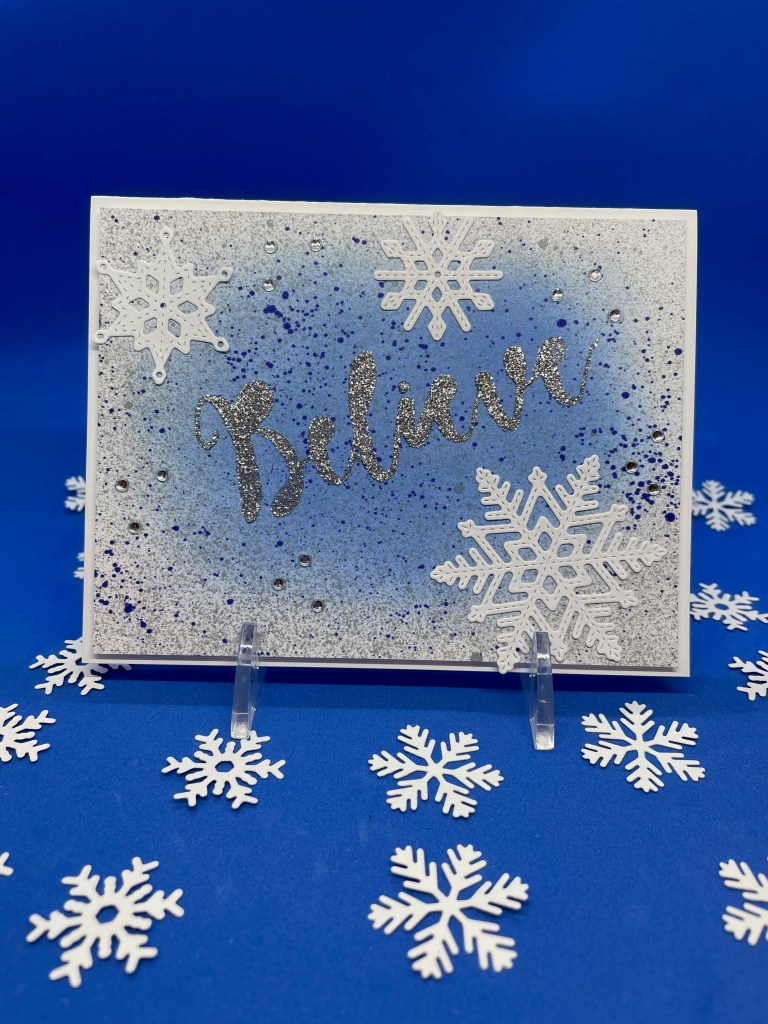
This card is my assignment for the Altenew On-Line Class called Stunningly Styled Stencils. I have to admit this was one of the most challenging designs I’ve had in a while. I don’t use stencils much, which is why I signed up for the class in the first place. Because I don’t use stencils much my supply of options for designing this card were limited. Throw in the holiday season, and I was stumped. I wanted to do a holiday card. I borrowed a few stencils from friends. In the end I made my own stencil. The rest just seemed to design itself.
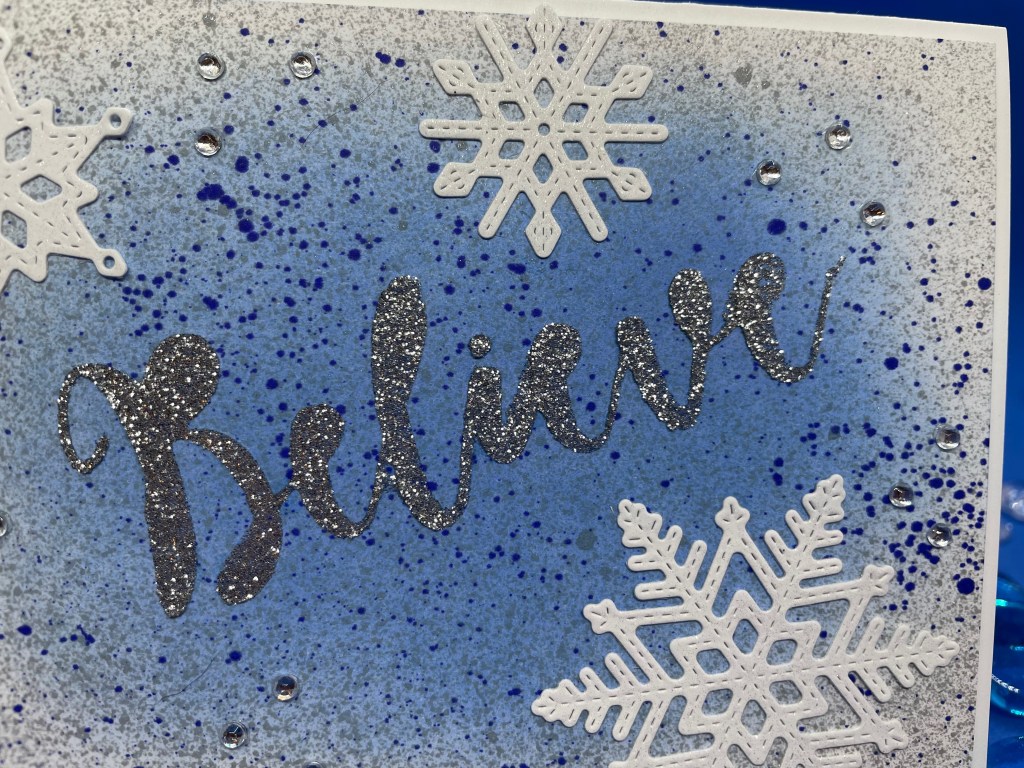
The first step involved creating the background. Using a large make-up brush, which are becoming a favorite way for stampers including myself to blend inks, I blended a large oval in Altenew Persian Blue Crisp Ink. I then spattered Altenew Sapphire Re-inker using my Tim Holtz spatter brush. This is a great spatter brush. It has firm plastic bristles which spatter well and then clean easily. The third step in creating the background is to spray the whole background with Altenew Metalic Archival Antique Silver Ink Spray. This spray creates a wonderful spray of silver which you can see in the upper corner of the above picture. This ink takes a minute or two to dry so set the panel aside to allow it to dry.
As I did not have the stencil I wanted, I used the “Believe” die from Altenew’s Holiday Script Words Die set to create a stencil. I created the die using a thick piece of vellum. I’m sorry as I do not have the pound weight of the vellum. I compared the thickness of my vellum with a stencil I had to get as close as I could to a pre-made stencil. I ran the die “Believe” on vellum through my Big Shot then cleaned the edges of the embossed image with a sharp edge to remove any vellum slivers off the edges. Using Pixie Spray lightly on the back of the vellum, I set the embossed image over the blue blended ink. Using a smooth plastic spatula, I spread the Glitz Glitter Gel evenly and smoothly. This gel, like many stencil pastes, starts to set up quickly. Remove the stencil quickly and, if you plan to reuse it, clean it quickly.
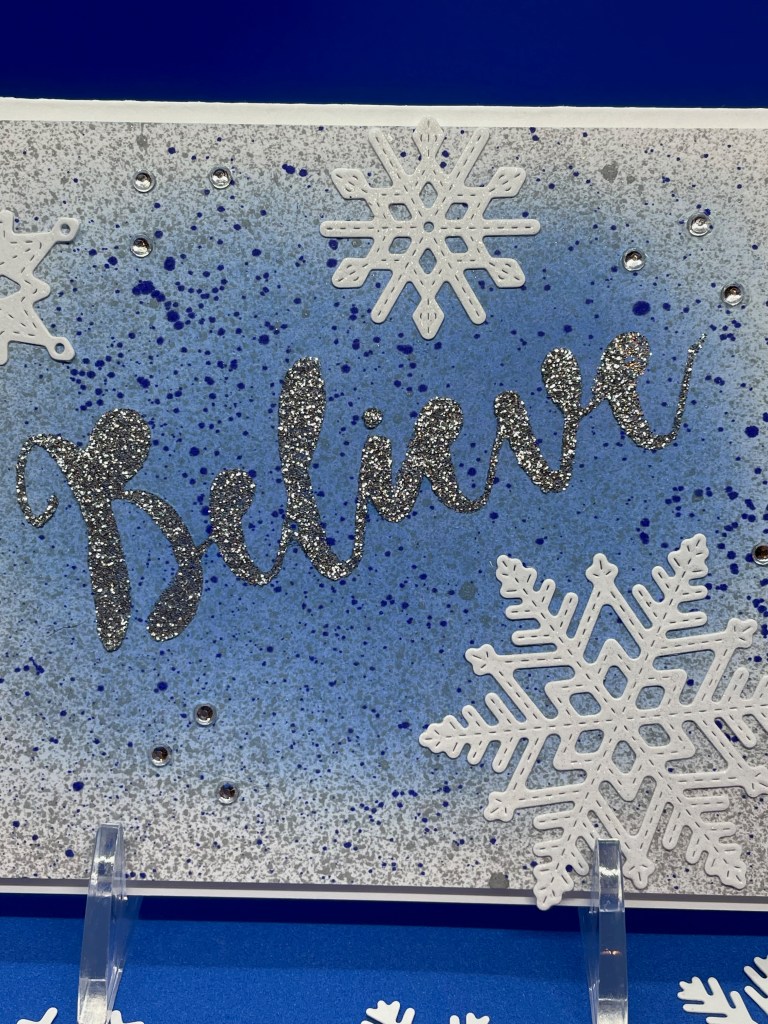
Next I used the snowflake dies to create three different snowflakes. I sprayed them with a mix of All Purpose Champagne Mist ink and 70% rubbing alcohol creating a fine glitter on the snowflakes. The snowflakes were then glued to the card front.
The last step, because the card just needed more sparkle, I put several rhinestone embellishments grouped in 3 on the card front. The completed panel was attached to the card base with foam tape.
I was so pleased with how this card turned out, especially given the difficulty I had getting past the first design element in creating it. Have you ever had one of those creation struggles?
I hope you enjoy this card. Even more, I hope each of you have a wonderful holiday season and a very happy new year!
Aimee

That looks beautiful, Aimee! Happy holidays!
LikeLike