
Hi everyone! It’s been a bit since I’ve posted a card. I want to give a shout out to Altenew before I move on to todays card. As many of you are aware, I am enrolled in the Altenew Educator Certification Program. This post is actually my last assignment before doing the on-line workshop that will be the “final exam”. As I said, it has been a while since I have posted. The certification program is self paced. I started early 2021. Initially I was able to post with regularity, moving through the program. In the fall the family practice I work in (I’m a family nurse practitioner) was purchased by a large medical corporation here in the Denver metro area. This change created a tremendous amount of work and I needed to remove some responsibilities off my plate to accommodate the amount of time I was spending at work. The Altenew Educator Certification Program, being self paced, allowed me to do this. A huge thank you to Altenew. This allowed me to do what I needed to do without pushing through the program, therefore learning less and not doing as good a job. A wonderful relief to some of my over-committed life.
To view a video of how this card was made, click HERE.
- Supplies
- Stamp sets:
- Altenew Pen Sketched Flowers
- Altenew Birthday Builder
- Altenew Baroque Motifs
- Card Stock:
- Neenah White Card stock
- Black card stock
- Stampin’Up! Pacific Point Card stock
- Inks:
- Altenew Watercolor Brush Markers, Tropical Fiesta Set:
- Desert Night
- Turquoise
- Altenew Watercolor Brush Markers, Winter Wonderland Set
- Metallic Silver
- Momento Tuxedo Black
- White Embossing Powder
- Versamark
- Lawn Fawn white pigment ink
- COPIC Y11, Y15, G40, G43
- Altenew Watercolor Brush Markers, Tropical Fiesta Set:
- Other supplies:
- Altenew Pen Sketched Flower Die
- Heat Gun
- Embossing paste
- Foam tape
- Black mat dots
- MISTI stamp positioning tool
- Stamp sets:
I started this card with the Altenew Turquoise and Desert Night from the Tropical Fiesta Watercolor Brush Markers laid down on a non-absorptive surface. These markers are highly pigmented so you do not need much. A trick to keep in mind is to not surround the lighter color with the darker color. You will see I put the Desert Night (the darker ink) only in the center and the upper outer corner. If the darker ink is surrounding the lighter ink, it will all mix together and you will not get enough definition between the two colors.

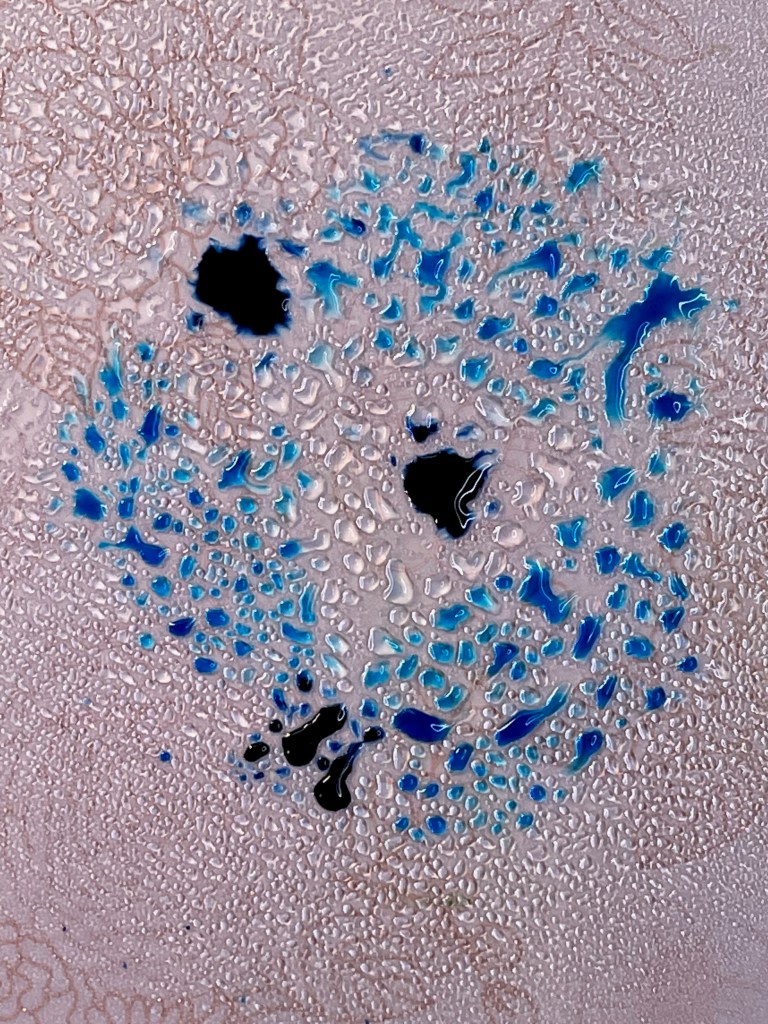
After the ink is down, spray the ink liberally with water.
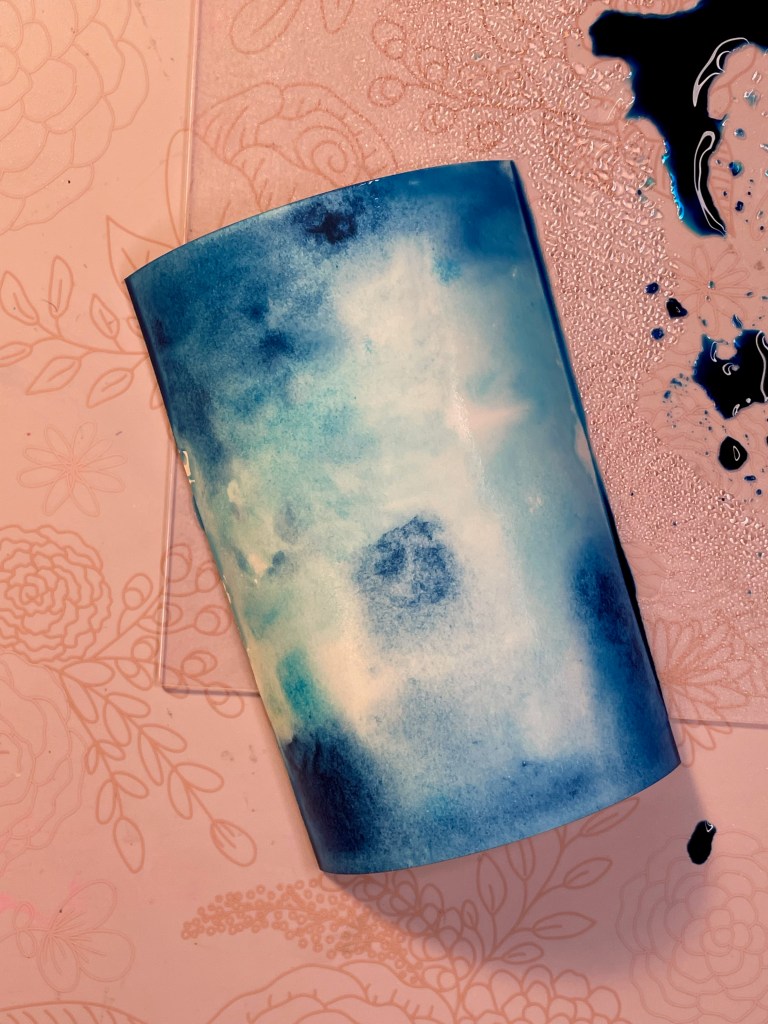

The first picture above shows the paper after I have placed it on the ink the first time. I then used a heat gun to dry the ink and spread the ink. Be careful to not burn the paper. The paper will be somewhat warped after this step. Do not worry about this. The second picture above is after the second time I placed the card stock in the ink and dried the ink. This will look different every time you do this. That is the magic. The trick is knowing when to stop applying ink. Part of this is personal taste, part is just playing and learning. Get inky, do several samples, have fun. I really enjoyed this process.
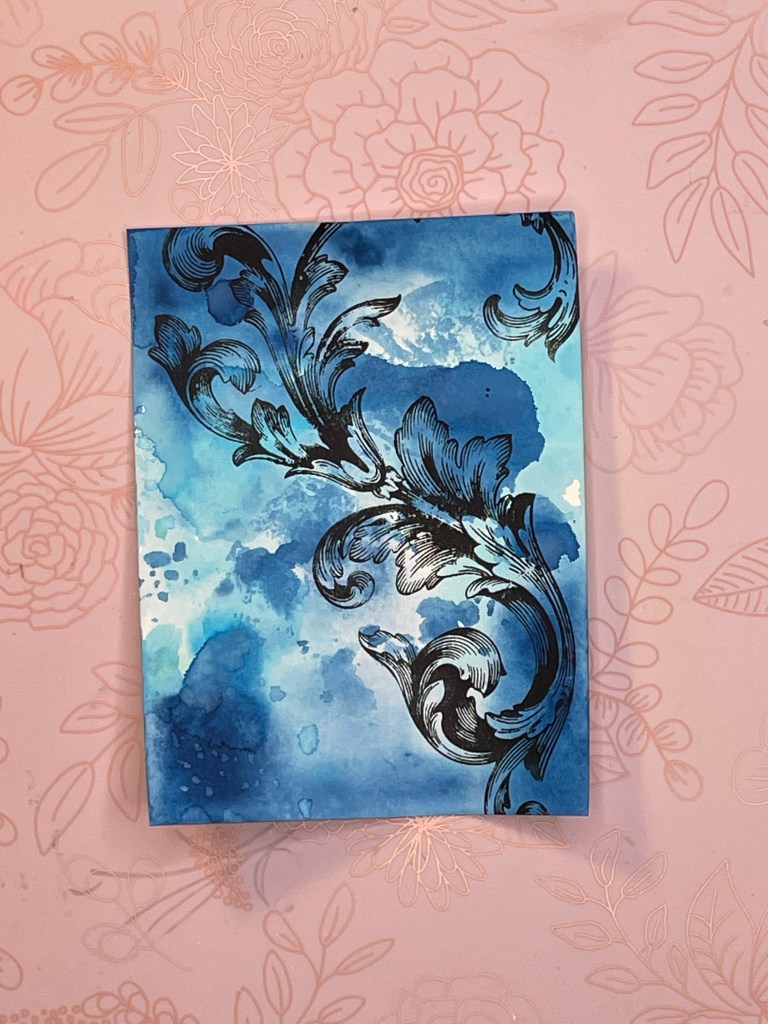
Stamp the Image from Altenew Baroque Motif in Momento Black ink. I used a MISTI for this step for two reasons. First, the stamp is large and the MISTI allows you to re-stamp allowing you to fully stamp the image. Two, the paper is warped at this point. The MISTI removes the risk of the image not being fully stamped.

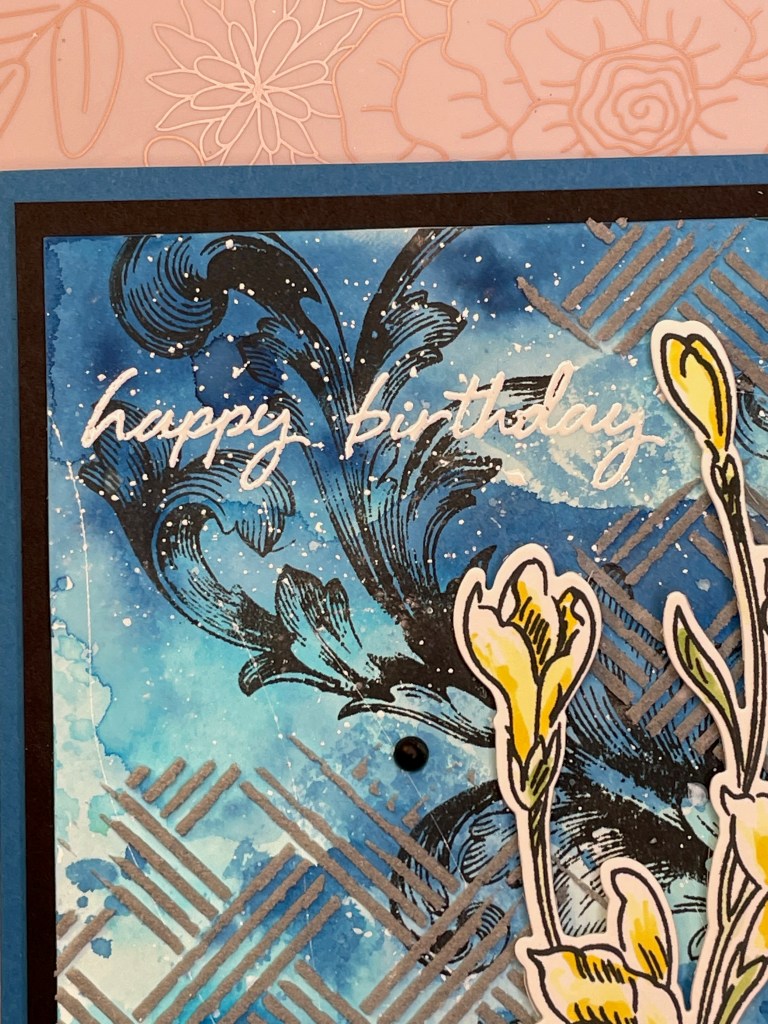
You will notice in this image I have spattered white craft ink on the card panel and I have stamped Happy Birthday in the upper left corner. I spattered the white craft ink using the Tim Holtz spatter tool. This spatter tool is amazing. The bristles are a stiff plastic and the clean up very well.
Use an embossing buddy to prep the panel. This helps to prevent excess embossing powder from sticking to the panel from moisture or static which would be heat set once you use the heat gun.
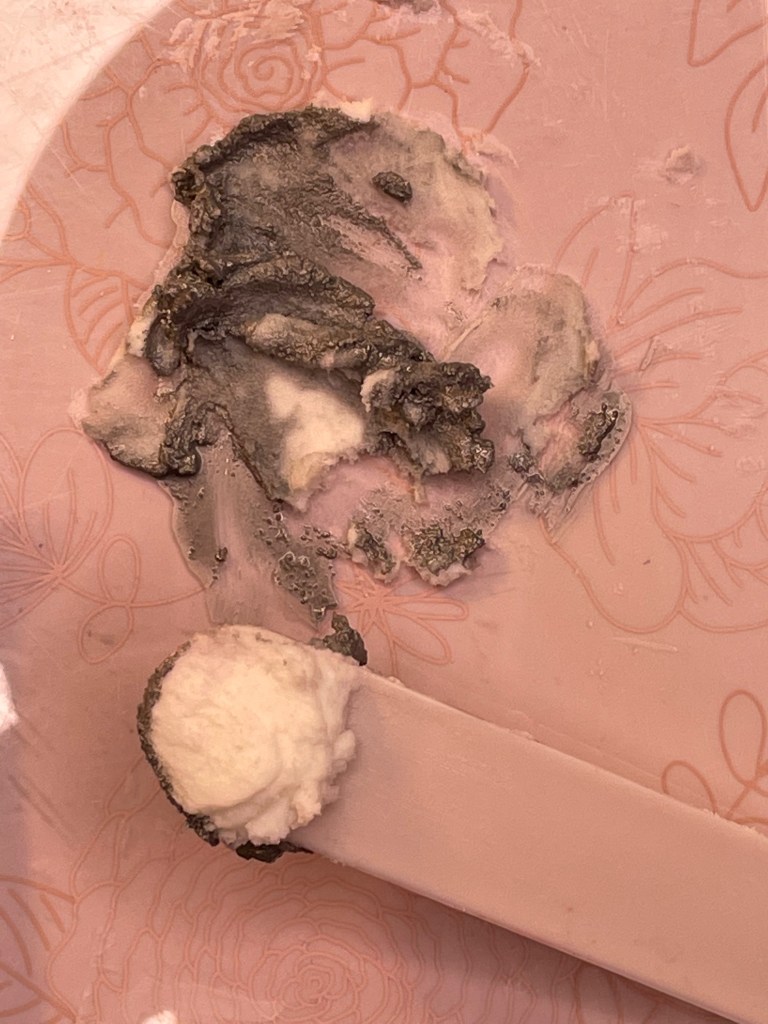
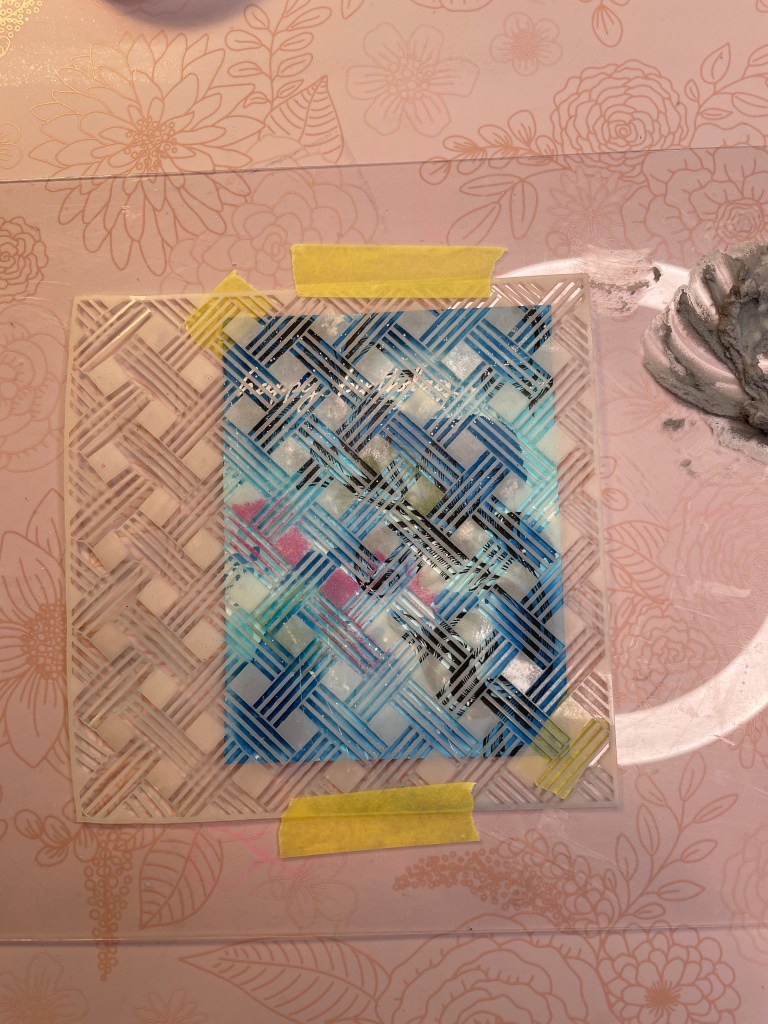
Mix the Metallic Silver watercolor ink with the embossing paste. Tape down your panel and stencil with a low tack tape.

I spread the colored embossing paste over the stencil using a plastic spatula. You will notice I spread the embossing past only to the upper right corner and the lower left quarter of the card.
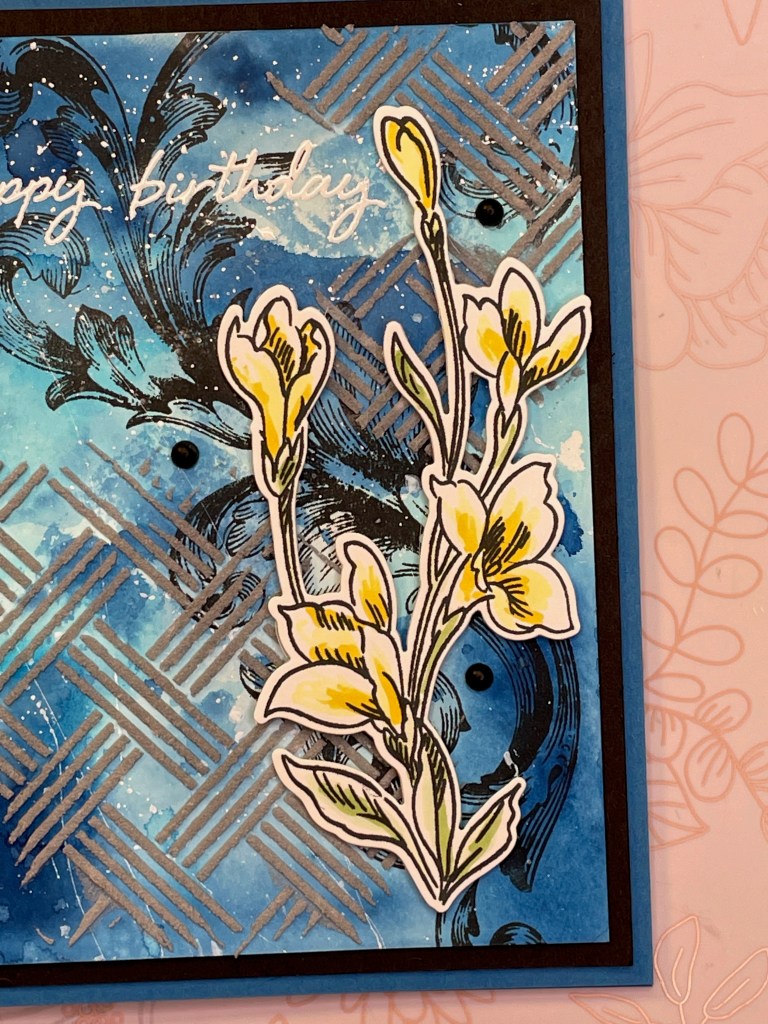
I stamped the flower image from Altenew Pen Sketched Flowers in Momento black ink, then used the Die for the flower to cut out the image. I chose a yellow so it stands out from the blue and black background. Use the COPIC Y11 to lightly color the flower petals. Use the COPIC Y15 to shade the flowers. Use the G40 to lightly color the greenery then the G43 to shade. When coloring both the flowers and the greenery do not fully color the background with the lighter colors. Leave some white at the edges. The colored flower image is then attached to the card panel with foam tape.
Attach the card panel to the black card stock using glue. Place a heavy stamp block over this for several minutes to allow the glue to fully adhere the panel which has been warped by heating. It will also help flatten the card panel. Repeat these steps to attach the card panel to the card base.
Place black mat dots around the flower as shown.
I hope you enjoyed this card. Mixed media is outside my typical design style but I truly enjoyed it. I also enjoyed getting somewhat messy in the process, a nice side effect.
Aimee Pankau

Love the inky goodness! Thank you for submitting your wonderful work to the AECP assignment gallery.
LikeLike